How to Install White Tile Countertops in Your Kitchen
To install white tile countertops in your kitchen, start by gathering your tools and measuring the countertop area accurately. Cut a plywood foundation, trace the sink opening, and secure the plywood with concrete board. Dry fit your tiles, then mix and apply thin-set mortar evenly. Set your tiles in place, using spacers for uniform grout lines. Carefully cut tiles for the sink area and install them. Apply grout, pressing it firmly into joints, then clean off excess grout. Allow it to dry, apply sealant, and finally reinstall the drawers and sink, ensuring stability and functionality. For a detailed step-by-step guide, continue.
Key Takeaways
- Accurately measure and cut the plywood foundation, ensuring a precise fit.
- Dry fit tiles to plan layout and spacing before applying thin-set mortar.
- Use spacers to maintain uniform grout lines while setting tiles row by row.
- Apply grout evenly, pressing firmly into joints, and clean excess for a polished finish.
- Reinstall the sink and drawers, checking for proper alignment and stability.
Gather Necessary Tools

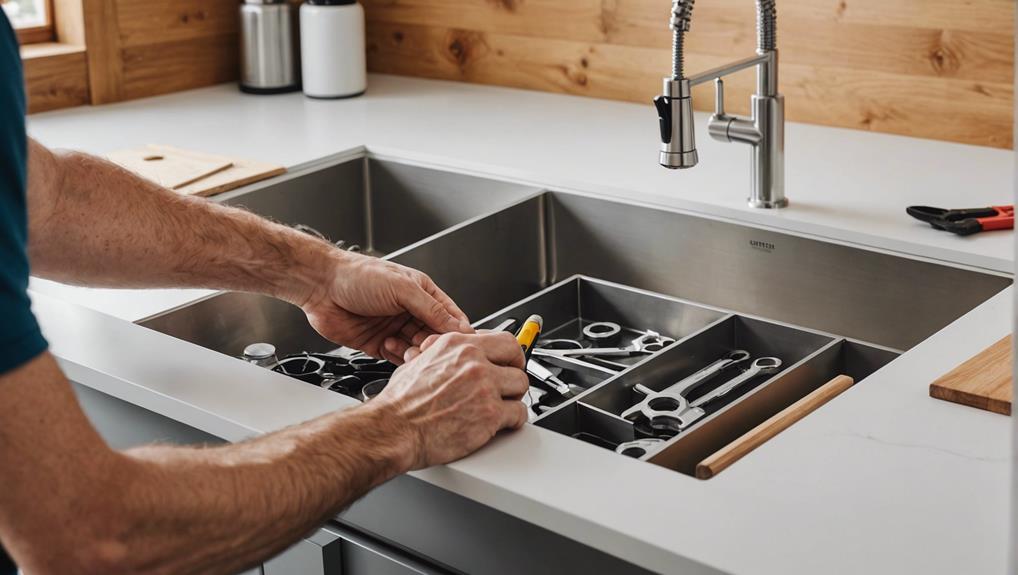
To begin your white tile countertop installation, make sure you gather all the essential tools listed for a smooth and efficient process. You'll need a spiral cutting saw, scoring tile cutter, notched trowel, rubber float, and a damp sponge. Don't forget additional items like a measuring tape, pencil, vinyl spacers, paper towels, and tile mastic for vertical backsplash tiles.
Before you get started, take some time to organize your tools. Arrange your tools on a sturdy work surface, such as your base cabinets, to keep everything within reach. This setup not only boosts efficiency but also minimizes interruptions. Each tool should have a designated spot to avoid clutter and confusion.
Equipment maintenance is equally important. Check the condition of each tool. Make sure your spiral cutting saw and scoring tile cutter blades are sharp to make precise cuts. Verify that your notched trowel is clean and free of hardened adhesive.
A well-maintained rubber float ensures smooth grout application, and a damp sponge should be free of debris for effective cleaning. Prepping your equipment properly will help you achieve a professional-looking white tile countertop in your kitchen.
Measure Countertop Area
With your tools organized and ready, measure the length and width of the countertop area to determine the amount of plywood and concrete board needed. Use a tape measure to get precise dimensions, and make sure your level is handy to confirm that the countertop surface is even. This step is vital for guaranteeing the tiles fit perfectly.
When measuring, don't forget to account for the sink dimensions. You'll need to cut an opening in both the plywood and the concrete board for the sink, so accurate measurements are essential. Double-check all your numbers before you start cutting to avoid costly mistakes.
Here's a quick reference table to keep your measurements organized:
| Measurement Area | Dimension (inches) |
|---|---|
| Countertop Length | |
| Countertop Width | |
| Sink Length | |
| Sink Width |
Having accurate measurements ensures that your countertop material, including the white tiles, will fit seamlessly. Tailor your tile color choices to the exact dimensions to avoid gaps or overlaps. By taking the time to measure correctly, you'll set a strong foundation for the rest of your installation process. Double-checking your work now will save you headaches later.
Cut Plywood Foundation

Before cutting, trace the sink opening on the plywood foundation for an accurate fit. This step is important for guaranteeing your sink sits perfectly within the countertop.
Begin by completing all necessary plywood prep: measure and mark your cuts precisely. Utilize a jigsaw or circular saw for cutting techniques that secure clean, straight lines.
Secure the Plywood:
Place the plywood on top of the base cabinets. Use screws or nails to fasten it securely. This prevents shifting and provides stability.
Check for Level:
Ensure the plywood is level and properly aligned. An uneven base can lead to problems when installing the concrete board and tiles.
Cut Sink Opening:
Carefully follow your traced outline with a jigsaw or circular saw. Make sure to support the plywood well to avoid splintering or an uneven cut.
Trace Sink Opening
Using the sink template, trace the opening onto the plywood foundation with meticulous accuracy to guarantee a perfect fit. Begin by confirming the sink positioning is centered and aligned correctly on the plywood. Place the sink template precisely where you want the sink to be installed. Mark the outline using a pencil or marker, maintaining steady hands to ensure tracing precision.
Double-check the alignment before you proceed with cutting. Measure the distance from the edges of the plywood to the traced outline at multiple points to confirm consistency. This step is vital to avoid any misalignment that could compromise the installation. Reassess the sink positioning and adjust if necessary.
After confirming the alignment, proceed by re-tracing the outline to reinforce the markings, making them easily visible during the cutting process. Accuracy in this step ensures that the sink opening accommodates the sink snugly, avoiding gaps or overhangs.
Take your time; precision is essential for a successful installation. Rushing through this step could lead to costly errors and wasted materials. By focusing on tracing precision and alignment, you set a solid foundation for the next steps in installing your white tile countertops.
Secure Plywood Foundation

After meticulously tracing and confirming the sink opening, secure the plywood foundation on top of the base cabinets using screws to guarantee stability. This step is important for ensuring the plywood stability necessary for a successful tile installation. Start by laying the plywood sheets evenly across the cabinet tops, making sure they fit snugly without gaps.
Next, use a level to confirm the plywood is flat and even. This attention to detail is essential for the countertop durability, as any unevenness can lead to issues with tile placement and longevity. Once you've confirmed the plywood is level, proceed with securing it.
Drill pilot holes: Space these holes approximately every 6-8 inches along the edges and across the plywood sheet to prevent splitting.
Insert screws: Use wood screws to firmly attach the plywood to the cabinets, ensuring a secure fit. This enhances foundation security.
Check stability: Confirm that the plywood doesn't move or shift, as a stable base is important for the tile installation process.
Attach Concrete Board
Attaching the concrete board to the plywood foundation is a vital step in ensuring a durable and long-lasting white tile countertop. Start by scoring and cutting the concrete board to the precise width needed. This material's advantages include its resistance to moisture and its ability to provide a stable base, essential for the longevity of your countertop.
Next, apply a layer of thinset mortar on the plywood. Place the concrete board on top and secure it with nails, making sure it's level. Don't forget to use a spiral cutting saw to cut out the sink opening. Making certain the board is flush and securely attached to the plywood is crucial for stability.
| Step | Description |
|---|---|
| 1 | Score and cut the concrete board to size. |
| 2 | Apply thinset mortar on the plywood foundation. |
| 3 | Secure the concrete board with nails. |
| 4 | Use a spiral saw to cut out the sink opening. |
Concrete board has its disadvantages, like being heavier and harder to cut compared to other materials. If you're considering alternative countertop materials, options like plywood or MDF can be easier to work with but may lack the durability you need for a high-moisture environment. Properly installing the concrete board ensures your white tile countertop withstands the test of time.
Dry Fit the Tiles
Start by measuring and laying out the tiles to guarantee they fit correctly on the countertop.
Align the tiles precisely, starting at the edges, to accommodate any wood movement.
Use vinyl spacers to maintain consistent joint widths and guarantee a balanced layout before moving on to the permanent installation.
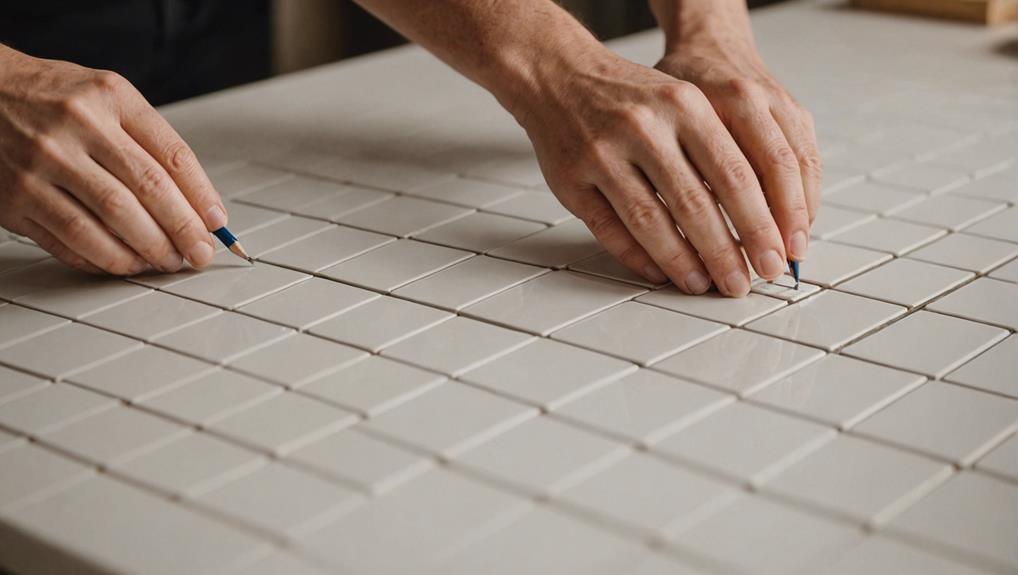
Measure and Layout Tiles
Begin by measuring and marking the centerline of the countertop to guarantee a balanced and symmetrical tile layout. This step ensures that your tiles will be evenly distributed, giving your kitchen a polished, professional look.
Dry fit the tiles without mortar to test the layout and make any necessary adjustments. This dry run helps identify potential issues, such as awkward tile placement or the need for small cuts at the edges, which can disrupt the overall appearance.
To maintain proper tile spacing and achieve even grout lines, use spacers between each tile during the dry fit. Proper tile spacing is essential for effective grouting techniques and avoiding tile lippage, which occurs when tiles aren't level with each other. Consistent joint width ensures a smooth and visually appealing finish.
Here's what to do next:
- Place the tiles: Start from the centerline and work your way outwards.
- Use spacers: Insert spacers between each tile to maintain uniform gaps.
- Adjust as needed: Shift tiles slightly to avoid small, awkward pieces at the edges.
After laying out the tiles, double-check all measurements and the overall layout. This careful preparation guarantees a smooth installation process and a stunning final result.
Ensure Proper Alignment
Now that you've measured and laid out the tiles, guarantee proper alignment by dry fitting each tile on the countertop without mortar. This critical step guarantees that your final installation will be both functional and visually appealing.
Start by placing the tiles according to your initial layout, using vinyl spacers to maintain spacing consistency. These spacers are essential for achieving uniform joint widths, which contribute to a polished, professional look.
As you position each tile, pay close attention to alignment techniques. Make sure that the edges are straight and the pattern flows seamlessly. Dry fitting allows you to visualize the final look of your countertop, making it easier to spot and correct any potential issues early on.
If you notice any misaligned or uneven tiles, now is the time to make final adjustments. Shift tiles as needed to maintain a balanced design.
Take a step back periodically to assess the overall visual appeal of your layout. This holistic view can reveal subtle inconsistencies that mightn't be apparent up close.
Apply Thin-Set Mortar
To start, mix the thin-set mortar according to the manufacturer's instructions until it reaches a peanut butter-like consistency.
Next, spread the mortar evenly on the surface using a notched trowel to create uniform ridges. This guarantees proper tile adhesion and prevents slippage or uneven surfaces.
Mixing the Thin-Set
When mixing the thin-set mortar, make sure you follow the manufacturer's instructions to achieve a smooth and lump-free consistency. Proper mixing techniques are essential for ensuring the thin-set provides adequate adhesion for your white tile countertops. Use a drill with a mixing paddle attachment for the best results. This will help you achieve a consistent, creamy texture without any lumps.
Perform a consistency check by lifting some mortar with your trowel; it should hold its shape but still be pliable. Here's a quick guide to get you started:
- Measure Water and Mortar: Accurately measure the water and mortar mix as specified by the manufacturer.
- Mix Thoroughly: Use a drill with a paddle attachment to mix the thin-set in a bucket, ensuring all the powder is fully incorporated.
- Slaking Process: Let the mix sit (slake) for about 5-10 minutes, then re-mix briefly before using it to ensure proper hydration and consistency.
Only mix as much thin-set as you can use within its pot life to avoid it drying out. This ensures that the mortar remains workable and effective throughout your tiling process. Adhering to these guidelines will set a strong foundation for your new countertops.
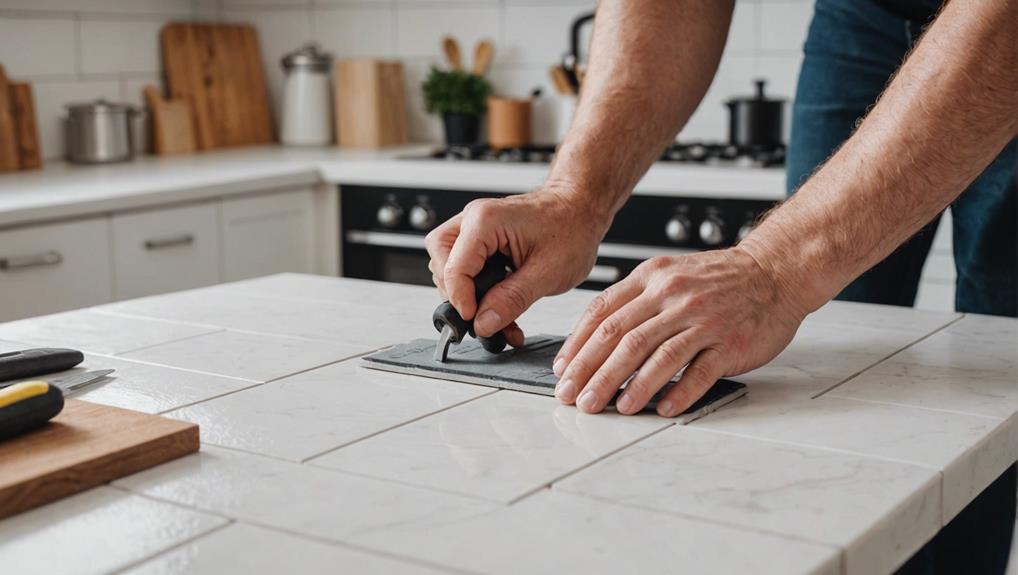
Spreading the Mortar
Ensuring a smooth and even application, use a notched trowel to spread the thin-set mortar over the concrete board, creating a uniform layer for best tile adhesion. Begin by scooping the mortar onto the board and spreading it with the flat side of the trowel to achieve an even thickness.
Switch to the notched side, holding the trowel at a 45-degree angle, and create parallel ridges. These ridges help maintain mortar consistency and guarantee proper tile adhesion.
Focus on working in small sections, about three feet at a time. This prevents the mortar from drying out before you have a chance to lay the tiles. Consistent mortar application is essential for avoiding uneven tile placement, which can compromise the final appearance and durability of your countertop.
Use the recommended type of thin-set mortar based on your tile material and project specifications. Firmly press each tile into the mortar, using a slight twisting motion to ensure a strong bond.
Check periodically to confirm that the tiles are level and evenly spaced. This proper technique will ensure a professional finish, providing you with a durable and aesthetically pleasing white tile countertop.
Install Edge Tiles
Begin by installing edge tiles to provide a clean, finished look and accommodate any natural wood movement. Start by selecting edge tiles that complement your chosen tile color options. This not only enhances the aesthetic but also guarantees a seamless shift to the main tiles.
Use flexible tile mastic on the sides of the countertop, while applying thin-set mortar on the top for a strong bond. Spread the mortar evenly with a notched trowel to create uniformly high ridges for proper tile adhesion.
Follow these steps:
- Positioning the Tiles: Align each edge tile carefully, inserting vinyl spacers between them to maintain consistent joint width. This step is important for a professional finish and prepares the surface for effective grouting techniques later.
- Securing the Tiles: Press each tile firmly into the mortar, ensuring no air pockets form underneath. This will prevent future loosening and contribute to the overall durability of your countertop.
- Finishing Touches: Once the tiles are set, wipe away excess mortar and verify that all tiles are level. Consider edge tile design and maintenance tips to keep your countertop looking pristine over time.
Set Main Tiles
Begin by applying a layer of thin-set mortar evenly on the concrete board using a notched trowel.
Position each white tile precisely, pressing them firmly into the mortar and using vinyl spacers to guarantee consistent joint width.
As you work your way across the countertop, check that each tile is level and aligned correctly.
Apply Adhesive Evenly
Start by using a notched trowel to spread the thin-set mortar evenly, creating consistent ridges across the concrete board. Ensuring adhesive importance is vital for the tiles to adhere properly. Use the proper tools—a notched trowel with the correct tooth size—to achieve the right depth and spacing of ridges. This technique ensures an even distribution of adhesive, which is essential for maintaining the integrity and longevity of your countertops.
Next, begin setting the main tiles from one corner of the countertop, working your way across. Here's a quick guide to help you:
- Insert Spacers: Place vinyl spacers between each tile to guarantee consistent joint width and alignment.
- Press Firmly: Press each tile firmly into the mortar, ensuring good contact between the tile back and the adhesive.
- Check Alignment: Periodically check the alignment and levelness of the tiles to maintain a uniform surface.
Pay special attention to the tile edges to prevent uneven gaps and shifting. Consistent pressure and placement will prevent air pockets, ensuring a smooth, professional finish.
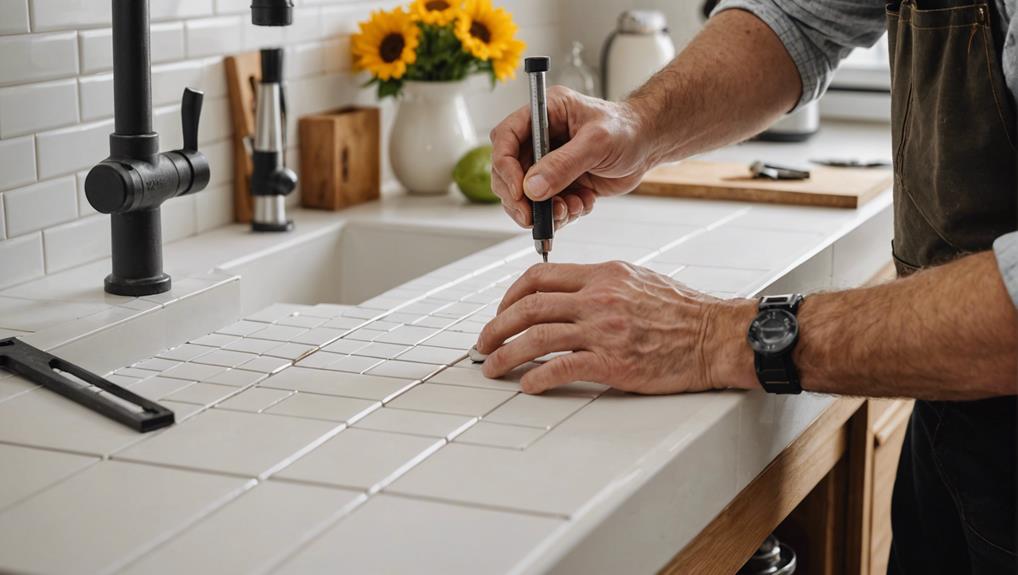
Position Tiles Precisely
Position the main tiles by aligning them meticulously along one edge of the countertop, guaranteeing a straight and professional layout. Use a level to make certain that each tile is perfectly even. This step is vital for achieving a seamless and polished appearance. Apply uniform pressure to each tile as you set it to ensure it adheres securely to the mortar or mastic.
Maintain tile spacing with precision by using spacers to keep gaps consistent. This won't only make your layout look clean but will also make the grout lines uniform, which is essential for a professional finish. Check the alignment of each tile with a straight edge to avoid crooked rows.
Continue setting the main tiles row by row, adjusting as necessary to maintain a straight and symmetrical layout. Consistent spacing and alignment are key to ensuring your grout color appears even and your finishing looks flawless. By focusing on these details, you'll guarantee a high-quality result that enhances the overall aesthetic of your kitchen.
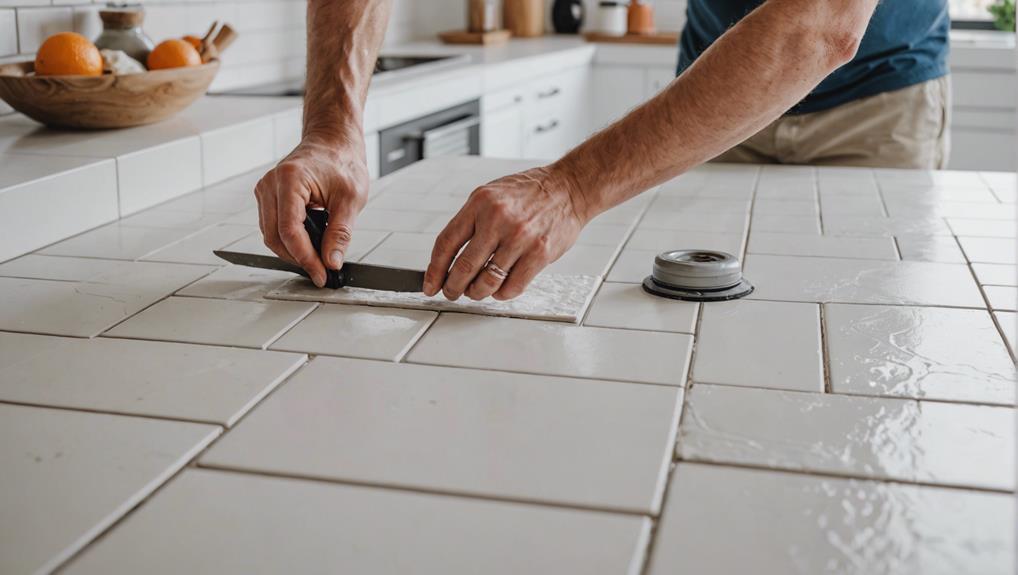
Cut Tiles for Sink
Accurately cut tiles for the sink area using a scoring tile cutter to guarantee a precise and seamless fit. Start by marking the tiles where they need to be cut to fit around the sink opening. Place the tile in the scoring tile cutter, align the mark with the cutter's scoring wheel, and apply steady pressure to score the tile. Snap it along the scored line to produce a clean cut.
Be sure to maintain your tile cutter by regularly cleaning the scoring wheel and lubricating the moving parts. This ensures precise cuts and extends the tool's life, making the process smoother.
—
Once the tiles are cut:
- Lay the cut tiles around the sink opening: Place them temporarily to confirm a perfect fit.
- Apply mortar to the backs of the tiles: Use a notched trowel to achieve even coverage and a secure bond.
- Press tiles firmly into place: Ensure they align well with adjacent tiles for a uniform look.
—
When choosing grout colors, consider how they'll complement your white tiles and overall kitchen design. A contrasting color can highlight the tile layout, while a matching hue offers a seamless appearance. Prioritize both aesthetics and functionality to achieve the best results.
Grout the Joints
After cutting and placing your tiles, distribute grout evenly over the tile surface using a rubber float to fill the joints securely. Press the grout into the joints with a firm, sweeping motion to guarantee a solid fit. Consider grout color options that complement your white tiles—choices like gray or beige can add subtle contrast, while white grout offers a seamless look.
Once the joints are filled, remove excess grout by raking it off at a steeper angle to avoid pulling it out of the joints. This step is crucial for a clean finish. Clean the tile face with a damp sponge to remove grout residue, making sure you work diagonally across the tiles to avoid disturbing the joints. Repeat as necessary to achieve a polished finish.
Allow the grout to dry for at least three hours. After drying, apply a grout sealant to protect against stains and moisture. Sealing recommendations include applying the sealant in a well-ventilated area and following the manufacturer's instructions for best results.
For long-term care, follow maintenance tips such as regularly cleaning the grout lines and resealing annually. If grout becomes damaged, use grout removal techniques like a grout saw or oscillating tool to replace it efficiently.
Reinstall Drawers and Sink
With the grout sealed and dried, carefully reinstall the cabinet drawers and sink, making sure everything fits back into place seamlessly. Start by checking the alignment of the drawers. They should slide smoothly and securely into their designated spaces. If necessary, make slight adjustments to guarantee a proper fit. This step is important for maintaining effective drawer organization.
Next, focus on the sink. Gently set it back into its opening on the countertop. Make sure it aligns correctly with the plumbing fixtures underneath. Proper sink maintenance is essential, so double-check all connections to prevent leaks. Ensure everything is securely fastened and in its original position.
To achieve a polished final look, follow these steps:
- Check and Adjust: Verify that the drawers and sink are properly aligned and adjusted. Rechecking ensures everything fits perfectly.
- Secure Fastenings: Ensure all screws, bolts, and fixtures are tightly secured to maintain stability.
- Inspect for Issues: Look for any gaps or misalignments and correct them immediately for a flawless finish.
Step back and admire your work. The white tile countertop, complemented by well-fitted drawers and a properly installed sink, enhances your kitchen's countertop decor and cabinet upgrades.
Frequently Asked Questions
What Do You Put Under Tile Countertops?
You should install a plywood base under tile countertops for structural support. Next, apply a waterproof membrane to prevent moisture damage. This combination guarantees durability and longevity, providing a solid foundation for your tile installation.
Do I Need Cement Board for Tile Countertop?
Yes, you need cement board for tile countertops. It provides stability, improves adhesive selection, and prevents moisture damage. Cutting tiles accurately also becomes easier with a stable base, ensuring a durable and professional finish.
Do You Tile Before or After Fitting a Worktop?
You should tile before fitting the worktop for a seamless installation. This approach allows precise grout selection and alignment with cabinets. It also prevents damage to the worktop, ensuring a cleaner, more professional finish.
Is Tile a Good Option for Kitchen Countertops?
Yes, tile is a good option for kitchen countertops. It offers excellent durability, resisting heat and scratches. Its aesthetic appeal is notable, with various design options available. However, consider durability concerns related to grout lines needing regular maintenance.
Conclusion
You've now successfully installed your white tile countertops. By gathering the necessary tools, measuring accurately, cutting and securing the plywood foundation, carefully setting the main tiles, and precisely cutting tiles for the sink, you've transformed your kitchen.
Grouting the joints and reinstalling the drawers and sink complete the project. Your meticulous attention to detail guarantees a professional finish. Enjoy the sleek, clean look of your new countertops, knowing your hard work paid off.
7 Stunning Greige Kitchen Cabinets That Elevate Your Home
Discover 7 stunning greige kitchen cabinets that elevate your home's aesthetic, blending tim
3 Stunning Ideas for Sage Green Kitchen Walls
One-of-a-kind sage green kitchen wall ideas await, promising to transform your space into a sere
Why Consider Double Kitchen Islands in Your Remodel?
See why double kitchen islands could transform your remodel with enhanced functionality, style&#
Leave a Reply