10 Tips for Installing a Small Kitchen Bay Window Over Your Sink
Start by measuring the opening and removing the old window. Next, install temporary support to guarantee stability. Build a new frame, making sure it’s level and secure. Install and anchor the bay window frame, confirming the header’s strength. Adjust plumbing and handle any electrical work. Position the newly framed bay window, insulate properly, and apply finishing touches such as trim and caulking. Additionally, choose durable window treatments to complement the new structure. If you’re curious about other detailed steps and the finer nuances of this process, the next sections cover those aspects thoroughly.
Key Takeaways
- Measure Accurately: Ensure precise measurements of the opening, considering space constraints and required depth for the bay window.
- Install Temporary Support: Use well-measured and securely positioned supports and studs to maintain structural integrity during the installation.
- Secure Frames Properly: Position frames within the opening, using double studs and ensuring they are plumb and square.
- Optimize Window Height: Choose a window height that maximizes natural light, visual appeal, and ventilation, enhancing the kitchen’s functionality.
- Select Suitable Window Treatments: Pick treatments that offer light control, privacy, and complement the kitchen’s design.
Measure the Opening
To guarantee a seamless installation, start by accurately measuring the width and height of the existing window opening. This step is important for determining the size of the bay window required. Begin by measuring from the inside edge to the inside edge of the window frame for both width and height. Record these measurements precisely to avoid any sizing errors.
Next, consider the space constraints in your kitchen area. Specifically, evaluate the space above the sink and the surrounding cabinets. It’s essential that the new bay window fits within the available wall space without obstructing any functional elements, such as the sink or adjacent cabinetry. This ensures a functional alignment that maintains the usability of your kitchen.
Additionally, take accurate measurements of the depth needed for the bay window. This will help prevent any interference with the sink or other fixtures. It’s recommended to consult with a professional to confirm these precise measurements. They can provide expert advice on any potential sizing considerations that might affect the installation.
Remove Old Window
Carefully remove the old window by detaching any trim and hardware with the appropriate tools. Start by using a pry bar and utility knife to gently pry off the trim, being cautious not to damage the surrounding wall. Progress methodically to guarantee all fasteners and screws are removed before attempting to take out the window frame.
Employ proper window removal techniques to ease the window out of its opening. If the window is stubborn, use a reciprocating saw with a metal-cutting blade to cut through any remaining nails or screws. Once loosened, have a partner help you lift and remove the window from the opening.
After removal, inspect the surrounding area for any signs of damage or wear. Look for issues like rot, mold, or structural damage that may need addressing before proceeding. This step is essential for preparing for the new installation and ensuring a secure fit.
Dispose of the old window responsibly. Check local disposal options or recycling centers to see if they accept old windows. Finally, make sure the opening is clean and free of debris, setting the stage for a smooth new bay window installation.
Install Temporary Support
To install temporary supports, start by measuring and cutting the supports to the required lengths.
Position the frames accurately and secure them firmly with screws.
Verify that the supports are level and stable to guarantee the roof’s weight is properly managed during the window replacement process.
Measure and Cut Supports
Start by measuring the area above your sink and cutting the necessary supports to install a temporary header for the roof. Accurate support placement is important to guarantee proper weight distribution during the installation.
Begin by determining the width of the opening where the bay window will be installed and mark these measurements on the header material. Use a circular saw to cut the header to the exact length required.
Next, consider material durability and structural integrity when choosing your temporary header. Opt for a sturdy wood, such as a 2×6 or 2×8, that can withstand the weight of the roof and prevent any sagging. Secure the temporary header in the middle using strong screws, and add additional screws along its length for enhanced stability.
To support the temporary header, cut studs to fit snugly between the counter and the header. Wedge these studs into place vertically to ensure they can carry the weight effectively. You may need to adjust the studs slightly to achieve a perfect fit.
Position and Secure Frames
After securing the temporary header, position the frames accurately to guarantee they align perfectly with the window opening. Start by making sure the frame reinforcement is strong, using double studs on each side for added support. This step is vital to maintaining the structural integrity of your bay window installation.
Next, position the window placement such that it’s centered within the framed opening. Use a level to confirm the frames are plumb and square. Secure the frames with screws, starting from the top and working your way down. This method preserves the alignment and prevents any shifting during installation.
Make certain that the new header, constructed from glued and screwed two by sixes, fits snugly. Notch out areas where necessary to accommodate any new drain vent piping. Adjust plumbing angles as required to maintain a seamless integration with your existing setup.
Pay close attention to waterproofing considerations. Apply appropriate sealants around the frame to prevent water infiltration. This step is essential to avoid future water damage and to maintain the longevity of your bay window. By following these guidelines, you’ll ensure a secure and durable installation.
Verify Level and Stability
How can you guarantee the levelness and stability of your installation area? Start by performing a stability check and a leveling process. Both are essential to make sure your small kitchen bay window is installed correctly and safely.
Begin by constructing a temporary support structure. This structure is important to prevent any structural issues during your installation. Position the temporary support in the middle of the installation area. This placement helps evenly distribute the weight and supports the ceiling and roof above. Use screws to secure the support structure firmly. Don’t hesitate to add more screws if needed, as additional screws enhance stability and prevent any shifting during the installation.
Next, wedge studs between the temporary support and the ceiling. This step is crucial for maintaining stability during the framing removal and adjustments. Make sure the support structure is securely in place before proceeding to remove old framing.
Build the New Frame
When building the new frame, start by measuring the dimensions carefully to guarantee a perfect fit for the bay window.
Use pressure-treated lumber and secure the frame with galvanized screws or nails to ensure durability and structural integrity.
Make sure to utilize a framing square and level to keep the frame level and plumb.
Measure Frame Dimensions
To begin building the new frame for your bay window, measure the width and height of the existing window frame accurately. This step is essential to guarantee that the new frame fits perfectly and provides adequate support and sealing.
Pay close attention to the following points:
- Bay Window Angles: Consider the angles and projection of the bay window. The angles will impact how much natural light enters the room and the overall aesthetic appeal. Standard bay window angles are typically 30, 45, or 60 degrees. Choose an angle that complements your kitchen’s layout and maximizes views.
- Waterproof Materials: Use durable and waterproof materials for constructing the new frame. Materials like treated wood, vinyl, or composite options are excellent choices. Waterproof materials will prevent water damage and ensure longevity, especially in a kitchen environment where moisture is prevalent.
- Frame Dimensions: Ensure the new frame accommodates the desired window size. Measure the inside edge of the existing window frame from side to side and top to bottom. Record these measurements accurately and consult manufacturer guidelines or a professional to verify their precision.
Secure Frame Materials
Start by gathering all necessary frame materials, confirming you have pressure-treated lumber for rot resistance and metal brackets for added reinforcement. These components are critical in guaranteeing the frame’s anchor strength and material durability, particularly in a kitchen setting where moisture levels can fluctuate.
Begin by cutting the pressure-treated lumber to the required dimensions, making sure each piece is accurate to avoid misalignment. Once cut, arrange the pieces to form the basic structure of the frame.
Secure the frame to the wall studs using heavy-duty screws, confirming each connection is firm to prevent any movement. Anchor strength is essential here, so double-check that each screw is firmly embedded into the studs.
Next, add metal brackets at each corner of the frame. These will provide additional reinforcement, enhancing the frame’s stability and longevity.
Before proceeding, use a level to verify the frame is perfectly aligned and even. Any deviation can cause issues during window installation.
Secure the Header
For securing the header, begin by constructing it using two glued and screwed two by sixes to guarantee maximum stability. This ensures that your header can adequately support the weight of the bay window and maintain header stability.
Next, follow these steps to properly install your header:
- Support Structure: Position the header so it’s slightly wider than the opening. This extra width guarantees the header sits firmly on the support studs, distributing the weight evenly.
- Wedged Studs: Secure the header with wedged studs on both sides. These studs should be tightly fitted to prevent any potential shifting and to provide additional support structure.
- Secure New Framing: Once the header is in place, remove the temporary header. Then, secure the new framing with multiple screws to prevent any movement. This step is essential to ensure the header remains stable over time.
Adjust Plumbing
When installing a small kitchen bay window, you’ll need to carefully adjust the plumbing to guarantee it seamlessly integrates with the new window placement. Begin by rerouting the plumbing around the new framing to ensure proper sink alignment and maintain drainage functionality. This involves accurately measuring and planning the new path for your pipes, keeping in mind the bay window’s dimensions and how they affect your existing setup.
One vital step is notching out the header to accommodate new drain vent piping. This ensures proper ventilation, which is essential for effective drainage. Make sure the newly adjusted piping angles below the window align with the new window height. This alignment is critical to prevent any future drainage issues and to ensure the smooth operation of your sink.
Next, create a new path for the drain vent through the framing. This involves carefully cutting and securing the new piping to integrate it seamlessly with the bay window installation. Pay close attention to maintaining the integrity of the framing while ensuring that the plumbing adjustments allow for proper ventilation and drainage.
Taking these steps will ensure that your new kitchen bay window functions perfectly without disrupting your plumbing system.
Handle Electrical Work

With the plumbing adjustments completed, it’s time to focus on handling the electrical work to make sure your kitchen bay window installation is both functional and safe.
First and foremost, always hire a professional electrician to handle the electrical tasks. This guarantees that all work meets safety standards and local building codes.
Prioritize safety first by planning the electrical layout meticulously. Here are three critical steps to follow:
- Add Outlets Near the Bay Window: Consider installing electrical outlets near the bay window for added convenience. This can be especially useful for small appliances or decorative lighting.
- Integrate Lighting Fixtures: Plan for lighting fixtures and under-cabinet lighting around the bay window area. Proper lighting enhances both functionality and ambiance.
- Use Appropriate Wiring Materials: Ensure that all wiring materials and techniques used are suitable for kitchen environments, reducing the risk of electrical hazards.
Your licensed electrician will make sure that all electrical components are installed correctly, adhering to local regulations. This attention to detail not only safeguards your home but also enhances the overall functionality and aesthetic of your new kitchen bay window area.
Install the Bay Window
Before you begin installing the bay window, make sure the rough opening is precisely prepared to accommodate the new structure. First, confirm that the opening is level and square, adjusting the framing as necessary. Double up on the studs on each side of the window for added structural stability. This reinforcement is essential to support the weight of the new bay window.
Next, focus on the window placement. Carefully follow the window manufacturer’s instructions to guarantee a secure installation. Use metal plates to protect any plumbing or electrical components that may be within the wall. Position the bay window in the opening, ensuring it’s level and plumb. Temporarily secure it with shims to hold it in place.
Cut the siding accurately to fit the larger dimensions of the bay window. This step is crucial for both aesthetic appeal and structural integrity. Opt for design options that maximize natural lighting, enhancing the overall ambiance of your kitchen.
Insulate Properly
Proper insulation around your new bay window is essential for maintaining ideal temperature control in your kitchen. Without it, you risk losing heat during colder months and allowing warm air to seep in during the summer, which can lead to higher energy bills. Here are key steps to guarantee proper insulation:
- Choose the Right Insulation Options: Utilize materials like foam or fiberglass to fill any gaps between the window frame and the wall. These materials are effective at preventing heat loss and enhancing thermal efficiency, leading to significant energy savings over time.
- Focus on Weatherproofing: Seal all edges and joints around the bay window to prevent air leaks. Weatherproofing is vital for maintaining heat retention, minimizing drafts, and ensuring that your kitchen remains comfortable throughout the year.
- Confirm a Tight Seal: After installing the insulation, double-check the seal between the window frame and the surrounding wall. A tight seal is essential for avoiding any air infiltration, which can compromise the effectiveness of your insulation efforts.
Apply Finishing Touches
Once the insulation is in place, it’s time to focus on applying the finishing touches to your small kitchen bay window to enhance both its functionality and aesthetic appeal. Start by considering a granite sill for a stylish and durable touch. A granite sill not only looks elegant but also withstands the daily wear and tear of a kitchen environment. Next, make sure the height of the bay window above the counter is optimized. This balance is important for both usability and visual harmony.
When choosing window treatments, consider options that complement your kitchen’s style while providing the necessary light control and privacy. Roman shades, mini blinds, or light curtains can be excellent choices. Additionally, selecting hardware options such as stylish handles, locks, and brackets can add a polished look to your bay window.
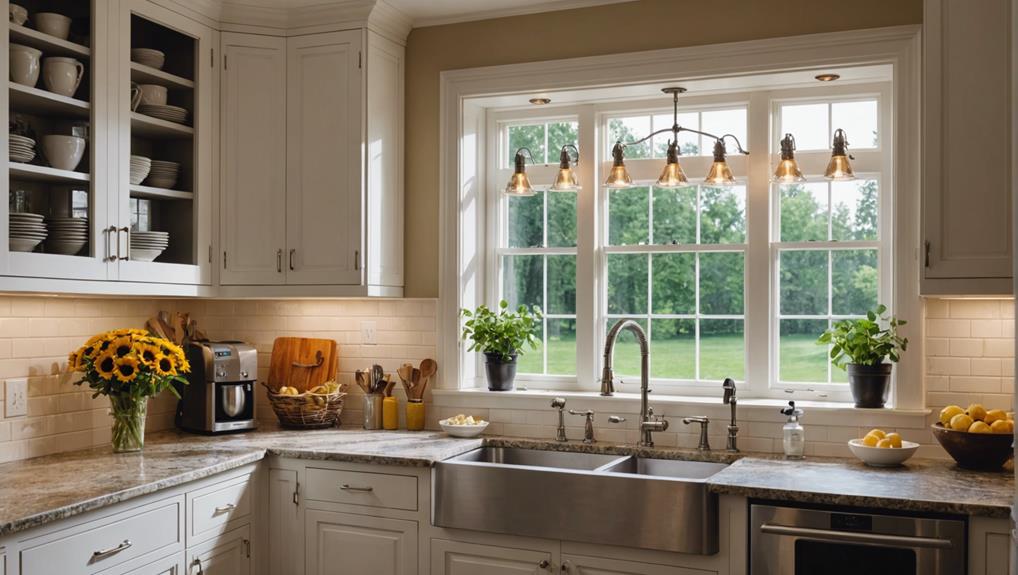
Furthermore, explore various examples of bay windows over kitchen sinks for design inspiration. Visiting a stone yard can provide unique materials and ideas, ensuring your bay window stands out. Finally, research different ways to incorporate finishing touches like trim or molding to complete the installation.
| Task | Action | Benefits |
|---|---|---|
| Adding a granite sill | Visit a stone yard | Style and durability |
| Optimizing window height | Measure carefully | Enhanced functionality and look |
| Choosing window treatments | Select light-controlling options | Improved aesthetics and privacy |
Frequently Asked Questions
How Do You Dress a Kitchen Window Above a Sink?
Dress a kitchen window above your sink with light window treatments like sheer curtains or Roman shades. Enhance decor ideas with moisture-resistant materials, decorative valances, and window shelves for plants or decorative items.
How High Should Window Be Above Sink?
You should position your window 18 to 24 inches above the counter height. This placement guarantees excellent viewing and complements your backsplash design while avoiding interference with the faucet and minimizing splash issues.
What Kind of Window Goes Over Kitchen Sink?
For your kitchen sink, consider casement windows for their excellent ventilation and ease of operation. Sliding windows are another option, offering a contemporary look and smooth functionality. Both choices enhance natural light and usability.
How Do You Use a Small Bay Window?
You can use a small bay window to create an indoor herb garden, adding fresh greenery and flavors to your kitchen. Additionally, install display shelves to showcase decorative items or essential kitchen tools, enhancing both functionality and aesthetics.
Conclusion
By following these 10 tips for installing a small kitchen bay window over your sink, you’ll guarantee a smooth and efficient process.
Measure the opening accurately, remove the old window carefully, and secure temporary support. Build a sturdy new frame, handle the electrical work safely, and install the bay window with precision.
Don’t forget to insulate properly and apply finishing touches for a professional look. With attention to detail, your kitchen will have a stunning new centerpiece.


Leave a Reply