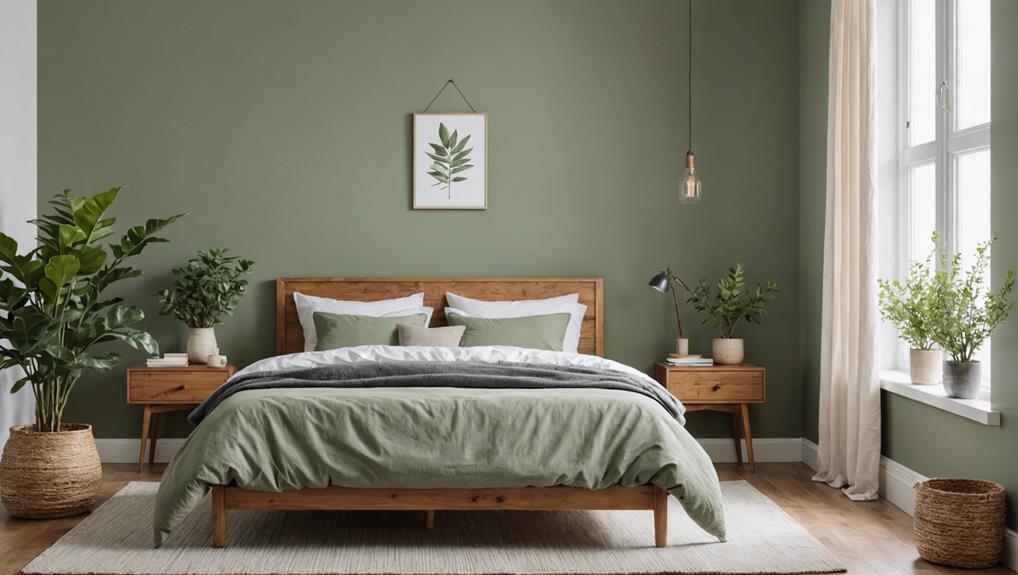
How to Create a Sage Accent Wall in Your Bedroom
To create a sage accent wall in your bedroom, start by selecting the perfect shade of sage, considering your room's natural and artificial lighting. Clean the wall thoroughly and repair any imperfections with spackling compound. Use high-quality painter's tape to mark clean, precise lines. Employ an angled brush for detailed areas and a roller for larger sections. Apply paint in 'W' or 'M' strokes for even coverage, allowing sufficient drying time between coats. Finally, add finishing touches like floating shelves, wall art, or a statement headboard to enhance the design. For a more in-depth guide, explore the next steps.
Key Takeaways
- Choose the right shade of sage green to set the desired mood, considering lighting and room size.
- Prepare the wall by cleaning, repairing imperfections, and sanding for smooth paint adhesion.
- Use high-quality painter's tape for sharp lines and prevent paint bleed during application.
- Apply paint using an angled brush for edges and a roller with 'W' strokes for even coverage.
- Ensure proper drying conditions with good ventilation and low humidity for a smooth finish.
Choose the Right Shade
Selecting the appropriate shade of sage green is essential for achieving the desired mood and ambiance in your bedroom. In interior design, color psychology plays a significant role, and sage green is no exception.
If you're aiming for a calming effect, opt for a soft sage. This lighter hue can evoke tranquility and make your space feel airy and spacious. On the other hand, a deeper shade of sage can bring warmth and coziness, perfect for creating an intimate sanctuary.
Lighting effects are vital when choosing the right shade. Natural light can enhance the green tones, making the room feel fresh and vibrant. If your bedroom lacks natural light, you might prefer a lighter shade to combat the dimness. Artificial lighting can also alter the perception of color; warm light can make sage appear more yellow-toned, while cool light can highlight its blue undertones.
Your room aesthetics are another aspect to take into account. Sage green is versatile, allowing you to match it with various styles, from modern minimalism to rustic charm. Remember, the perfect shade of sage shouldn't only reflect your personal style but also create a serene and relaxing atmosphere in your bedroom.
Prepare the Wall
To guarantee a flawless sage accent wall, start by thoroughly cleaning the surface to remove any dirt or dust that could hinder paint adhesion. Use a mild detergent solution and a soft cloth to wipe down the wall. For stubborn grime, a more robust cleaner may be required, but make sure it's suitable for painted surfaces. Effective wall cleaning is essential for best paint performance.
Next, inspect the wall for any imperfections. Address any cracks, holes, or uneven areas using proper wall repairs. Apply a spackling compound to fill in these defects. For larger holes, apply the spackling in layers, allowing each layer to dry before adding the next. Use a putty knife to spread the spackle evenly, ensuring a smooth surface. Once the spackle is dry, sand the area with fine-grit sandpaper to achieve a seamless finish. This meticulous surface preparation will ensure the paint adheres smoothly.
After completing the wall repairs, wipe away any dust from sanding with a damp cloth. This final step in surface preparation ensures a clean, smooth wall ready for priming and painting. By taking these steps, you'll create a pristine canvas for your sage accent wall.
Apply Painter's Tape
When applying painter's tape, start with high-quality tape to guarantee sharp, clean lines.
Measure and mark your lines carefully to guide your tape placement, making sure it's straight and aligned with the wall's edges.
Press down firmly on the tape to secure it and prevent any paint bleed, achieving a professional finish for your sage accent wall.
Choose Quality Painter's Tape
High-quality painter's tape is crucial for achieving clean, sharp lines on your sage accent wall. When selecting tape thickness, opt for a width that matches the scale of your design while guaranteeing easy handling. Typically, a tape width of 1.41 inches offers excellent control and precision without overwhelming your workspace.
Make sure the painter's tape you choose is explicitly designed for delicate surfaces. This will help in avoiding tape damage to your existing paint. Delicate surface tapes have a lower tack, meaning they adhere well without pulling off the paint or leaving residue behind.
To apply the tape, press it firmly along the edges where you want the paint to stop. Use a putty knife or a similar flat tool to smooth out the tape, eliminating any air bubbles that might allow paint to bleed underneath. This technique ensures your accent wall has that professional-looking finish you desire.
When you're ready to remove the tape, do so at a 45-degree angle while the paint is still slightly wet. This method helps in creating crisp, clean lines, guaranteeing your sage accent wall looks impeccable.
Measure and Mark Lines
Now that you've selected the right painter's tape, grab a level and a pencil to measure and mark straight lines on the wall for precise tape application. Begin by determining the desired width of your accent wall. Accurate measurements guarantee uniformity and a professional finish.
To get started, follow these steps:
- Measure the Wall: Use a measuring tape to determine the boundaries of your accent wall. This helps in maintaining color coordination and planning for wall accessories.
- Mark Lines with a Level: Place your level against the wall and draw straight lines with a pencil. This ensures your tape is applied evenly, essential for clean edges.
- Apply Painter's Tape: Firmly press the tape along the marked lines. This prevents paint from bleeding through and maintains sharp, clean edges.
- Consider Lighting Effects: When marking and taping, think about how lighting will interact with your accent wall placement. Proper lighting can enhance the color and texture of the sage paint.
- Double-Check Measurements: Before starting to paint, double-check all measurements and tape placements to guarantee consistency and precision.
Ensure Tape Adherence
To guarantee the painter's tape properly adheres and creates crisp edges, start by pressing it down firmly along the marked lines with a putty knife or a similar tool. This step ensures that the tape creates a tight seal against the wall, preventing paint seepage and ensuring sharp, clean lines. Use high-quality painter's tape; it's essential for achieving that professional finish you desire for your sage accent wall.
Secure the tape along the edges of the wall, following the lines you measured and marked previously. This important boundary is vital for a polished look. As you apply the tape, make sure to press down firmly, especially at the edges where paint is most likely to bleed through.
Here's a quick guide to help you stay organized:
| Task | Tool Needed |
|---|---|
| Pressing tape down | Putty knife |
| Ensuring no gaps | Your fingertips |
| Tape removal | Slow, steady pull |
Painting Techniques
When creating a sage accent wall, start by using painter's tape to guarantee clean, precise lines. Selecting the right brush is vital for achieving a professional finish. Opt for a high-quality, angled brush for detailed work around edges and corners. For larger areas, a roller with an extended handle will make the job easier and guarantee smooth, even application.
Use a 'W' or 'M' painting stroke technique with your roller to cover the wall uniformly without streaks. This method helps distribute the paint evenly and avoids drips.
Make sure the painter's tape is firmly pressed to prevent paint bleed.
Use a small brush to paint around edges and corners with precision.
Apply multiple coats of sage green paint for a rich, saturated color.
Remove the tape carefully while the paint is still slightly wet to achieve clean edges.
Consider using a paint roller with an extended handle to reach higher areas effortlessly.
After painting, take special care when removing the tape. Pull it off slowly at a 45-degree angle to maintain those sharp, clean edges you've worked hard to achieve. This attention to detail will result in a flawless sage accent wall that enhances your bedroom's aesthetic.
Drying Time
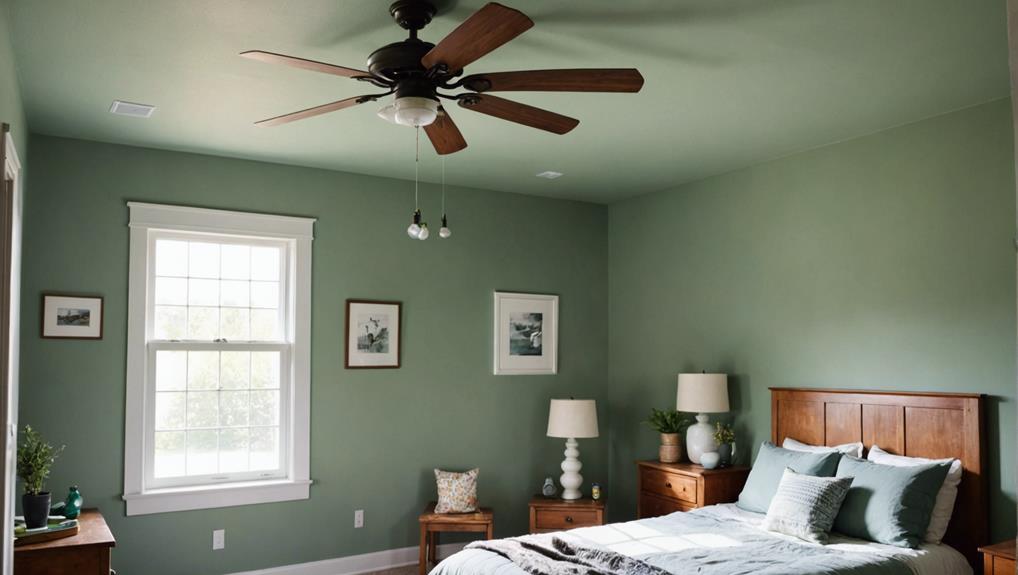
To achieve the best results for your sage accent wall, pay attention to drying time, which hinges on ideal conditions, like good ventilation and low humidity.
Water-based paints generally dry faster, needing only 2-4 hours to be ready for a second coat, while oil-based paints can take 6-8 hours or longer.
Ensuring the paint is completely dry before proceeding will help you attain a smooth, flawless finish.
Optimal Drying Conditions
Securing ideal drying conditions is crucial for achieving a flawless finish on your sage accent wall. Begin by setting up proper ventilation and temperature control in the room. Maintaining a well-ventilated space helps avoid paint fumes and speeds up the drying process. Aim for a room temperature between 60-80°F to create a conducive drying environment.
Next, pay attention to humidity levels and paint type. Ideally, keep humidity levels below 50% to prevent the paint from taking too long to dry. Water-based paints generally dry faster than oil-based ones, so choose your paint type accordingly if you're pressed for time.
To optimize drying conditions, follow these tips:
- Ensure good air circulation by opening windows and using fans, but avoid direct airflow on the painted wall.
- Utilize a dehumidifier to maintain low humidity levels.
- Apply thinner paint layers for quicker drying times and better adherence.
- Follow the paint manufacturer's recommendations for temperature and humidity.
- Monitor the drying process and adjust environmental controls as necessary.
Required Drying Duration
The drying time for your sage accent wall largely depends on the type of paint used, room temperature, and humidity levels. When you opt for latex paint, a popular choice for its quick-drying properties, expect it to dry to the touch within 1-2 hours. However, achieving a fully cured paint finish can take up to 2-3 weeks. Oil-based paints, while offering a robust finish, take longer to dry, typically around 6-8 hours to the touch and also require 2-3 weeks to cure completely.
| Paint Type | Dry to Touch | Fully Cured |
|---|---|---|
| Latex | 1-2 hours | 2-3 weeks |
| Oil-based | 6-8 hours | 2-3 weeks |
Room temperature and humidity levels greatly impact drying times. For instance, higher humidity can prolong drying, while good ventilation can expedite it. Use the touch test to gauge whether the paint is ready for a second coat. Gently press your fingertip against the wall; if it feels dry and doesn't smudge, it's time for the next layer.
Ensuring adequate drying time between coats is essential for a smooth, durable finish. Keep an eye on both the paint finish and environmental conditions to achieve the best results for your beautiful sage accent wall.
Ensuring Complete Dryness
When you're painting a sage accent wall, providing at least 24 hours of drying time between coats guarantees a smooth, professional finish. Proper ventilation and moisture control are essential to ensuring complete dryness. Open windows or use fans to circulate air, and consider using a dehumidifier to manage humidity levels. This will help the paint dry evenly and prevent moisture-related issues.
To achieve the best results, follow these steps:
- Check the manufacturer's recommendations: Different paints have varying drying times. Adhering to these guidelines ensures excellent performance.
- Perform a touch test: Lightly touch the painted surface to check for dryness. The wall should feel cool and not tacky.
- Monitor paint consistency: Ensure the paint is applied evenly, as this affects drying time and final appearance.
- Avoid rushing the process: Patience is key. Rushing can lead to uneven application and compromise the wall's aesthetic.
- Control the environment: Use tools like dehumidifiers and fans to maintain ideal drying conditions.
Add Finishing Touches
To complete your sage accent wall, consider adding floating shelves or wall art that complements the soothing color scheme. These styling tips can greatly enhance the overall aesthetic, providing finishing touches that bring cohesion to your design.
Floating shelves offer both functionality and decor opportunities; you can display curated items like small plants, framed photos, or decorative objects. When selecting wall art, opt for pieces that incorporate similar hues or themes, guaranteeing color coordination throughout the space.
Incorporate a statement headboard that draws attention and adds a layer of sophistication. Unique lighting fixtures, such as pendant lights or sconces, can provide a personalized touch while enhancing the room's ambiance. To add depth, layer different textures like faux fur throws or woven baskets, creating a cozy and inviting atmosphere.
Enhance the wall further with a large mirror to reflect light and make the room feel more spacious. Finally, use a mix of decorative pillows and throws in coordinating colors to tie the room together.
These decor ideas not only add visual interest but also ensure that every element harmonizes with your sage accent wall, achieving a balanced and stylish bedroom.
Frequently Asked Questions
Is Sage Green a Good Color for a Bedroom?
Yes, sage green's mood benefits make it an excellent bedroom choice. Color psychology highlights its calming and tranquil effects, creating a serene atmosphere. It's versatile, pairing well with various textures for a cozy and inviting space.
How to Style a Sage Bedroom?
To style a sage bedroom, place natural wood furniture strategically to enhance organic vibes. Use decorative accessories like throw pillows and artwork to inject hints of sage. Optimize furniture placement to guarantee natural light maximizes the airy atmosphere.
What Color Bedding Goes With Sage Green Walls?
For sage green walls, choose bedding in neutral tones like tan or beige for warmth. Light gray or white offers a fresh look. Add metallic accents such as gold or silver pillows to enhance sophistication and design depth.
How to Build an Accent Wall in a Bedroom?
To build an accent wall in your bedroom, gather materials needed like primer, paint, brushes, and painter's tape. Focus on wall preparation by cleaning, priming, and taping off the area. Paint evenly for a professional finish.
Conclusion
You've now transformed your bedroom with a stunning sage accent wall! By choosing the perfect shade, properly preparing the wall, and utilizing precise painting techniques, you've created a serene focal point.
Allow the paint to dry thoroughly before adding any finishing touches like artwork or shelves.
This accent wall not only enhances your room's aesthetic but also brings a calming ambiance.
Enjoy your beautifully refreshed space, and feel proud of your design accomplishment.
Leave a Reply