DIY Outdoor Wood Ceiling Ideas: Transform Your Space in 5 Easy Steps
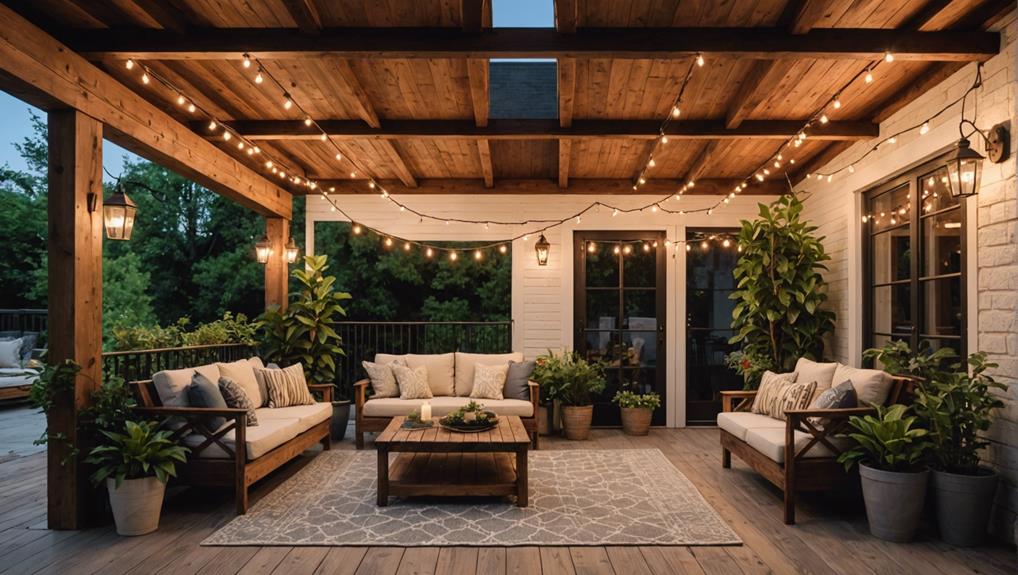
Transform your outdoor space with a gorgeous wood ceiling in five easy steps. Start by choosing durable wood like cedar, pine, or cypress. Thoroughly clean and sand the ceiling surface, repairing any cracks for a smooth base. Install roofing paper to provide moisture protection. Secure wood planks to the joists using a nail gun, construction adhesive, and proper spacing. Finish by attaching nailing strips for structural support, making certain they’re fastened evenly. Following these steps guarantees a stunning, long-lasting wood ceiling that enhances your outdoor area. Learn more about each step to achieve the best results!
Key Takeaways
- Choose weather-resistant wood like cedar or cypress for durability and minimal maintenance.
- Prepare the ceiling surface by cleaning, repairing, sanding, and priming for optimal wood adhesion.
- Install roofing paper with proper overlapping and secure it with staples or nails for moisture protection.
- Attach wood planks to joists using a nail gun or screws, and apply construction adhesive for added stability.
- Secure nailing strips evenly to joists for structural support, especially in high-moisture areas.
Choose Your Wood Material
When selecting your wood material for an outdoor ceiling, consider cedar, pine, or cypress for their natural durability and resistance to weather elements. Cedar is an excellent option due to its natural oils, which safeguard against insects and decay. This makes it particularly suited for outdoor use, guaranteeing your ceiling remains in good condition for years. Cedar also offers a rich, warm aesthetic that enhances your outdoor decor.
Pine is another great choice, especially if you’re looking for a cost-effective option. Its rustic appearance can be easily stained or painted to match your outdoor aesthetics, providing flexibility in design. Pine requires regular maintenance, such as sealing and staining, to keep it looking its best and to protect against weathering.
Cypress wood stands out for its remarkable resistance to rot, decay, and insect damage. Its natural durability makes it a long-lasting choice for your outdoor ceiling. Cypress also boasts a unique, textured look that can add an element of sophistication to your outdoor space.
In essence, your wood selection should balance durability, maintenance needs, and aesthetic appeal to ensure your outdoor ceiling not only looks stunning but also withstands the test of time.
Prepare the Ceiling Surface
Properly preparing the ceiling surface is essential to guarantee a lasting and visually appealing wood ceiling installation. Start by thoroughly cleaning the outdoor ceiling surface to remove any dirt, debris, and existing finishes. This ensures a clear, contaminant-free base for your project. Use appropriate surface cleaning methods to achieve this, as it sets the stage for successful adhesion.
Next, inspect the ceiling for any damage. If you find cracks or holes, apply suitable repair methods to create a smooth, even surface. Sanding the ceiling afterwards will further ensure that you have a suitable base for the wood installation. Sanding also helps promote better adhesion of the wood materials.
Now, apply a primer to the ceiling surface. This step is essential in outdoor ceiling priming as it enhances the durability and adhesion of the wood.
| Step | Description |
|---|---|
| Surface Cleaning | Remove dirt, debris, and any existing finishes |
| Repair Methods | Fix cracks, holes, and ensure a smooth surface |
| Outdoor Ceiling Priming | Apply primer to enhance durability and adhesion |
Lastly, make sure the ceiling surface is completely dry before proceeding. Proper drying techniques are important to prevent moisture issues that could affect the wood installation later on. This careful preparation will set you up for a successful and long-lasting wood ceiling.
Install Roofing Paper
With the ceiling surface properly prepared, the next step is to install roofing paper to provide stability and protect against moisture. Roofing paper is a critical layer in your outdoor wood ceiling project, guaranteeing that the wooden planks above remain pristine and durable.
One of the main benefits of roofing paper is its capacity to prevent gaps and knots in the wood from showing through, creating a smoother and more aesthetically pleasing finish.
Begin by rolling out the roofing paper across the ceiling’s surface, making sure it extends slightly beyond the edges. This will help create a seamless barrier. Use a staple gun or roofing nails to secure the paper firmly, starting from one end and working your way to the other. Make sure to overlap each strip by at least four inches to ensure maximum protection against moisture infiltration.
For alternative installation methods, consider using an adhesive roofing underlayment specifically designed for outdoor applications. This type of underlayment can offer additional waterproofing benefits and ease of installation.
Whichever method you choose, ensure the roofing paper is flat and secure before moving on to the next step. This attention to detail will greatly enhance the longevity and performance of your outdoor wood ceiling.
Attach the Wood Planks
To attach the wood planks, use a nail gun or screws to securely fasten them to the ceiling joists, guaranteeing a durable and lasting installation. Start from one end of the ceiling and work your way across systematically. Pre-drill holes to prevent splitting the wood and make installation easier. Consider applying construction adhesive along with nails or screws for added stability.
Proper spacing between planks is crucial for a uniform and visually appealing look. Be consistent in your measurements to maintain symmetry across the entire ceiling.
Here are some practical steps to follow:
- Measure and cut planks precisely: Ensure each plank fits perfectly between the ceiling boundaries.
- Pre-drill holes: This prevents the wood from splitting and makes attaching easier.
- Use construction adhesive: Apply a bead along the back of each plank for added security.
- Secure with nail gun or screws: Attach firmly to the ceiling joists to ensure durability.
- Check alignment frequently: Keep your planks straight and evenly spaced.
Once installed, consider various finish options like stain or paint to complement the rest of your outdoor space. Regular maintenance tips include sealing the wood annually to protect against weather exposure and periodically checking for loose planks.
Secure With Nailing Strips
Securing your outdoor wood ceiling is both essential and visually appealing starts by securing nailing strips along the ceiling joists. Nailing strips provide necessary structural support, ensuring your wood planks remain evenly spaced and securely fastened. This step is vital for achieving a uniform and professional finish.
To begin, measure and cut your nailing strips to fit between the joists. Attach them perpendicular to the joists using screws or nails, making sure they’re securely fastened. One of the key nailing strip benefits is that they allow for easier installation and adjustment of your wood planks, reducing the risk of warping or bowing due to weather exposure.
Consider alternatives such as metal furring strips if you’re in a high-moisture area, but wood nailing strips are generally preferred for their compatibility with wood planks.
For best results, follow these nailing strip installation tips and tricks: use a level to ensure strips are straight, space them evenly (typically every 12-16 inches), and double-check their alignment before proceeding.
Properly installed nailing strips ensure the longevity and stability of your outdoor wood ceiling, making this investment of time and effort well worth it.
Frequently Asked Questions
How to Create a Wooden Ceiling?
To create a wooden ceiling, start with material selection, choosing tongue and groove wood planks for seamless installation. Guarantee proper ceiling insulation. Measure precisely, then install the planks. Add beams or trim for structural interest.
What Does a Wood Ceiling Do to a Room?
A wood ceiling enhances your room by providing acoustic benefits, reducing echo and improving sound quality. It also offers natural insulation, helping regulate temperature. Plus, its aesthetic appeal adds warmth, making the space feel cozy and inviting.
How to Wood Plank a Ceiling?
To wood plank a ceiling, you’ll need tools like a tape measure, saw, nails, and a hammer. Choose plank materials that suit your style. Measure joist lines, secure planks, cut for fixtures, and handle stubborn boards carefully.
What Is the New Trend for Ceilings?
The new trend for ceilings focuses on innovative designs and sustainable materials. You can create a warm, inviting space by incorporating natural elements like wood, which adds texture and character to your outdoor living areas.
Conclusion
By following these five straightforward steps, you’ll transform your outdoor space into a stunning wood-ceiling retreat.
Choose quality wood.
Prepare your ceiling surface meticulously.
Install roofing paper for added protection.
Attach the wood planks securely.
Finalize with nailing strips.
Each step is essential for a professional finish that’s both durable and visually appealing.
Don’t hesitate—start your DIY project today and enjoy the beauty and functionality of your new outdoor haven.


Leave a Reply