Transform Your Space With Modern Vertical Shiplap: 3 Easy Steps for Your Bathroom
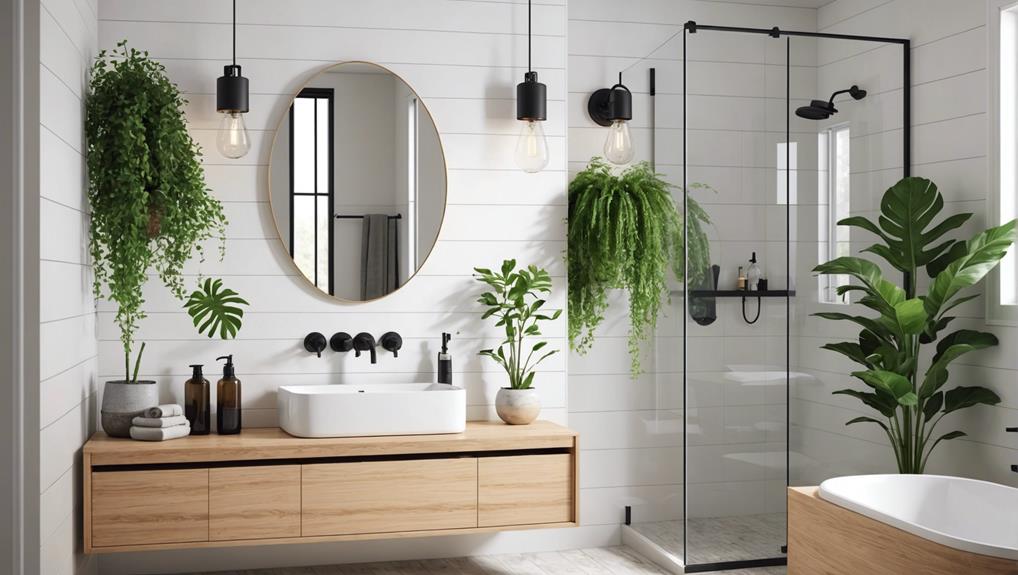
Transform your bathroom into a stylish sanctuary with modern vertical shiplap in three easy steps. Start by measuring your wall's dimensions and pre-painting the boards for a uniform finish. Next, cut the shiplap to fit, aligning each piece vertically with a level, and secure them to the wall studs with a nail gun. For a polished look, reinstall baseboards, fill nail holes with wood filler, and caulk the edges. Sand the surface smooth and apply high-quality, moisture-resistant paint. By following these detailed steps, you'll achieve a sleek, sophisticated look that enhances your space. Discover more to perfect your shiplap installation.
Key Takeaways
- Measure and plan your layout to ensure a precise fit, considering obstacles like light switches and outlets.
- Choose moisture-resistant materials like pine or MDF for durability in a bathroom setting.
- Pre-paint your boards for a uniform finish and ease of installation.
- Securely install boards with a nail gun, using a level to maintain vertical alignment.
- Finish with wood filler, caulk, and moisture-resistant paint for a polished, long-lasting look.
Planning and Preparation
Before diving into your bathroom transformation, you'll need to meticulously measure the wall length and height to determine the exact quantity of vertical shiplap boards required. This step guarantees you purchase the correct amount of material, avoiding delays and extra costs.
Next, focus on material selection. Choose a type of wood or other material that aligns with your aesthetic preferences and maintenance needs. For a sleek, modern look, consider smooth, high-quality pine or MDF. If you prefer a rustic charm, reclaimed wood might be your go-to. Don't forget to factor in moisture resistance, especially in a bathroom setting.
Layout planning is essential for a seamless installation. Sketch a detailed layout, marking the placement of each vertical shiplap board. Consider obstacle placement, such as light switches, outlets, and any built-in fixtures. Proper planning around these elements ensures a clean, professional finish and avoids the hassle of cutting boards on the fly.
Lastly, make sure your bathroom has adequate ventilation to prevent moisture buildup, which can compromise the durability of your shiplap. Pre-painting the boards before installation can save time and provide a uniform finish, setting the stage for a stunning transformation.
Installing the Shiplap
Once you've completed your preparations, it's time to start installing the shiplap with careful attention to detail and precision. Begin by measuring the bathroom wall length to guarantee cutting accuracy for each shiplap board. Accurate board length is essential for a seamless installation.
Use a table saw or miter saw to cut the boards to the required length. Make sure each cut is precise to maintain a consistent look across the wall.
Next, secure each shiplap board using a nail gun. Align the boards vertically, and nail them into the wall studs or drywall for securing stability. The nail gun usage not only speeds up the process but also ensures each board is firmly attached, creating a durable finish.
| Step | Action | Tools Needed |
|---|---|---|
| Measure | Measure wall length for cutting accuracy | Tape Measure |
| Cut | Cut shiplap boards to the measured board length | Table/Miter Saw |
| Align | Align boards vertically on the wall | Level |
| Secure | Secure boards using nail gun for stability | Nail Gun, Nails |
Be meticulous with each step to achieve a professional look. Remember, the key to a stunning shiplap installation is precision and stability.
Finishing Touches
After securing the last shiplap board, re-install the baseboards and crown moldings to frame your new vertical shiplap beautifully. This step is essential to give your bathroom a finished, cohesive appearance. Use wood filler to fill any nail holes, guaranteeing a smooth, seamless surface.
Next, focus on caulking along the top, bottom, and corners of the boards. This not only enhances the polished look but also provides a moisture barrier, important in a bathroom setting.
Detailed sanding is your next task; this ensures your vertical shiplap is perfectly smooth and ready for painting.
When it comes to paint selection, opt for a high-quality, moisture-resistant paint suited for bathrooms. Apply at least two full coats for complete coverage and durability. Precision is key here; take your time to make sure every groove and edge is well-coated.
For trim options, consider using contrasting colors or types of wood to add a sophisticated touch. Whether you choose a classic white or a bold hue, your trim should complement the overall design while highlighting the vertical lines of the shiplap.
Frequently Asked Questions
Is It a Good Idea to Put Shiplap in a Bathroom?
Yes, it's a good idea to put shiplap in a bathroom if you use moisture-resistant materials and proper paint options. This can add texture and warmth while ensuring durability and visual interest in the space.
Where Do I Start Vertical Shiplap?
Start vertical shiplap by using measuring tools to find the center of your wall. Guarantee proper wall preparation by cleaning and smoothing the surface. This creates a balanced, professional look and simplifies the installation process.
Should I Use Horizontal or Vertical Shiplap in a Small Bathroom?
You should choose vertical shiplap for a small bathroom if you want to visually elongate the space. Guarantee moisture resistance with proper sealing and explore color choices that complement your design goals for a modern, dramatic look.
Does Vertical Shiplap Make Room Look Bigger?
Yes, vertical shiplap makes a room look bigger. Choosing light color choices enhances this effect. For installation tips, guarantee precise alignment to maintain clean lines, which will maximize the illusion of height and spaciousness.
Conclusion
By following these three easy steps, you've transformed your bathroom into a modern, stylish haven.
With careful planning, precise installation, and thoughtful finishing touches, your vertical shiplap now exudes a contemporary elegance.
Remember, attention to detail and quality materials make all the difference. Enjoy the sophisticated new look you've created and take pride in your beautifully updated space.
Your bathroom isn't just functional; it's a design statement.


Leave a Reply