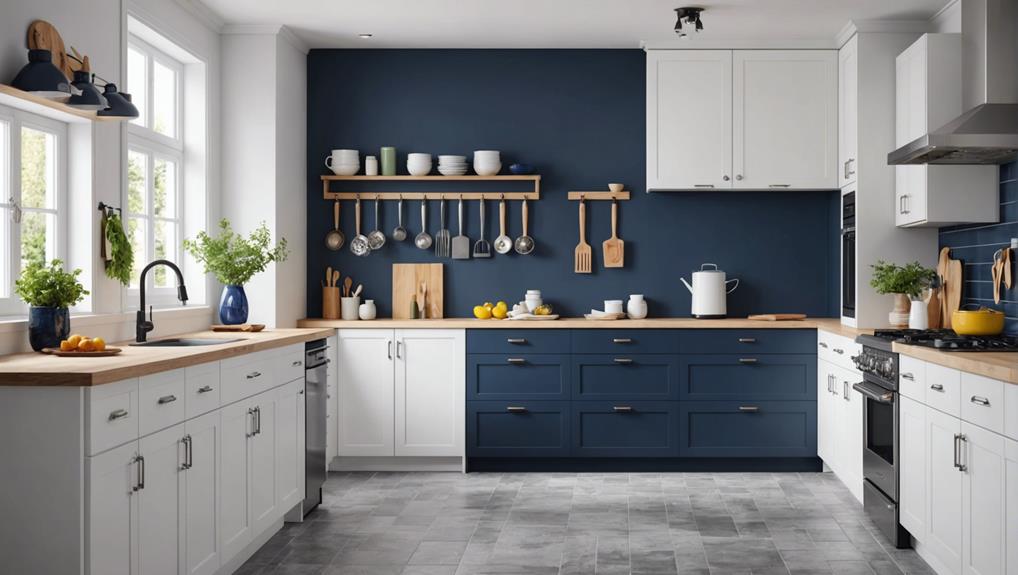
10 Expert Tips for Perfectly Painted Kitchen Cabinets
Transforming your kitchen cabinets requires meticulous planning and expert techniques. Allocate 3-5 days for thorough preparation and painting. Remove and label all hardware systematically to guarantee efficient reassembly. Clean surfaces with a high-quality degreaser and sand with fine-grit sandpaper for best adhesion. Apply a premium primer in thin, even coats, followed by multiple layers of quality paint, allowing proper drying time between coats. Use professional-grade brushes and sanding tools to achieve a smooth, durable finish. Reassemble the cabinets carefully, guaranteeing alignment and secure hardware attachment. With each step executed meticulously, a stunning cabinet transformation is guaranteed.
Key Takeaways
- Clean and degrease cabinets thoroughly to ensure proper paint adhesion.
- Sand surfaces lightly with fine-grit sandpaper for smoothness and durability.
- Apply a high-quality primer in thin, even coats for better coverage.
- Use quality brushes and foam rollers to achieve a smooth, professional finish.
- Allow each coat to dry completely before sanding and applying the next layer.
Plan Your Timeline
When planning your timeline for painting kitchen cabinets, allocate a minimum of 3-5 days to encompass the essential stages of preparation, painting, and drying. Efficient time management is vital to achieving a professional finish.
Begin by selecting your color, as this decision will influence the number of coats required and hence the overall timeline. Lighter colors may need multiple coats for full coverage, while darker shades might require fewer applications.
Consider the drying time for each coat of paint. Typically, water-based paints dry faster than oil-based counterparts, but both require adequate intervals to prevent tackiness and guarantee durability. Weather considerations play a significant role, especially if painting outdoors. High humidity and low temperatures can extend drying times, potentially disrupting your schedule. It is advisable to monitor weather forecasts and plan accordingly.
Allocate additional time for sanding, priming, and applying multiple coats. Each of these steps is integral to the final outcome, ensuring the paint adheres properly and the finish is smooth. Rushing through these stages can lead to imperfections, necessitating rework.
Consequently, a meticulously planned timeline that factors in all these variables will guarantee a seamless and efficient painting process.
Prepare the Area
Having established a thorough timeline, the next step is to carefully prepare the area to guarantee a favorable painting environment. A meticulous workspace setup is critical for achieving a professional finish. Begin by completely clearing out the cabinets, ensuring no items are left inside. This not only provides an unobstructed area for painting but also protects your belongings from potential paint splatter.
Simultaneously, focus on ventilation requirements. Proper ventilation is essential to dissipate fumes and facilitate drying. Open windows, use exhaust fans, or employ portable ventilation systems to maintain a steady airflow throughout the workspace.
Surface protection is another crucial aspect. Shield all surrounding surfaces—floors, countertops, and appliances—with drop cloths or plastic sheeting. Secure these coverings with painter’s tape to prevent movement and ensure thorough protection against drips and spills.
Additionally, conduct a detailed inspection of the cabinet surfaces. Clean and vacuum them meticulously to eliminate dust, grease, and debris. Address any surface imperfections, such as dents or scratches, with appropriate fillers and sanding techniques. This step is important for ensuring a smooth, even paint application.
Remove Cabinet Hardware
To begin the process of removing cabinet hardware, assemble the necessary tools, such as a screwdriver and labeling materials.
Employ a meticulous technique to carefully detach knobs, handles, and hinges, ensuring no damage occurs to the surfaces.
Systematically label and organize each piece of hardware, documenting their original locations for seamless reinstallation.
Tools You’ll Need
Removing cabinet hardware, such as knobs and hinges, requires essential tools including screwdrivers, pliers, painter’s tape, sandpaper, and drop cloths. These tools play a vital role in a seamless and efficient process, enhancing both paint selection and surface preparation phases.
Start by using the appropriate screwdriver to carefully unscrew the cabinet hardware. Flathead or Phillips screwdrivers are commonly used, depending on the type of screws. Pliers can assist in loosening any stubborn hardware. After the hardware is removed, label and store each piece systematically to streamline reassembly.
Painter’s tape proves invaluable for marking the cabinet doors and frames, ensuring that each component is painted uniformly. When considering paint selection, understanding the type of surface you are working with is essential. High-quality paint designed for cabinetry can provide a durable and aesthetically pleasing finish.
Sandpaper is crucial for surface preparation, allowing you to smooth out any imperfections and provide a texture that the paint will adhere to effectively. Finally, drop cloths protect your workspace from paint splatters and debris, maintaining a clean environment throughout the project.
Proper Removal Technique
Begin by selecting the appropriate screwdriver to meticulously unscrew and detach all knobs, handles, and hinges from the cabinet surfaces. This initial step is vital to guarantee a smooth painting process and to prevent any drips or uneven coverage. Carefully remove each piece of hardware and place them in designated hardware storage containers to keep all components organized. This will greatly facilitate the reinstallation process.
For areas where hardware cannot be easily removed, such as built-in hinges, employ masking tape to protect these sections from paint splatters. The use of masking tape should be precise to make certain that no paint seeps into unwanted areas, maintaining the integrity of the hardware and cabinet surfaces.
Ensure that all screws, knobs, and handles are accounted for to avoid any complications during the reinstallation process. A systematic approach to hardware storage not only preserves the condition of the hardware but also streamlines the final steps of your project.
Labeling and Organizing Hardware
After carefully detaching the hardware, it is essential to systematically label and organize each piece to guarantee an efficient reassembly process post-painting.
Begin by labeling each piece of hardware with its corresponding cabinet location. This can be achieved through a numbering system or color coding. For instance, assign a unique number or color to each cabinet door and drawer, and then mark the corresponding hardware to match. This method ensures precise hardware organization, eliminating the risk of mismatched pieces during reassembly.
Once labeled, store the hardware in labeled bags or containers. Use ziplock bags or small containers, clearly marked with the designated number or color. This approach not only prevents misplacement but also facilitates efficient reinstallation. Grouping similar items together, such as screws, hinges, and handles, further enhances organization and expedites the reassembly process.
For more advanced hardware organization, consider using a small parts organizer with multiple compartments. Allocate a compartment for each set of hardware, labeled accordingly. This meticulous organization system will streamline the cabinet painting process, ensuring that all components are readily accessible when needed.
Taking these steps will greatly reduce confusion and save time during reinstallation, guaranteeing a smooth and professional outcome.
Clean All Surfaces
To achieve a professional finish, meticulously clean all cabinet surfaces using a quality degreaser such as sugar soap to eliminate grease and grime.
Follow by lightly sanding the surfaces to guarantee smoothness and better paint adhesion.
Remove Grease and Grime
Thoroughly eliminate grease and grime from your kitchen cabinets using a degreaser or a mixture of warm water and dish soap to guarantee ideal paint adhesion. Begin by preparing your cleaning solution; for a homemade mixture, combine a few drops of dish soap with warm water in a bucket.
Utilize a soft sponge or cloth to apply the solution to the cabinet surfaces, focusing particularly on areas near the stove and sink where grease buildup is most prevalent. Employ effective grease removal techniques by scrubbing in a circular motion to lift embedded oils and residues. If using a commercial degreaser, follow the manufacturer’s instructions meticulously to ensure best results without damaging the cabinet material.
After cleaning, rinse the surfaces with a damp cloth to remove any soap or degreaser residue, which could otherwise interfere with paint adhesion. To implement grime prevention methods, make it a habit to wipe down kitchen cabinets regularly, especially after cooking sessions. This practice will mitigate future buildup, ensuring that the painting process remains smooth and professional.
Sand for Smoothness
Achieving a smooth and even finish on kitchen cabinets necessitates thorough sanding of all surfaces, starting with medium-grit sandpaper (120 grit) to remove imperfections and followed by fine-grit sandpaper (240-320 grit) between coats for best results. This meticulous process guarantees smooth surfaces and flawless paint application, key to a professional finish.
Employing advanced sanding techniques, such as using an orbital sander, greatly enhances efficiency and consistency. The orbital sander’s circular motion provides even coverage, which is vital for larger cabinet surfaces. Sanding facilitates better paint adhesion, thereby enhancing the durability and quality of the painted cabinets.
| Step | Description |
|---|---|
| Initial Sanding | Use 120-grit sandpaper to eliminate surface imperfections and old finishes. |
| Between Coats Sanding | Employ 240-320 grit sandpaper to smoothen surfaces between paint applications. |
| Finishing Touches | Perform a final sanding with 320-grit for an ultra-smooth finish. |
| Equipment | Utilize an orbital sander for efficient and consistent sanding results. |
Precision in sanding not only prepares the surface but also ensures the finishing touches are impeccable. Proper sanding techniques are essential in achieving a flawless paint job that stands the test of time. By dedicating effort to this important step, one can transform kitchen cabinets to look professionally painted and exceptionally smooth.
Use Quality Degreaser
A high-quality degreaser is vital for eliminating grease, grime, and residues from kitchen cabinet surfaces, ensuring ideal paint adhesion and a professional finish. Proper surface preparation begins with the meticulous application of a commercial-grade degreaser. This essential step in the painting process removes built-up dirt, oils, and residues that can compromise the effectiveness of paint application.
To achieve best results, commence with the degreaser application by pouring a moderate amount onto a clean, lint-free cloth. Methodically wipe down all cabinet surfaces, ensuring thorough coverage. Pay special attention to high-touch areas such as handles, corners, and edges where grease and grime tend to accumulate. For stubborn spots, allow the degreaser to sit for a few minutes before scrubbing gently with a non-abrasive brush.
Once the surfaces are thoroughly cleaned, rinse them with a damp cloth to remove any degreaser residues. Allow the cabinets to dry completely before proceeding to the next steps.
Investing in a high-quality degreaser not only ensures a smooth and durable finish but also extends the longevity of the paint job, resulting in a professional and lasting transformation of your kitchen cabinets.
Sand Thoroughly
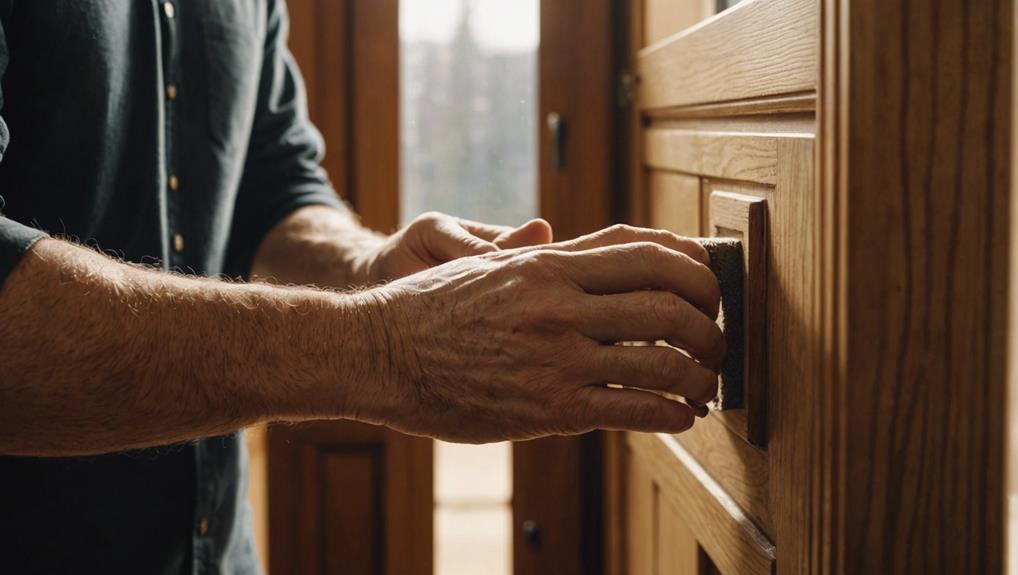
Properly sanding your kitchen cabinets is essential for achieving a smooth and durable painted finish. Employing the right sanding techniques during surface preparation guarantees optimal paint adhesion, leading to a professional result.
Begin with 120 grit sandpaper to remove any existing finish and imperfections. This coarse grit is ideal for initial sanding, effectively smoothing rough surfaces and preparing the cabinet for subsequent layers of paint.
To enhance efficiency and uniformity, consider using an orbital sander. This tool greatly reduces the labor involved and yields a more consistent sanding outcome.
After the initial sanding, it is important to progress to finer grits such as 240 to 320 for sanding between coats. These finer grits help achieve a smooth finish by eliminating minor scratches and ensuring that each layer of paint adheres seamlessly.
Key points to remember:
- Initial Sanding: Start with 120 grit sandpaper to remove old finishes and smooth out rough surfaces.
- Between Coats: Use 240-320 grit sandpaper to sand between paint coats for a flawless finish.
- Tools: An orbital sander can expedite the process and enhance the uniformity of the sanding.
Thorough sanding not only ensures better paint adhesion but also contributes to the durability and aesthetic appeal of your painted kitchen cabinets.
Apply Primer
Applying primer is an essential step in the painting process, as it guarantees the best adhesion and durability of the paint on your kitchen cabinets. Proper primer application techniques are vital for achieving a flawless finish.
Begin by selecting a high-quality adhesion-promoting primer tailored to the material of your cabinets—whether they are wood, laminate, or a glossy surface. This choice is critical because the right primer will prevent issues such as peeling and chipping over time.
Before application, make sure that the cabinets are clean and free of dust and grease. Use a synthetic bristle brush or a high-density foam roller to apply a thin, even coat of primer. For intricate areas, a brush is more effective, while a roller works well on larger, flat surfaces. Allow the primer to dry completely, as per the manufacturer’s instructions, which typically ranges from one to four hours.
If the surface is not smooth after the first coat, lightly sand the primed surface with fine-grit sandpaper and apply a second coat. This step ensures a smooth base for the paint, resulting in a professional-looking finish.
Properly following these primer application techniques will greatly enhance the longevity and appearance of your kitchen cabinets.
Choose Quality Paint
Selecting high-quality paint is paramount for achieving a durable and aesthetically pleasing finish on your kitchen cabinets. For the best results, it is essential to choose paints specifically formulated for cabinetry. Brands such as Farrow & Ball Modern Eggshell offer exceptional durability, making them ideal for high-traffic areas like kitchens.
When selecting paint finishes, consider the desired sheen and functionality. For a mid-sheen finish, Dulux Cupboard Paint and Dulux Quick Dry Satinwood are excellent choices, providing a balance of gloss and matte characteristics that enhance the visual appeal while maintaining ease of cleaning.
To guarantee the paint adheres uniformly and lasts longer, using a suitable primer is vital. Opt for Dulux Primer & Undercoat for wood surfaces to create a smooth base. For cabinets made of tricky materials, Dulux Difficult Surface Primer, a low odor formulation, ensures effective adhesion without the overpowering smell.
Additionally, choosing custom color choices allows for personalized aesthetics, making your kitchen truly unique. Quick-drying and low-VOC options like those available in the Dulux range offer convenience and environmental benefits, ensuring a safer and faster painting process.
- Farrow & Ball Modern Eggshell
- Dulux Cupboard Paint
- Dulux Quick Dry Satinwood
Selecting the right paint can significantly impact the longevity and appearance of your kitchen cabinets.
Use Proper Tools
To achieve a flawless finish on kitchen cabinets, guaranteeing high-quality tools is paramount. Opt for a two to two-and-a-half inch fine bristle brush for detailed work, and consider a smooth mini roller like Two Fussy Blokes for broader surfaces.
Additionally, make sure proper sanding tools are on hand to prepare the surfaces meticulously before painting.
Choose Quality Brushes
Using high-quality brushes with fine bristles is essential for achieving a smooth and professional finish when painting kitchen cabinets. Opt for brushes that are two to two-and-a-half inches in width to guarantee precision and control. The importance of brush quality cannot be overstated, as it directly influences the evenness and smoothness of the paint application on cabinet surfaces.
Proper brush maintenance is vital for extending the life of your tools and ensuring peak performance. Clean brushes thoroughly after each use, removing all paint residues to prevent bristle damage and maintain their shape. This practice not only preserves the integrity of the brushes but also readies them for future projects.
When it comes to paint selection, pairing high-quality brushes with the appropriate type of paint is fundamental for achieving the best results. High-quality brushes can handle different paint viscosities, ensuring an even application and preventing streaks.
Durability: Quality brushes offer better coverage and enhance the durability of the paint job, reducing the need for frequent touch-ups.
Precision: Fine bristles allow for precise painting, especially in detailed or intricate areas of the cabinets.
Smooth Finish: High-quality brushes ensure a smooth, professional-grade finish, enhancing the overall aesthetic of your kitchen cabinets.
Invest in Rollers
Investing in high-quality foam rollers specifically designed for cabinet surfaces is essential for achieving a smooth and professional finish. Foam roller advantages include their ability to apply paint evenly and efficiently, reducing the risk of streaks or brush marks. These rollers are particularly effective for cabinets due to their fine foam, which guarantees a consistent coat and a refined appearance.
When selecting a foam roller, roller size considerations are vital. Opt for smaller rollers, typically 4 to 6 inches in width, which are ideal for maneuvering around the intricate details and narrow surfaces of kitchen cabinets. Smaller rollers provide better control and precision, ensuring that every nook and cranny is covered seamlessly.
To avoid cross-contamination of colors, it is advisable to use separate rollers for applying primer and top coat. This practice not only preserves the integrity of the colors but also contributes to the overall durability and aesthetic of the painted cabinets.
Proper roller selection, coupled with the right technique, can greatly enhance the final outcome, making your cabinets look professionally finished. By investing in the correct tools, such as foam rollers, you guarantee a high-quality, long-lasting result that stands the test of time.
Essential Sanding Tools
For a flawless cabinet painting project, the selection and use of essential sanding tools are critical in guaranteeing a smooth and adherent surface. Proper sanding is essential for effective surface preparation, ultimately enhancing paint adhesion and ensuring a professional finish.
When starting on this task, the sandpaper selection is paramount. Begin with 120-grit sandpaper for initial sanding to effectively remove old finishes and imperfections. Follow this with finer 240-320 grit sandpaper for sanding between coats, which smooths the surface and prepares it for subsequent layers of paint.
To achieve best results, consider these recommendations:
- Orbital Sander: This tool accelerates and refines the sanding process, providing uniform results across large cabinet surfaces.
- High-Quality Sandpaper: Investing in premium-grade sandpaper ensures durability and consistent abrasion, which is vital for meticulous surface preparation.
- Sanding Laminate Surfaces: Prioritize sanding laminate cabinets to enhance paint adhesion, as these surfaces are particularly resistant to paint without proper abrasion.
Mastering the appropriate sanding technique is essential. Employ uniform strokes and apply gentle pressure to prevent gouging. Such meticulous attention to sanding will lay the groundwork for a pristine, durable finish on your kitchen cabinets.
Apply Multiple Coats
Applying two to three coats of paint to kitchen cabinets guarantees thorough coverage and a long-lasting, professional finish. This multi-layer approach enhances paint adhesion, securing a strong bond to the cabinet surface. The result is a finish that can withstand the rigors of daily kitchen use. Additionally, multiple coats amplify color richness, providing a deep, vibrant hue that single-coat applications fail to achieve.
Begin by making sure each coat is applied evenly across the entire surface. Use a high-quality brush or roller suitable for the type of paint you are using. After applying the first coat, allow it to dry completely—typically 24 hours, depending on the paint type and environmental conditions.
Once dry, lightly sand the surface with fine-grit sandpaper (220-grit is recommended). This step smooths out any imperfections and enhances paint adhesion for subsequent layers.
Apply the second coat in the same meticulous manner. For best opacity and color richness, a third coat may be necessary, especially for darker colors or if the original cabinet color is notably different. Always ensure complete drying and a light sanding between each coat to achieve a flawless, professional-grade finish.
Reassemble Carefully
After confirming that each coat of paint has dried and been sanded to perfection, it is time to reassemble your kitchen cabinets with careful attention to alignment and hardware security. The reassembly process is vital; it demands precision and patience to avoid common mistakes that could mar your hard work.
First, make sure the paint has fully cured to prevent any smudging or damage. Inspect all surfaces for missed spots or necessary touch-ups before reattaching components. Utilize the correct tools, such as a screwdriver, to securely fasten hardware, ensuring it is aligned properly. Misaligned doors or drawers can detract from the overall aesthetic and functionality of your cabinets.
Here are some advanced reassembly techniques to take into account:
- Alignment checks: Use a level to ensure that doors and drawers are perfectly aligned.
- Hardware security: Tighten screws carefully to avoid over-tightening, which can strip the wood.
- Final adjustments: Make necessary adjustments to hinges and handles to ensure smooth operation.
The importance of precision during reassembly cannot be overstated. Taking your time to make final adjustments and secure each component properly will ensure that your kitchen cabinets not only look impeccable but also function seamlessly.
Frequently Asked Questions
How Do You Get a Professional Finish on Painted Cabinets?
Achieving a professional finish on painted cabinets requires meticulous surface preparation, including sanding and priming, and careful paint selection. Utilize high-quality, adhesion-promoting primers and durable paints, applying thin, even coats with precision for best results.
How Do You Paint Kitchen Cabinets Like a Professional?
Achieve professional results by prioritizing surface preparation, including cleaning and sanding. Employ high-quality paint types and tools. Apply thin, even coats with adequate drying time, sanding between layers, and finishing with multiple topcoats for durability.
How Do You Paint Flawless Kitchen Cabinets?
To achieve flawless kitchen cabinets, meticulously remove cabinet hardware, conduct thorough surface preparation with 120-grit sandpaper, apply adhesion-promoting primer, use high-quality paint, sand between coats, and utilize premium brushes for a professional-grade finish.
What Do Professional Painters Use for Kitchen Cabinets?
Professional painters use spray booths for even application, high-quality paints like Benjamin Moore Advance, and adhesion-promoting primers. Proper primer selection and preparation are critical to achieving durable, flawless finishes on kitchen cabinets.
Conclusion
To summarize, achieving perfectly painted kitchen cabinets necessitates meticulous planning and execution. Key steps include:
- Planning the timeline
- Preparing the area
- Removing hardware
- Cleaning surfaces
- Thorough sanding
The use of quality paint and proper tools, along with the application of multiple coats, guarantees a professional finish. Careful reassembly completes the process. Adherence to these expert tips not only enhances the aesthetic appeal but also extends the durability of the kitchen cabinets.
Leave a Reply