
10 Steps to Soundproof Your Bedroom From Outside Noise
To soundproof your bedroom, first identify noise sources with a sound level meter. Seal windows using acoustical sealant and upgrade to double-glazed windows. Insulate walls with mass-loaded vinyl and soundproof drywall. Upgrade to solid-core doors and apply door sweeps. Block vents using acoustic sealant and insulate ducts. Soundproof the ceiling with high-density glass fiber pads. Treat floors with soundproof underlayment and carpets. Hang dense, sound-absorbing curtains. Add thick area rugs and strategically place heavy furniture against shared walls to absorb noise. By addressing these critical elements, you’ll learn more about optimizing your soundproofing setup.
Key Takeaways
- Install double-glazed windows and use acoustical sealant to fill gaps around window frames.
- Upgrade to a solid-core door with weather stripping and door sweeps for enhanced soundproofing.
- Use high-density soundproofing materials like mass-loaded vinyl or acoustic panels on walls and ceilings.
- Lay thick area rugs or carpets with soundproof underlayment to absorb floor noise.
- Position heavy furniture against walls with external noise sources to act as sound barriers.
Identify Noise Sources
Identifying noise sources requires a thorough analysis of common culprits such as traffic, neighbors, barking dogs, and construction work. To commence, you should utilize a sound level meter to quantify noise pollution within your bedroom. This device will give you precise decibel readings, enabling you to pinpoint the noisiest sources.
Categorize the noise by frequency and intensity. Low-frequency sounds, such as distant traffic, demand different soundproofing techniques compared to high-frequency sounds like a neighbor’s barking dog. Understanding these nuances is critical for implementing effective solutions.
Next, inspect structural vulnerabilities: scrutinize gaps in windows, doors, walls, and ceilings. These can serve as entry points for unwanted noise, undermining your quest for a peaceful environment. Remote work necessitates minimizing auditory distractions, making this step particularly essential.
Consider the directionality of the noise. If traffic noise primarily enters from a specific window, focus your efforts there first. Pinpointing the exact location and source of noise will guide you in applying targeted soundproofing techniques.
Seal Windows
To effectively mitigate external noise, start by using an acoustical sealant to meticulously seal any gaps around your bedroom windows. Acoustical sealant, unlike traditional caulk, remains flexible and adheres well to various surfaces, ensuring long-term efficacy in blocking sound transmission.
Next, apply acoustic tape around the window frames. This soundproofing technique involves placing the tape where the window sash meets the frame, creating an additional barrier against noise. Acoustic tape is particularly effective in enhancing window insulation because it fills in micro-gaps that even sealant might miss.
For further sound attenuation, consider the installation of double-glazed windows. Double-glazing incorporates two panes of glass separated by an air or inert gas layer, offering a substantial reduction in sound penetration. This advanced window insulation method provides superior performance compared to single-pane windows.
To sum up, here are three critical elements for effective window soundproofing:
- Acoustical Sealant: Fill gaps around windows to block sound leaks.
- Acoustic Tape: Apply around window frames for additional sealing.
- Double-Glazed Windows: Install for enhanced sound reduction.
For additional soundproofing benefits, hang thick, soundproof curtains or use clear window inserts. These supplementary measures absorb frequencies and provide extra layers of noise reduction, ensuring a quieter bedroom environment.
Insulate Walls
After sealing your windows, focus on insulating your walls with high-density soundproofing materials like mass-loaded vinyl or specialized soundproofing drywall to effectively reduce noise transmission.
Mass-loaded vinyl (MLV) is a dense, flexible material that acts as a sound barrier, greatly attenuating sound waves. Soundproofing drywall, constructed with viscoelastic polymers, provides additional layers of noise reduction by dampening vibrations.
To enhance your soundproofing efforts, consider adding acoustic foam or panels. These materials absorb sound waves, reducing reverberation and echo within the room.
For best results, install double layers of drywall or soundproofing drywall. This method increases the wall’s mass, creating an even more formidable barrier against external noise.
When installing these soundproofing materials, follow best practices for maximum effectiveness. Secure MLV to the wall studs using nails or screws, ensuring a tight fit to eliminate gaps. Apply acoustic caulk around the edges to seal any potential sound leaks. For soundproofing drywall, stagger the seams of the double layers to prevent sound from passing through weak points.
The benefits of insulating your walls extend beyond noise reduction. These soundproofing materials also improve thermal insulation, contributing to a more energy-efficient and comfortable living environment.
Upgrade Doors
Upgrading your bedroom door to a solid-core variant greatly enhances its soundproofing efficacy.
Implement door sweeps and automatic door bottoms to achieve maximum noise isolation by sealing gaps.
Integrate weather stripping to mitigate perimetric sound leakage, ensuring a thorough acoustic barrier.
Opt for Solid Core
Solid core doors, with their increased mass and density, greatly enhance the soundproofing capabilities of your bedroom by minimizing noise penetration. These doors are engineered with solid material throughout, unlike their hollow-core counterparts, which consist of a lightweight frame filled with empty space or a honeycomb structure.
The solid construction effectively blocks sound waves, reducing noise transmission by up to 50%.
When considering the soundproofing benefits, solid core doors are superior due to their dense materials and robust construction. Here’s a material comparison to underscore the advantages:
- Density: Solid core doors are notably denser than hollow-core doors, providing a formidable barrier to airborne noise.
- Thickness: The substantial thickness of solid core doors further impedes sound transmission, enhancing their soundproofing effectiveness.
- Construction: Solid core doors are uniformly solid, minimizing gaps through which sound can travel, unlike the hollow-core doors that have internal voids.
Install Weather Stripping
Enhancing the soundproofing efficiency of your bedroom door doesn’t stop at opting for solid core; installing weather stripping is essential for sealing gaps and preventing acoustic leakage. Weather stripping entails the application of materials designed to close the gaps around your door frame, thereby ensuring maximum noise reduction.
Using advanced insulation techniques, weather stripping mitigates the infiltration of unwanted sound waves. This process involves selecting the appropriate material, such as rubber, foam, or vinyl, and applying it meticulously around the perimeter of the door. Here’s a breakdown:
| Material Type | Durability | Noise Reduction Efficiency |
|---|---|---|
| Rubber | High | Excellent |
| Foam | Medium | Good |
| Vinyl | High | Very Good |
By employing these materials, you seal the micro-gaps and cracks that often serve as conduits for external noise. This not only enhances the overall soundproofing but also contributes to energy efficiency by improving thermal insulation.
Weather stripping serves as a dual-purpose solution, addressing both noise and thermal efficiency issues. It’s a straightforward, cost-effective technique that significantly enhances your bedroom’s soundproofing capabilities. Be precise in measurement and application to guarantee maximum efficacy in noise reduction.
Add Door Sweeps
Adding door sweeps to your bedroom door is a highly effective strategy for mitigating sound transmission and enhancing acoustic insulation. Door sweeps, typically constructed from materials such as rubber, aluminum, or silicone, create a tight seal between the door and the floor, greatly reducing noise ingress. This simple yet efficient soundproofing solution leverages door sweep benefits to offer an affordable upgrade for your bedroom’s acoustic performance.
When considering installation, adhere to these essential installation tips to guarantee maximum efficacy:
- Material Selection: Choose a material compatible with your door type. Rubber and silicone sweeps offer superior flexibility, while aluminum provides durable, long-lasting performance.
- Proper Measurement: Accurately measure the door width and the gap between the door and floor to ensure the door sweep fits perfectly, thereby optimizing the seal’s effectiveness.
- Secure Attachment: Use adhesive or screws to attach the door sweep securely. Adhesive-backed sweeps offer a quick, tool-free installation, while screws provide a more robust, permanent solution.
Block Vents and Ducts
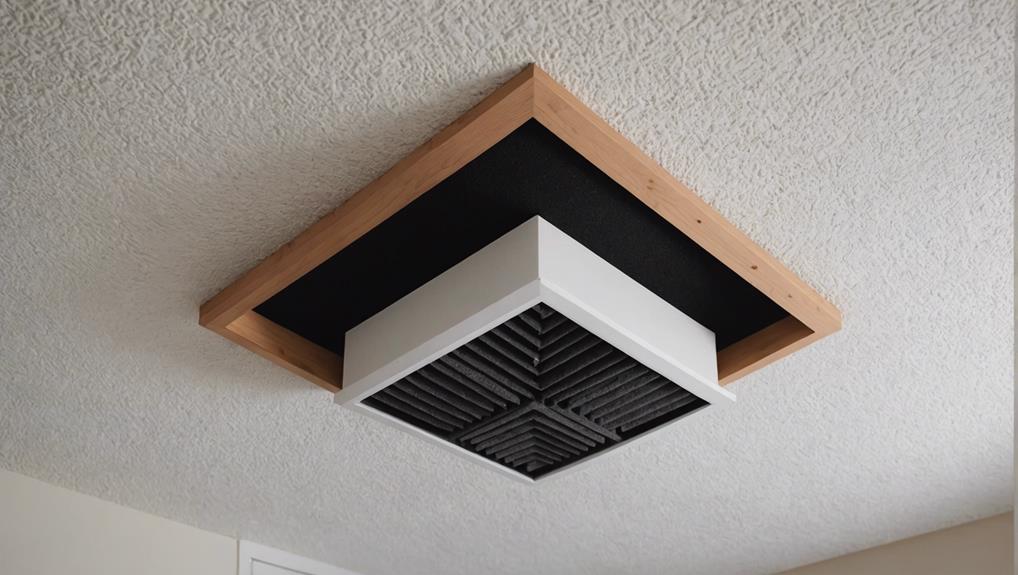
To effectively block noise transmission through vents and ducts, you’ll need to seal any gaps using acoustic sealant, ensuring an ideal barrier.
Insulate the ducts with high-density soundproofing materials, such as mass-loaded vinyl, to attenuate external noise.
Additionally, verify that vents remain unobstructed to maintain peak airflow while minimizing noise intrusion.
Seal Vent Gaps
Sealing gaps and cracks around vents and ducts with acoustic sealant is essential to preventing noise leakage into your bedroom. To achieve the best noise reduction, meticulous attention to detail is necessary. Ventilation maintenance ensures that any potential noise pathways are effectively blocked. By applying acoustic sealant to vent gaps, you create an impermeable barrier that hinders sound transmission.
Properly sealing these gaps involves several critical steps:
- Inspection: Conduct a thorough examination of all vents and ducts. Look for any visible gaps, cracks, or openings that could serve as conduits for noise infiltration.
- Application: Use a high-quality acoustic sealant specifically designed for soundproofing purposes. Apply the sealant generously around the perimeter of vent openings and any discovered gaps to ensure a tight seal.
- Verification: After the sealant has cured, inspect the sealed areas to confirm that no gaps remain. This step is essential for ensuring the effectiveness of the noise reduction measures.
Insulate Ducts Properly
Once you’ve sealed the vent gaps, insulating the ducts with appropriate sound barriers or insulation materials becomes imperative to further mitigate noise transmission. Proper insulation can greatly reduce the infiltration of external noise into your bedroom. You can utilize a variety of materials, each offering distinct insulation benefits.
| Material | Insulation Benefits | DIY Duct Sealing |
|---|---|---|
| Mass Loaded Vinyl | High density, effective soundproofing | Moderate difficulty |
| Acoustic Foam | Absorbs sound waves, easy to install | Easy |
| Fiberglass Insulation | Thermal and acoustic insulation | Requires precision |
| Rubber Insulation | Excellent for low-frequency sounds | Moderate difficulty |
| Duct Liners | Pre-fabricated, versatile | Easy to moderate |
Using these materials, you can undertake DIY duct sealing to enhance your bedroom’s soundproofing. Mass Loaded Vinyl offers superior density for blocking noise, while acoustic foam is straightforward for non-professionals. However, for a more precise installation, consider professional services. Experts can ensure meticulous application, particularly with complex materials like fiberglass insulation or rubber insulation, which are excellent for mitigating low-frequency disturbances.
Incorporating these soundproofing measures will make sure that your bedroom remains a sanctuary from external noise, providing an environment conducive to rest and relaxation.
Soundproof the Ceiling
For effective soundproofing of your ceiling, consider installing high-density glass fiber pads wrapped in decorative acoustic fabric to absorb reflected noise and reduce echo. This technique is particularly beneficial in minimizing reverberation and enhancing overall sound quality.
To further bolster your ceiling’s soundproofing capabilities, you can implement a combination of acoustic panels and soundproof tiles. These materials are engineered to provide exceptional noise reduction and can be seamlessly integrated into your existing ceiling structure.
To achieve best results, follow these steps:
- Install Acoustic Panels: Mount acoustic panels directly onto your ceiling. Choose panels with high noise reduction coefficients (NRC) to maximize sound absorption.
- Use Soundproof Tiles: Place soundproof tiles between the ceiling joists. These tiles are designed to block airborne sound transmission and improve the room’s acoustic environment.
- Hang Acoustic Baffles: Suspend acoustic baffles from the ceiling to further minimize noise reflection and reduce ambient echo. These baffles are particularly effective in large spaces where sound waves can travel unchecked.
Treat the Floor
To effectively mitigate impact noise and airborne sound transmission, installing a high-density soundproof underlayment beneath your flooring is essential. This underlayment acts as a barrier to dampen the vibrations caused by footsteps and movement, greatly reducing noise transmission. Choose a dense material like mass-loaded vinyl (MLV) or rubber to maximize sound attenuation.
In addition to underlayment, consider adding carpet padding, which further enhances sound absorption. High-density foam or fiber padding underneath your carpet can dramatically decrease impact noise.
Floor treatments such as area rugs or fully carpeted floors not only provide comfort but also absorb sound waves, minimizing echo and reverberation within the room.
Soundproofing mats, such as acoustic foam tiles or interlocking floor mats, offer an additional layer of noise reduction. These mats are particularly effective in isolating sound and preventing it from traveling through the floor structure.
For best results, you might explore floating floors, which incorporate a gap between the subfloor and the finished floor, creating an air pocket that dampens sound transmission.
Use Heavy Curtains
After addressing the floor, mitigate exterior noise infiltration by installing heavy curtains composed of dense, sound-absorbing materials like velvet or wool. These materials excel in noise reduction by absorbing sound waves, thereby minimizing the transmission of external disturbances into your bedroom. To maximize effectiveness, it’s important to cover the entire window area with floor-to-ceiling curtains, eliminating gaps where sound can penetrate.
To optimize sound absorption, consider implementing the following:
- Layering Curtains: Install an extra layer of blackout curtains behind your heavy, sound-absorbing curtains. This dual-layer approach greatly enhances noise reduction by adding density and trapping more sound waves.
- Ensuring Tight Fit: Make sure that your curtains fit snugly against the wall and floor. This reduces gaps where sound can enter, providing a more thorough barrier against exterior noise.
- Using High-Density Fabrics: Select curtains made from high-density fabrics like velvet or wool. These materials have excellent sound absorption properties, which are essential for effective noise reduction.
Add Rugs and Carpets

Incorporating thick area rugs or carpets in your bedroom can greatly enhance sound absorption and dampen external noises. Opt for high-density pile carpets, as their intricate fiber composition offers superior acoustic insulation. Rug materials such as wool or nylon are particularly effective due to their dense and resilient fibers, which trap sound waves and mitigate reverberation.
You’ll want to select a rug with an integrated soundproof underlayment; this additional layer not only boosts the overall sound absorption coefficient (SAC) but also reduces impact noise from foot traffic or other disturbances.
Size considerations are critical when aiming for maximum soundproofing. Choose large area rugs that cover a substantial portion of your bedroom floor. A broader coverage area ensures a greater reduction in sound transmission, both from external sources and from within lower floors. The rug should extend beyond the perimeter of your bed and other major furniture pieces to maximize acoustic benefits.
Additionally, ensure that the edges of your rug are secured to prevent any movement, which can compromise the rug’s sound-absorbing efficacy. By incorporating these technical details, you’ll create a notably quieter and more serene bedroom environment.
Rearrange Furniture
To optimize your room layout for noise reduction, consider the following strategies:
Position heavy furniture like bookshelves or dressers against walls that face noise sources. This effectively creates sound barriers.
Strategically place upholstered furniture such as sofas or armchairs to act as acoustic baffles, minimizing noise transmission.
Additionally, consider incorporating sound-absorbing elements like thick headboards or floor rugs to further obstruct and dampen sound wave pathways.
Block Noise Pathways
Strategically positioning heavy furniture like bookshelves and cabinets against walls where noise infiltrates can effectively disrupt sound transmission pathways and create a more soundproof environment. This furniture placement acts as noise barriers, absorbing and deflecting sound vibrations before they penetrate further into your bedroom.
To enhance your soundproofing efforts, consider these steps:
- Identify Noise Source Walls: Determine which walls are most susceptible to external noise. These are likely the walls facing the street or adjacent noisy rooms.
- Deploy Heavy Furniture: Position substantial items such as bookshelves, wardrobes, and cabinets directly against these identified walls. Their mass will absorb sound waves and reduce vibration transmission.
- Layering Strategy: Arrange multiple pieces of furniture to create a buffer zone. For instance, place a bookshelf against the wall and a sofa in front of it. This double-layered approach increases the effectiveness of your noise barriers.
Utilize Heavy Furniture
Rearranging heavy furniture like bookcases and armoires against walls shared with high-noise areas greatly reduces sound transmission, leveraging the mass and density of these items to absorb and block sound waves effectively. By strategically optimizing furniture placement, you can enhance room acoustics and improve sound absorption.
Positioning hefty pieces such as dressers or sofas along walls adjacent to noisy exteriors acts as a substantial barrier, mitigating airborne noise. Incorporate bookcases filled with dense materials like books, as their combined mass exponentially increases sound dampening. The principle behind this method lies in mass-loaded barriers; the larger the mass, the more effective the soundproofing.
When considering interior design, balancing functionality with acoustic efficiency is critical. Make sure that these heavy items are flush against the walls to create a continuous barrier, leaving no gaps for sound waves to penetrate.
Additionally, integrating heavy curtains and rugs can further enhance this soundproofing strategy by complementing the furniture’s mass. Essentially, this simple yet effective furniture placement approach not only augments the room’s acoustics but also serves as a cost-effective solution, seamlessly integrating into your bedroom’s existing interior design.
Optimize Room Layout
By optimizing your room layout, you can greatly enhance soundproofing by repositioning furniture to act as effective noise barriers. Heavy furniture items, such as wardrobes, bookshelves, and large dressers, can be strategically placed against walls that are most exposed to external noise. This approach leverages sound absorption principles to mitigate noise transmission.
To effectively rearrange your furniture layout for maximum soundproofing, consider the following steps:
- Position heavy furniture against noisy walls: Placing items like wardrobes or bookshelves against walls facing the street creates a buffer zone that dampens incoming noise.
- Create layered barriers: Arrange multiple pieces of furniture in a staggered layout to form multiple layers of sound absorption. For example, place a bookshelf in front of a dresser along the same wall.
- Utilize soft furnishings: Integrating items such as upholstered chairs or fabric-covered headboards in your layout enhances sound absorption, reducing noise reflection within the room.
Frequently Asked Questions
How to Soundproof a Bedroom From Outside Noise?
To soundproof your bedroom, install advanced window treatments and high-quality door seals. Opt for double-pane windows and weatherproof seals. Enhance wall mass with acoustic panels. Implement white noise machines for additional ambient sound masking.
How Do You Soundproof a Bedroom From Traffic Noise?
To soundproof your bedroom from traffic noise, install acoustic panels on walls facing the street. Integrate soundproof curtains for additional noise absorption. Make sure all gaps are sealed with acoustical caulk to maximize sound attenuation efficiency.
How Do You Noise Cancel Outside Noise?
To noise cancel outside noise, integrate acoustic panels onto your walls for sound absorption. Additionally, employ a white noise machine to generate consistent ambient sound, effectively masking external disturbances and enhancing the acoustic environment.
Is It Possible to 100% Soundproof a Room?
You can’t achieve absolute silence due to soundproofing myths. Even with advanced materials and techniques, total sound isolation is unattainable. Understanding the limitations helps in managing expectations for effective noise reduction.
Conclusion
By meticulously identifying noise sources and employing robust soundproofing techniques like sealing windows, insulating walls, and upgrading doors, you’ll effectively mitigate external disturbances.
Ensuring vents and ducts are blocked, treating floors, and using heavy curtains will further enhance acoustic isolation.
Adding rugs and carpets, along with strategic furniture placement, will absorb residual noise.
Implementing these precise, detail-oriented steps will transform your bedroom into a serene, noise-free sanctuary ideal for rest and relaxation.


Leave a Reply