10 Steps to Set Up Your Bedroom Projector
To set up your bedroom projector effectively, start by choosing a projector with appropriate brightness, resolution, and connectivity features. Carefully plan its placement, considering throw distance and height alignment. Opt for a dedicated screen, evaluating the type and material, then properly install it, maintaining eye-level comfort. Connect an audio system such as a soundbar using HDMI ARC for superior sound quality. Adjust image settings for ideal visuals and keep your cables well-managed for a clutter-free look. Control room lighting with blackout curtains to enhance picture clarity, and perform regular maintenance for lasting performance. Exploring these elements further promises a truly immersive home cinema experience.
Key Points
- Select a projector with at least 1080p resolution and suitable brightness for your bedroom's lighting conditions.
- Position the projector at the correct throw distance and height to ensure a clear, distortion-free image.
- Use a retractable or freestanding screen if permanent installation isn't feasible in your bedroom.
- Connect a soundbar or speakers via HDMI ARC for enhanced audio quality and an immersive experience.
- Manage cables using sleeves or clips to maintain a tidy setup and prevent tangling.
Choose the Right Projector
When setting up your bedroom projector, the first critical step is to choose the right device that aligns with your viewing needs and environment. A key consideration is the brightness level of the projector. For rooms with ambient light, selecting a projector with higher lumens is vital to maintain clear visibility. This guarantees that your viewing experience is not compromised by external lighting conditions.
Resolution is another significant factor; a minimum of 1080p is recommended for crisp images, whilst a 4K projector offers the sharpest visuals for those seeking a premium experience. It's crucial to match the resolution with your content and viewing preferences to maximise image quality.
The throw distance of the projector must be evaluated according to the space available, as it dictates how far the projector should be from the screen to achieve your desired image size. Referring to the manufacturer's specifications will guide you in this decision.
Additionally, projectors with low noise levels, ideally around 20 dB, are preferred to minimise distractions.
Finally, verify the device has diverse connectivity options, such as HDMI and VGA ports, which allow seamless integration with various media sources.
Determine Screen Type
Selecting the appropriate screen type is a vital decision in maximising your bedroom projector setup. The choice between dedicated screens and walls notably impacts image quality, as projector screens are specifically designed to reflect light more effectively, enhancing the viewing experience. The variety of screen types—fixed frame, retractable, and tensioned—offers different levels of installation flexibility and aesthetic appeal. Fixed frame screens provide a sleek, permanent solution, while retractable and tensioned screens cater to those needing space-saving or temporary setups.
| Screen Type | Installation Flexibility | Viewing Experience |
|---|---|---|
| Fixed Frame | Permanent, requires wall mount | Enhanced image stability |
| Retractable | Space-saving, ceiling mountable | Convenient, versatile |
| Tensioned | Portable, freestanding option | Reduces screen wrinkles |
Size considerations are essential for bedroom environments, with ideal projector screen dimensions ranging from 80 to 120 inches, tailored to room size and viewing distance. Material matters greatly impact brightness and contrast; options like matte white are suitable for controlled lighting, whilst high-gain materials enhance visibility in ambient light. For renters or those seeking minimal installation, freestanding or retractable screens provide excellent flexibility. Carefully considering these factors guarantees a superior and personalised viewing setup in your bedroom.
Plan Projector Positioning
Considering the intricacies of projector placement is essential to achieving an ideal viewing experience in your bedroom setup. Proper projector placement begins with determining the ideal throw distance, which is vital in achieving precise image size and clarity. By consulting the manufacturer's specifications, you can gauge the necessary throw distance to fit your specific room dimensions and confirm your projector setup caters to space constraints.
Short-throw projectors offer a practical solution for smaller spaces, as they require minimal throw distance to produce large images.
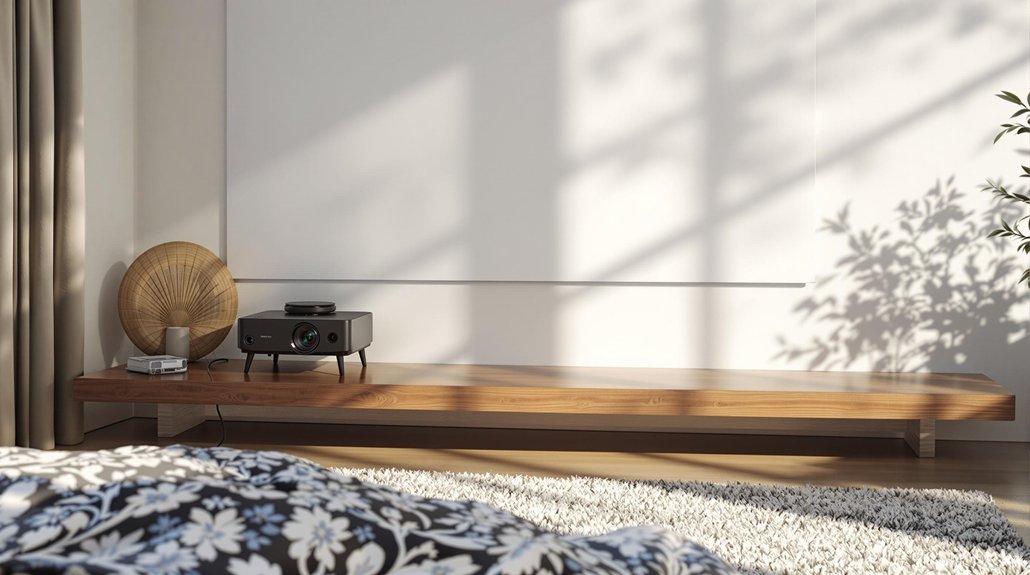
Height is another fundamental aspect of projector placement. Aligning the projector with the centre of the projector screen prevents trapezoidal distortion, maintaining image quality. Most projectors project images above the lens centre, so an appropriate height must be maintained. Securing the projector on a ceiling or shelf guarantees stability and allows easy access for adjustments and maintenance.
The choice of a projector screen over a wall greatly enhances image quality, as screens are engineered to reflect light more effectively. Conducting trial runs before finalising the projector setup is advisable.
This process allows for adjustments in image alignment, size, and quality, assuring a prime viewing experience tailored to your bedroom environment.
Set Up the Screen
When setting up your bedroom projector, selecting the appropriate screen is essential for achieving the best image quality.
Prioritise a dedicated projector screen, as its material is specifically designed to reflect light more effectively than a simple wall, and choose a size that fits your space comfortably, typically between 100 to 120 inches.
Consider the benefits of tensioned or fixed-frame screens for a smooth viewing surface, and ensure proper installation using secure mounting options to enhance your overall viewing experience.
Screen Placement Options
Positioning the screen for your bedroom projector is essential to achieving an ideal viewing experience. The interplay between screen size, projector and screen alignment, ambient light, and viewing comfort requires careful consideration.
To start, the screen should be mounted at eye level when seated—approximately 36 to 42 inches from the floor. This positioning enhances viewing comfort and reduces neck strain. Utilising a retractable screen, such as an 80-inch model, can deliver a cinematic experience whilst preserving space efficiency.
Consider the following screen placement options:
- Screen Size and Viewing Distance: Use the projector manufacturer's throw distance calculator to verify the screen size aligns with the projector's capabilities, achieving the desired image quality.
- Ambient Light Control: Avoid direct sunlight or glare on the screen by considering room layout and seating arrangements, which could otherwise impair picture quality.
- High-Quality Materials: Choose screens made from high-quality materials to optimise brightness and colour accuracy.
- Secure Mounting: Confirm the screen is securely mounted to prevent movement that could disrupt image clarity.
- Flexibility in Small Spaces: Retractable screens are advantageous in smaller rooms, providing versatility without sacrificing aesthetics.
Material and Size Choice
Achieving the perfect setup for your bedroom projector requires careful attention to both material and size choice of the screen. Opting for a dedicated projector screen, rather than a regular wall, considerably enhances image quality due to its superior light reflection capabilities. Selecting the appropriate screen size is equally essential; a range between 100 to 120 inches is generally ideal for most bedroom settings, balancing viewing comfort and immersive experience.
The choice of screen material also plays an important role. Matte white screens are a versatile option, providing enhanced brightness and contrast across various lighting conditions, while grey screens are better suited for rooms with more ambient light, improving black levels. The projection surface should be tensioned or fixed frame for a smooth, wrinkle-free display.
| Screen Type | Screen Material | Installation Options |
|---|---|---|
| Matte White | Enhanced Brightness | Roll-Down, Wall-Mounted |
| Grey | Improved Contrast | Freestanding |
| Tensioned/Fixed | Smooth Surface | Easy Setup |
Lastly, consider installation options that align with your spatial and functional needs. Whether you choose a roll-down, wall-mounted, or freestanding projector screen, confirm it complements the room's aesthetics and facilitates ease of setup and storage.
Mounting and Installation Tips
Mounting and installation of your bedroom projector screen require a strategic approach to guarantee the best viewing experience and longevity.
Begin by evaluating your room dimensions to select a screen size, typically ranging between 100 to 120 inches, that complements the projector's throw distance specifications. Opt for a high-quality screen composed of materials that enhance brightness and contrast, as dedicated screens surpass walls in image quality.
When setting up a projector, consider utilising a fixed frame or tensioned screen for a seamless projection surface. Verify it is mounted securely at eye level for maximum viewing comfort.
Choose between a ceiling mount or a sturdy shelf to install the projector, ensuring stability and minimising noise disruptions. Proper alignment with the screen is vital, and projectors have preset options to assist with this process.
Before finalising the installation, conduct trial runs to fine-tune image alignment and quality. Address any keystone distortion using the projector's lens shift or keystone correction settings.
Important tips include:
- Measure room dimensions for the best screen sizing.
- Select a high-quality screen for superior image quality.
- Use a fixed frame or tensioned screen to avoid surface irregularities.
- Mount the projector on the ceiling for a stable setup.
- Perform trial runs to adjust image alignment.
Connect Audio Equipment
When connecting audio equipment to your bedroom projector, selecting the right audio system is vital for achieving a cinematic experience.
Consider options such as soundbars or home theatre systems that connect via HDMI ARC or optical cables, ensuring superior sound quality over built-in speakers.
Additionally, optimising speaker placement is essential for balanced audio delivery, enhancing immersion and ensuring sound reaches every corner of your room effectively.
Select Audio System
Choosing the right audio system is an essential step in setting up your bedroom projector to guarantee a superior audiovisual experience. A high-quality audio system transforms ordinary viewing into an immersive sound experience, enhancing the impact of films, games, and music.
When selecting speakers, it's important to evaluate options that support HDMI cables and optical connections, as these offer superior audio transmission compared to internal projector speakers.
To achieve ideal audio performance, assess these critical factors:
- Soundbar or Home Theatre System: Both options greatly enhance sound quality. Soundbars are compact, while home theatre systems offer extensive surround sound.
- HDMI ARC or Optical Cables: Utilise these connections to secure high-fidelity audio output and minimal signal loss.
- Bluetooth Connectivity: For projectors with Bluetooth capability, connecting wireless speakers can eliminate cable clutter and allow flexible speaker placement.
- Audio Synchronisation: Regularly adjust audio settings to synchronise with video output, guaranteeing a seamless viewing experience.
- Cable Length and Quality: Invest in long, high-quality cables if needed, to maintain signal integrity and secure connections.
Optimise Speaker Placement
Optimising speaker placement is an important step in maximising the audio quality of your bedroom projector setup. To achieve a truly immersive experience, strategically position your speakers at ear level, angled between 30-45 degrees from your main seating area. This arrangement not only creates an enveloping soundstage but also complements the visual output of your projector, enhancing the overall viewing experience.
For ideal audio performance, consider a 5.1 or 7.1 surround sound system. Each speaker in this configuration should be meticulously connected to the audio source using high-quality cables to minimise signal loss.
Experimentation with speaker placement—such as adjusting the positions of front left, front right, centre, and rear speakers—is vital to discovering a balanced sound distribution that suits your room's acoustics.
In tight spaces, utilising wireless speakers or soundbars with Bluetooth capabilities can greatly reduce cable clutter, streamlining the setup process.
Regular calibration of your surround sound system using built-in equalisers or specialised calibration tools guarantees that audio settings are finely tuned and balanced.
Optimise Image Quality
Enhancing the visual experience of your bedroom projector hinges on several critical factors, starting with the choice of a dedicated projector screen. Unlike ordinary walls, dedicated screens are engineered to reflect light more effectively, which improves image quality by enhancing both brightness and colour accuracy.
The synergy between the projector and the screen is pivotal; therefore, it's crucial to adjust the focus meticulously to guarantee sharpness and clarity.
To achieve the best viewing, consider the following:
- Adjust the brightness and contrast: Tailor these settings to the ambient light conditions to maintain vivid colours and deep blacks.
- Position the projector correctly: Adhere to the specified throw distance to guarantee proper image size and sharpness.
- Utilise zoom and focus adjustments: Align the image perfectly with the screen to prevent distortion, and avoid reliance on keystone correction.
- Regular maintenance: Clean the projector lens regularly and update firmware to sustain peak performance.
- Consider screen material: Different materials can affect the reflectivity and colour fidelity, impacting overall image quality.
Adjust Picture Settings
Adjusting picture settings is a crucial step in optimising the performance of your bedroom projector, guaranteeing a superior viewing experience tailored to your environment.
Begin by accessing the projector's settings menu to fine-tune brightness, contrast, and colour. These adjustments are essential for adapting to the ambient light conditions in your bedroom, directly impacting picture quality. An increase in brightness may be necessary for well-lit rooms, while a reduced setting can enhance contrast in darker environments.
Similarly, optimising image contrast will improve the depth and clarity of the visuals, while careful calibration of colour settings guarantees accurate and vibrant hues.
Utilise the preset picture modes that many projectors offer, such as "Movie" or "Cinema" for dark rooms and "Vivid" or "Dynamic" for brighter settings. These presets are designed to enhance viewing experiences based on content type.
Experimenting with sharpness settings can also enhance image detail, guaranteeing that text and visuals remain crisp without creating unwanted artefacts.
For those seeking the highest level of picture quality, consider professional calibration. This service can provide precise colour accuracy and image quality specifically suited to your viewing environment.
Regularly updating projector firmware can further enhance performance by incorporating new features and improvements.
Manage Cable Organisation
In the pursuit of an organised and aesthetically pleasing bedroom setup, managing cable organisation for your projector system is paramount. Effective cable management solutions not only enhance the visual appeal of your space but also improve safety and functionality.
Utilising cable sleeves or cable management boxes can help conceal and organise multiple cables, ensuring a tidy appearance. Adhesive cable clips can be used to secure cables to walls or furniture, preventing tangling and minimising tripping hazards, particularly in high-traffic areas.
To optimise your setup:
- Cable Sleeves/Boxes: Use these to bundle and hide cables for a cleaner look.
- Adhesive Cable Clips: Securely fasten cables to surfaces, reducing clutter and hazards.
- Long HDMI Cables: Opt for cables rated for wall use to maintain signal integrity and allow neat routing.
- Cable Labelling: Mark each cable at both ends to facilitate easy troubleshooting and adjustments.
- Wireless Alternatives: Consider Bluetooth or Wi-Fi options to greatly reduce cable clutter.
Choosing longer HDMI cables rated for wall use is advisable to prevent signal loss while allowing for tidy routing from the projector to media sources.
Additionally, wireless alternatives such as Bluetooth or Wi-Fi can further minimise cable clutter, offering seamless streaming capabilities. Effective cable organisation enhances both the functionality and aesthetics of your bedroom projector setup.
Control Room Lighting
Having meticulously organised your cables, the next step in perfecting your bedroom projector setup is to effectively manage room lighting. Achieving ideal viewing conditions requires a strategic approach to control room lighting, an essential factor in enhancing image quality.
Begin by installing blackout curtains to eliminate ambient light, especially beneficial for daytime viewings. These curtains greatly improve picture clarity by preventing external light sources from interfering with the projected image.
In addition, incorporate dimmable LED lighting to tailor the brightness levels to the content being viewed. This flexible lighting solution guarantees a comfortable viewing experience by adjusting to various lighting needs, whether watching an action-packed thriller or a serene documentary.
Positioning lights away from the screen is vital for glare reduction, as misplaced lighting can detract from image sharpness and viewer immersion.
Smart lighting offers a modern solution, allowing you to effortlessly modify the room's ambience via remote or smartphone. This convenience enhances the cinematic experience by providing precise control over lighting conditions.
Soft under-bed illumination can add a sophisticated touch to your bedroom, creating an inviting atmosphere for both viewing and relaxation.
Finally, confirm any accent lighting complements the room's aesthetic while maintaining a mainly dark environment, essential for ideal projection visibility. These strategies collectively create a superior viewing atmosphere in your bedroom.
Conduct Routine Maintenance
Guaranteeing ideal performance and longevity of your bedroom projector hinges on diligent maintenance practices. Regular maintenance is not only about preserving the device but also about enhancing your viewing experience.
To clean the projector lens, use a microfibre cloth to remove dust and prevent deterioration of the image clarity. Dust accumulation can severely impact the best possible image quality, which is why this step is critical.
Maintaining the air filters is another crucial task. Check and clean them every few months to confirm proper ventilation, which prevents overheating and guarantees the projector runs smoothly.
Furthermore, keeping the projector's firmware up to date is essential; updates often include performance improvements and new features. These updates are typically available on the manufacturer's website.
In addition to technical maintenance, consider the physical positioning of your setup. Periodically re-evaluate the screen and projector alignment to maintain the best possible image quality, as slight shifts may occur over time.
Finally, store the projector in a cool, dry place when not in use to protect it from humidity and extreme temperatures, which can cause damage.
- Clean the projector lens regularly
- Check and clean air filters
- Update firmware as needed
- Re-evaluate projector alignment
- Store the projector properly
Frequently Asked Questions
How to Set up a Bedroom Projector?
To set up a bedroom projector, focus on projector placement for ideal viewing, select appropriate screen types, ensure effective light control with blackout curtains, enhance audio with sound options, and maintain tidy cable management for a seamless setup.
How to Set up a Projector Step by Step?
To set up a projector step by step, first select appropriate projector types and image resolution. Determine ideal screen size and viewing distance. Control ambient light for enhanced clarity. These factors guarantee a superior visual experience and performance.
How to Mount a Projector in a Bedroom?
To mount a projector in a bedroom, evaluate projector placement by considering screen size, projection distance, and room lighting. Utilise a ceiling mount for stability and adjust for ideal alignment, ensuring a clear image with minimal distortion.
Are Projectors Good for a Bedroom?
Projectors are excellent for bedrooms, offering a home theatre experience with diverse screen options and projector types. They effectively handle ambient lighting and room acoustics, providing a versatile solution for immersive viewing in a private setting.
Conclusion
In summary, establishing a bedroom projector system involves several critical steps that guarantee ideal functionality and viewing experience. Selecting an appropriate projector and screen type lays the foundation for a successful setup. Strategic planning of projector placement, coupled with proper screen installation, enhances image quality. Integrating audio equipment and adjusting picture settings further refine the experience. Effective cable management and controlled lighting conditions contribute to a clutter-free environment. Finally, routine maintenance guarantees the longevity and performance consistency of the equipment.


Leave a Reply