3 Easy Steps to Hang LED Lights in Your Bedroom
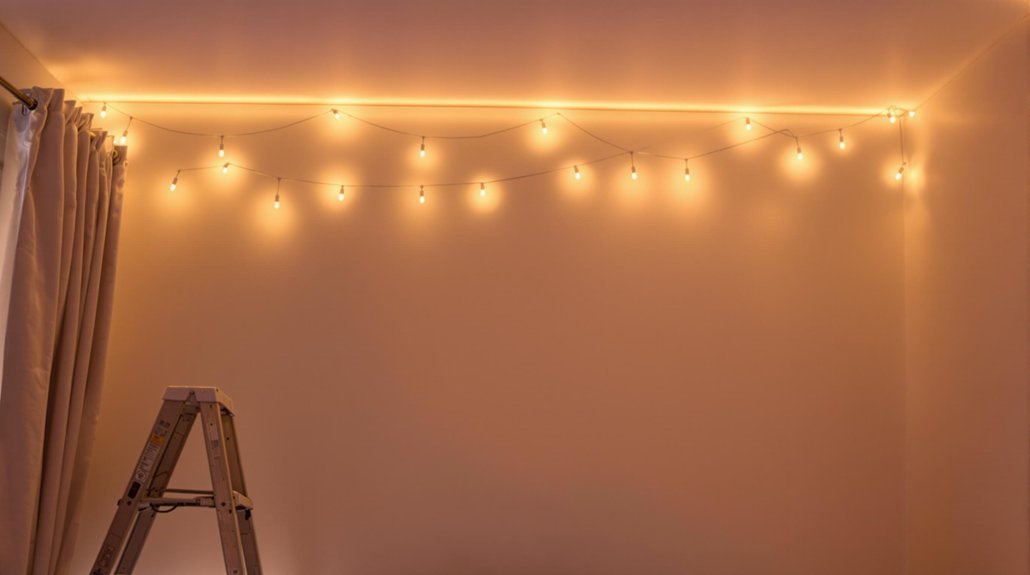
To elegantly enhance your bedroom's ambience with LED lights, start by planning your layout. Measure the area to determine the precise length of LED strips needed and creatively design your lighting pattern, ensuring ease of access to power sources. Next, prepare the installation surface by cleaning it thoroughly for ideal adhesive performance, ensuring it's smooth and dry. Finally, install and connect your LED lights by aligning the strips carefully and securing them with firm pressure, using connectors for seamless power and control integration. As you advance, you'll discover additional insights on perfecting your bedroom's luminous atmosphere.
Key Points
- Measure the perimeter of the bedroom to determine the precise length of the LED strip needed.
- Ensure the installation surface is clean and dry for optimal adhesive performance.
- Peel off the adhesive backing and firmly press the LED strip onto the surface.
- Use quick connectors to attach the LED strips to the power supply.
- Test the setup by cycling through the lighting options to ensure functionality.
Plan Your LED Layout
The art of illumination begins with meticulous planning of your LED layout, an essential step that marries functionality with aesthetic appeal.
Begin by measuring the perimeter or specific areas in your bedroom where LED strips will accentuate the ambience. This guarantees you purchase the correct length of strip lighting, avoiding gaps or overlaps.
Craft a detailed plan by sketching a layout that includes strategic placement of power sources, ensuring seamless integration with your room's design. Your plan should incorporate creative light patterns, opting for straight lines to emphasise walls or inventive shapes that introduce a unique aesthetic flair.
Consider positioning LED strips in discreet areas, such as under the bed frame, along shelves, or behind furniture, to enhance ambient lighting without being visually intrusive. Proper warmth and glow enhance visual appeal from all angles, transforming everyday objects into stylish focal points.
Pay close attention to corners and gaps; planning for these will require corner connectors or jumper wires to maintain a consistent flow of light.
The adhesive backing on the LED strips demands a clean surface for a secure installation, which will be pivotal for both functionality and longevity.
Through careful planning, achieve a luminous bedroom that complements your personal style and modern lighting trends.
Prepare the Installation Surface
Preparing the installation surface is a crucial step that underpins the success of your LED lighting project. The surface must be clean and dry to guarantee ideal adhesion of the LED strip lights. Begin by wiping it with a damp cloth, then allow it to fully dry. This simple act enhances the adhesive's performance, ensuring the LED lights stay in place. Remove grease, dust, or residues with soap, water, or vinegar for a pristine surface. Opt for smooth materials, such as wood, plastic, metal, or vinyl, instead of textured surfaces like painted plasterboard. These materials provide a more reliable base for LED strip lights. If the self-adhesive backing doesn't hold, double-sided adhesive tape or LED clips can offer extra support and longevity. Consider using engineered wood as a durable and stable option for your bedroom flooring, providing an ideal surface for LED installation.
| Task | Tools Needed | Purpose |
|---|---|---|
| Clean the surface | Damp cloth, soap | Remove dust or residues |
| Dry the surface | Clean towel | Ensure the surface is dry |
| Measure the area | Measuring tape | Determine LED strip length |
| Choose materials | Material samples | Ensure even illumination |
Finally, measure the area accurately to determine the length of LED strip lights needed. This guarantees the surface provides even illumination, avoiding unsightly gaps.
Install and Connect the Lights
Now that your installation surface is meticulously prepared, it's time to bring your LED lighting vision to life by installing and connecting the lights.
Begin by carefully measuring the area to determine the precise length of LED strips required, ensuring a seamless fit with your desired layout. This attention to detail will enhance the aesthetic appeal of your bedroom.
Next, follow these steps to install LED strip lighting:
- Peel and Stick: Remove the adhesive backing from a manageable section of the LED strip—typically 6 to 18 inches—and meticulously align it with the installation surface. Press firmly to secure the strip, ensuring ideal adhesion.
- Connect the LED Strip: Utilise plug-in quick connectors to connect the LED strip to a compatible power supply, ensuring proper polarity alignment. This facilitates easy connections, especially when using multiple strips.
- Integrate the Controller Unit: Connect the controller unit to the LED lights, allowing for seamless control over colour and brightness variations, consequently enhancing the ambience of your room.
- Test the Setup: Finally, power on the system and cycle through the lighting options to confirm that all connections are secure and functional, ensuring your installation is both effective and visually stunning.
Frequently Asked Questions
What Is the Best Way to Hang LED Lights in a Room?
The best way to hang LED lights involves strategic LED light placement to enhance room aesthetics and bedroom ambience. Consider DIY lighting ideas for creative lighting, mood lighting effects, energy-efficient options, colour temperature choices, lighting safety tips, and seasonal decor ideas.
How to Make LED Lights Look Good in a Bedroom?
To enhance bedroom aesthetics with LED lights, explore colour combinations and creative patterns. Focus on mood enhancement and room ambience by aligning lighting effects with design themes. Accent walls can further amplify aesthetic appeal, supported by insightful installation tips and DIY projects.
How to Attach LED Lights to a Wall?
To affix LED lights on a wall, prioritise wall surface preparation and select suitable LED light adhesives. Ensure precise LED strip placement, considering creative designs and ambient lighting effects. Explore power source options, LED dimming features, and removal techniques.
Where to Put LED Light Strips in Bedroom?
To enhance bedroom ambience, strategically place LED light strips for ideal lighting placement. Consider ceiling accents and furniture coordination. Choose colours for mood enhancement, integrate creative layouts, explore dimming options, and incorporate personal touches to complement wall design.
Conclusion
In summary, the harmonious integration of LED lights into a bedroom setting not only enhances aesthetic appeal but also aligns with contemporary design trends. By meticulously planning the LED layout, preparing the installation surface with precision, and executing the installation and connection process with care, an inviting and modern ambiance is effortlessly achieved. This attention to detail guarantees that the lighting serves as both a functional and visually pleasing element, reflecting a sophisticated and trend-conscious approach to interior design.


Leave a Reply