10 Easy Steps to Change Your Kitchen Cabinet Doors
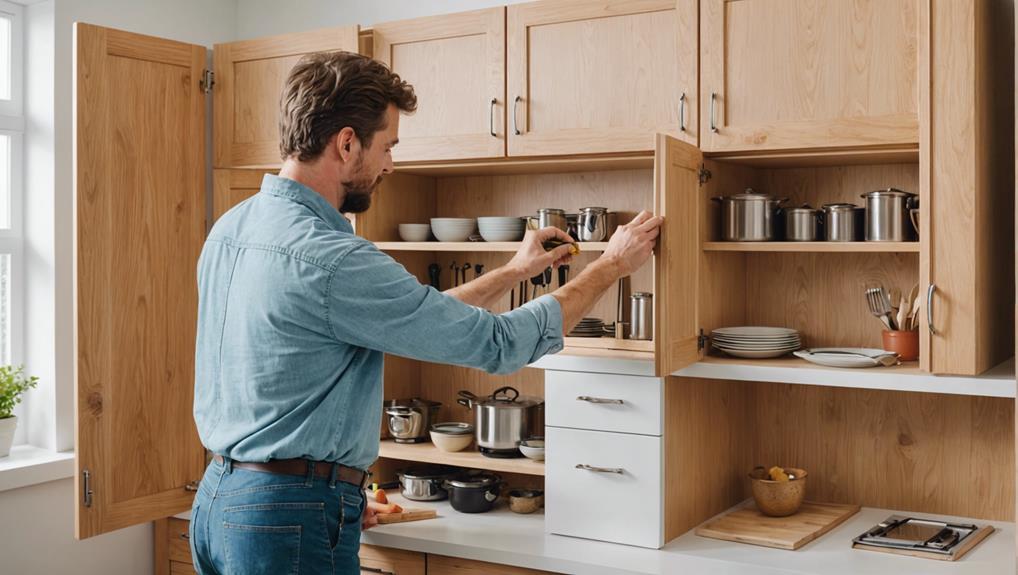
To change your kitchen cabinet doors, first gather tools and safety gear like safety goggles and gloves. Protect the floor with dust sheets and clear countertops. Measure the existing doors precisely and remove them carefully. Drill hinge holes using a 35mm Forstner bit, then attach the new hinges securely. Next, align and mount the new doors, making necessary adjustments for smooth operation. Choose and install the cabinet handles, then test door functionality and alignment. With these detailed steps, you’ll have a smooth installation process. To master each step in detail, continue with our thorough guide.
Key Takeaways
- Measure the height, width, and depth of each existing door accurately for a precise fit.
- Clear countertops and protect flooring to create a safe and organized workspace.
- Drill hinge holes using a 35mm Forstner bit for clean and precise openings.
- Securely attach new hinges, ensuring they match the cabinet design for smooth operation.
- Align and mount the new doors, adjusting screws for fine-tuning and testing for smooth movement.
Gather Your Tools
Always make sure to gather essential tools like a screwdriver, measuring tape, drill, and new hinges before starting your kitchen cabinet door replacement. Proper tool organization is crucial for streamlined operations.
Lay out your workspace by arranging your tools within easy reach—this minimizes downtime and boosts efficiency.
Safety precautions can’t be overstated. Equip yourself with protective gear, such as safety goggles and gloves, to guard against accidental injuries. Ensure your workspace layout includes dust sheets to protect your kitchen floor from damage and debris during the door replacement process.
Time management directly correlates with your preparedness. Having tools like a 35mm Forstner drill bit handy allows you to drill precise hinge holes, ensuring a secure fit for the new doors. This reduces the need for rework and helps maintain a steady workflow.
Retain the original mounting plates on the cabinet frame; they simplify the installation of new doors, cutting down on alignment time.
Prepare Your Workspace
To guarantee a seamless door replacement process, clear your countertops of any items to maximize your workspace.
Gather all necessary tools, such as screwdrivers and a drill, to streamline your workflow.
Protect the flooring by covering it with a dust sheet, safeguarding against debris and potential scratches.
Clear the Countertops
Before you begin replacing the cabinet doors, make sure your countertops are completely cleared to create an organized and efficient workspace. Start by removing all appliances, utensils, and any other items that might be sitting on your countertops. This not only prevents potential damage but also guarantees that nothing interferes with your workflow.
A clear workspace is essential for precision and safety. With everything off the countertops, you’ll have unobstructed access to the cabinets and doors, making the removal and installation process smoother. Additionally, having a clutter-free surface minimizes the risk of accidents or mishaps, such as knocking over tools or damaging removed cabinet doors.
Once your countertops are clear, it’s important to organize tools you’ll need for the replacement process. Designate a specific area on your cleared surface where you can neatly arrange your screwdrivers, hinges, and any other necessary hardware. This organization will save you time and frustration as you’ll know exactly where everything is when you need it.
Taking these preparatory steps ensures a streamlined and efficient process, allowing you to focus entirely on the task of replacing your kitchen cabinet doors without unnecessary distractions or risks.
Gather Necessary Tools
Prepare your workspace by laying down a dust sheet to safeguard the floor and arranging your tools within easy reach. Ensuring tool organization and workspace efficiency will save you time and effort. Here’s a list of essential tools and materials you’ll need:
| Tool/Material | Purpose |
|---|---|
| Dust Sheet | Protects flooring from debris and damage |
| Measuring Tape/Ruler | Accurate dimensions for doors and cabinets |
| Screwdriver/Drill | Removes old hinges and installs new ones |
| Replacement Hinges | Needed for new cabinet doors |
| Safety Glasses | Protects your eyes from debris |
Begin by covering the floor with a dust sheet to prevent any scratches or damage. Keep your tools well-maintained and organized to avoid any delays. Tool maintenance is vital; check your screwdriver or drill for functionality and ensure all attachments are secure.
Safety precautions are paramount. Wear safety glasses to protect your eyes from any debris while drilling or screwing. Arrange your tools in a way that allows quick access, enhancing workspace efficiency and minimizing unnecessary movement. Accurate measuring with a tape or ruler is essential for a perfect fit of the new cabinet doors. Remember, keeping the original hinges can simplify the installation process.
Protect the Flooring
Covering the flooring with a dust sheet guarantees it remains protected from debris and scratches during the cabinet door replacement process. Begin by selecting a durable dust sheet to serve as your primary floor covering. This is important for effective flooring protection and maintenance, making sure that no accidental damage occurs while you work.
Unroll the dust sheet and spread it evenly across your workspace, ensuring it covers the entire area beneath your cabinets. Secure the edges with painter’s tape to prevent it from shifting as you move around. This will provide a stable surface and reduce the risk of tripping over loose material.
Creating ample working space is essential. Before you start, clear away any kitchen items and obstacles that could impede your movement. With a screwdriver or drill in hand, you’ll be ready to remove the old cabinet doors. Carefully unscrew the hinges from the cabinet frame and lift the doors off, keeping the original mounting plates intact for the new doors.
Maintaining the original mounting plates simplifies the installation process and ensures proper alignment.
This step-by-step approach to flooring protection and workspace preparation will streamline your kitchen cabinet door replacement, minimizing mess and protecting your floors.
Measure Existing Doors
To guarantee a precise fit for your new kitchen cabinet doors, follow these steps:
- Measure the height, width, and depth of each existing door in millimeters.
Utilize a reliable measuring tape or digital caliper for accuracy.
Account for any decorative features that could impact dimensions.
Always measure from the back of the door for the most accurate results.
Accurate Door Dimensions
Accurately measuring the height, width, and depth of your existing cabinet doors in millimeters is crucial for guaranteeing a proper fit for the replacements.
Employing precise door sizing techniques will help you avoid costly mistakes and ensure a seamless installation. Begin by measuring the height and width of each door from edge to edge, making sure your measurements are taken from the back of the door for the most accurate results. Deduct 4mm from the width if the doors are currently missing to account for clearance, guaranteeing proper fit once the new doors are installed.
Next, measure the depth of the doors, taking into consideration any decorative features that could impact the dimensions. This ensures your new doors will sit flush and operate smoothly without any interference.
Record all measurements meticulously, as even a small discrepancy can lead to misalignment or functionality issues. Before selecting your new cabinet doors, compare these dimensions to guarantee they match the existing openings.
Measuring Tools Required
Having recorded precise door dimensions, you’ll need a set of specific measuring tools to guarantee accuracy when measuring your existing kitchen cabinet doors. First, a high-quality measuring tape is essential for measuring accuracy. Opt for one with clear metric markings, as millimeter precision is critical in ensuring a perfect fit.
Begin by measuring the height and width of each door from the back, noting any decorative features or unique dimensional considerations. This meticulous approach will aid in selecting replacements that align seamlessly during the installation process.
Don’t skip measuring the depth; it’s essential for ensuring that new doors sit flush with the cabinet frames.
When you’re noting these dimensions, make sure to use a straight edge or a carpenter’s square to maintain right angles, which enhances the reliability of your measurements.
A digital caliper can also come in handy for intricate details and ensuring uniformity across all measurements.
Remove Old Doors
Begin by using a screwdriver to unscrew the hinges securing the old cabinet doors to the frame. This is a critical step in DIY door removal, as it guarantees you don’t damage the cabinet structure. Make sure the cupboards are fully open for easy access. Carefully remove the old doors to avoid scratches or dents, especially if you’re working with delicate cabinet door styles.
Keep the original mounting plates attached to the cabinet. This is a key door removal tip that will streamline the installation of your new doors. Note the hinge locations; accurate measurement and alignment are essential when updating kitchen cabinets.
| Task | Tools Needed |
|---|---|
| Unscrew hinges | Screwdriver |
| Remove old doors | None |
| Keep mounting plates | None |
| Open cupboards fully | None |
| Note hinge locations | Pencil, Notepad |
Drill Hinge Holes
Before drilling, make sure you measure and mark the precise hinge hole locations on the new cabinet doors. Accurate measurements and markings are essential for hinge hole accuracy, ensuring proper alignment during door hinge installation. Use a pencil and a measuring tape to mark the exact spots where the hinges will be attached.
For the drilling process, you’ll need a 35mm Forstner drill bit—this is the industry standard for most European-style hinges. Drill bit selection is critical; a Forstner bit provides clean, flat-bottomed holes ideal for hinge cups. Once you’ve selected the appropriate bit, set your drill to the correct hinge hole depth. Typically, this is around 12-13mm, but always verify with your specific hinge manufacturer’s guidelines.
Carefully drill into the marked locations, maintaining steady pressure and ensuring the drill remains perpendicular to the door surface. This technique will help maintain hinge hole accuracy. After drilling, check the fit of each hinge in the newly drilled holes. They should sit flush without any gaps.
Repeat the process for each hinge hole on all the new doors, maintaining uniformity across all measurements and drill depths. Properly drilled hinge holes are essential for seamless door hinge installation and long-lasting cabinet functionality.
Attach New Hinges
To attach the new hinges, first select the appropriate hinge type that matches your cabinet design.
Precisely position the hinges by aligning them with the pre-drilled holes and the existing frame plates.
Secure the hinges with screws and verify the door’s alignment for smooth operation.
Select Appropriate Hinge Type
Selecting the appropriate hinge type is crucial for guaranteeing your cabinet doors function smoothly and align with your kitchen’s aesthetic. Begin by considering hinge material options. Stainless steel and brass are popular choices due to their durability and resistance to corrosion. Stainless steel hinges are ideal for modern kitchens, offering both strength and a sleek appearance. Brass hinges, on the other hand, are perfect for traditional or vintage styles, providing a warm, classic look.
Next, ponder hinge design considerations. Concealed hinges are excellent for a contemporary, minimalist appearance as they remain hidden when the doors are closed. Visible hinges, also known as butt hinges, add a decorative element that complements rustic or farmhouse designs. Make sure your selected hinges can support the weight and size of your new cabinet doors to avoid functional issues.
| Feature | Considerations |
|---|---|
| Material Options | Stainless Steel, Brass |
| Design Options | Concealed, Visible (Butt) |
| Functional Needs | Weight Support, Size Compatibility |
Moreover, soft-close hinges are worth considering as they prevent doors from slamming, thereby minimizing wear and tear. Ensure the hinge size matches the existing cutouts on your cabinets for a seamless installation. Proper hinge selection enhances both functionality and aesthetics, ensuring a successful cabinet door update.
Position and Install Hinges
Accurately positioning and installing hinges is crucial for guaranteeing your cabinet doors align perfectly and operate smoothly. Start by using the existing mounting plates on the cabinet frame as a guide. This guarantees proper door alignment and eliminates guesswork.
Position the new hinges so they match the pre-drilled holes on the new doors, facilitating a seamless installation. Insert the hinges into these pre-drilled holes, ensuring they sit flush against the door surface.
Check the fit and movement of the doors by temporarily securing the hinges with a couple of screws. This preliminary step allows for hinge adjustment to achieve ideal door alignment.
Once satisfied with the door’s fit and movement, secure the hinges firmly with all the screws to lock the doors in place. This final step ensures the doors will operate smoothly and stay aligned.
Here’s a step-by-step checklist to guide you through the process:
- Use existing mounting plates as a guide.
- Position hinges to align with pre-drilled holes.
- Temporarily secure hinges for hinge adjustment.
- Check door alignment and movement.
- Secure hinges with all screws.
Mount New Doors
Align the hinges with the frame plates to guarantee a precise fit for the new cabinet doors. This step is important for door alignment and door security. Begin by positioning the hinges into the pre-drilled holes on the door, making sure they match up perfectly with the frame plates. Use adjustable screws to fine-tune the alignment, ensuring the doors are level and flush with the cabinet frame.
Next, secure the hinges with screws, tightening them firmly to make certain the doors are securely mounted. This prevents any wobbling or misalignment, providing a stable and durable fixture. It’s vital to test the functionality of the doors at this stage. Open and close each door to check for smooth movement and proper alignment. If any adjustments are needed, use the adjustable screws to make fine corrections.
Once you’re satisfied with the door alignment and security, proceed to install the remaining doors following the same meticulous process. This consistency guarantees a seamless and professional finish throughout your kitchen. Enjoy your transformed kitchen with the newly installed cabinet doors, appreciating the blend of functionality and aesthetic improvement.
Align and Adjust Doors
Now that the new doors are mounted, use the adjustable screws to fine-tune the alignment, ensuring each door is flush with the cabinet frame and operates smoothly. Begin by focusing on door alignment. Use the hinge adjustment screws to achieve a precise fit.
To get started, follow these steps:
- Adjust Vertical Alignment: Loosen the top and bottom hinge screws slightly and adjust the door up or down to align perfectly with adjacent doors.
- Adjust Horizontal Alignment: Use the lateral adjustment screws to move the door left or right, making sure it sits evenly within the cabinet frame.
- Depth Adjustment: Fine-tune the door’s depth by adjusting the in-and-out screws, making sure the door is flush with the surrounding cabinetry.
- Secure Hinges: Once aligned, tighten all screws firmly to secure the hinges and maintain the door’s position.
- Test Operation: Open and close the door several times to ensure smooth operation and make any necessary minor adjustments.
Repeat these steps for any remaining doors to complete the transformation.
Install Door Handles
Choose door handles that complement the aesthetic and finish of your new cabinet doors to guarantee a cohesive look. Start by picking handle styles that align with your kitchen’s overall design, whether contemporary, rustic, or minimalist. For placement, measure and mark the exact spots where the handles will go, making sure they’re ergonomically positioned for ease of use.
Utilize a template or jig to maintain consistent hole placement, an essential step for achieving a professional, uniform appearance. The table below outlines some popular handle styles and their ideal placements:
| Handle Style | Ideal Placement |
|---|---|
| Bar Pulls | Centered horizontally |
| Knobs | 1-2 inches from the corner |
| Cup Pulls | Bottom center of drawers |
| T-Bar Handles | Vertically, near edges |
When it comes to door handle finishes, trends like matte black, brushed nickel, and aged brass are currently popular. These finishes can add a modern or vintage touch to your cabinetry.
Secure the handles with the screws provided, making sure they’re straight and aligned. Double-check alignment with a level for precision. This attention to detail ensures not only aesthetic appeal but also the functional integrity of your kitchen’s new look.
Test Door Functionality
Once the handles are securely installed, meticulously test each door to make sure it opens and closes smoothly, confirming that the alignment with the cabinet frame is essential. Proper door alignment and functionality are vital for a professional finish. Begin by gently opening and closing each door to assess the ease of movement and ensure there’s no friction or obstruction.
Pay close attention to hinge stability. Examine whether each hinge is securely fastened and check for any wobbling. If you notice any instability, you’ll need to make precise adjustments to the hinge screws. This may involve tightening or loosening the screws to achieve the best door alignment.
Here are some critical steps to ensure flawless door functionality:
- Verify Door Alignment: Ensure the door sits flush with the cabinet frame without any gaps.
- Check Hinge Stability: Make sure hinges are firmly attached and free from play.
- Adjust Hinges as Needed: Fine-tune hinge screws for proper alignment and smooth operation.
- Test for Obstructions: Open and close the door multiple times to confirm no obstructions.
- Confirm Smooth Operation: The door should move effortlessly without any sticking points.
Frequently Asked Questions
Can You Easily Replace Kitchen Cabinet Doors?
Yes, you can easily replace kitchen cabinet doors. Confirm accurate measurements and take into account budget constraints. Explore material options like MDF or solid wood for durability. Install new doors precisely by aligning hinge holes and using quality hardware.
Is Replacing Kitchen Cabinet Doors Hard?
No, replacing kitchen cabinet doors isn’t hard. Conduct a cost analysis to budget effectively, and focus on material selection to guarantee durability. With precise measurements and the right tools, you’ll achieve a professional finish seamlessly.
How Can I Update My Kitchen Cabinet Doors Without Replacing Them?
You can update your kitchen cabinet doors without replacing them by painting cabinets for a fresh coat, or implementing hardware upgrades like new handles and knobs. Consider adding decorative molding or trim for an enhanced aesthetic.
How Do You Replace Old Cabinet Doors With New Ones?
To replace old cabinet doors, first use precise measuring tips to guarantee accurate door sizing. Remove old doors, then drill new hinge holes. Different hinge types may require specific tools. Align hinges with mounting plates, guaranteeing perfect functionality.
Conclusion
You’ve successfully transformed your kitchen by changing the cabinet doors. With precise measurements, accurate drilling, and careful alignment, the new doors are perfectly installed and functional.
Remember, consistent maintenance will guarantee longevity. You’ve demonstrated technical proficiency and attention to detail, making your kitchen both aesthetically pleasing and efficient.
Keep this guide handy for future projects and share your expertise with others. Your proficiency in cabinet door installation has unquestionably enhanced your DIY skills.


Leave a Reply