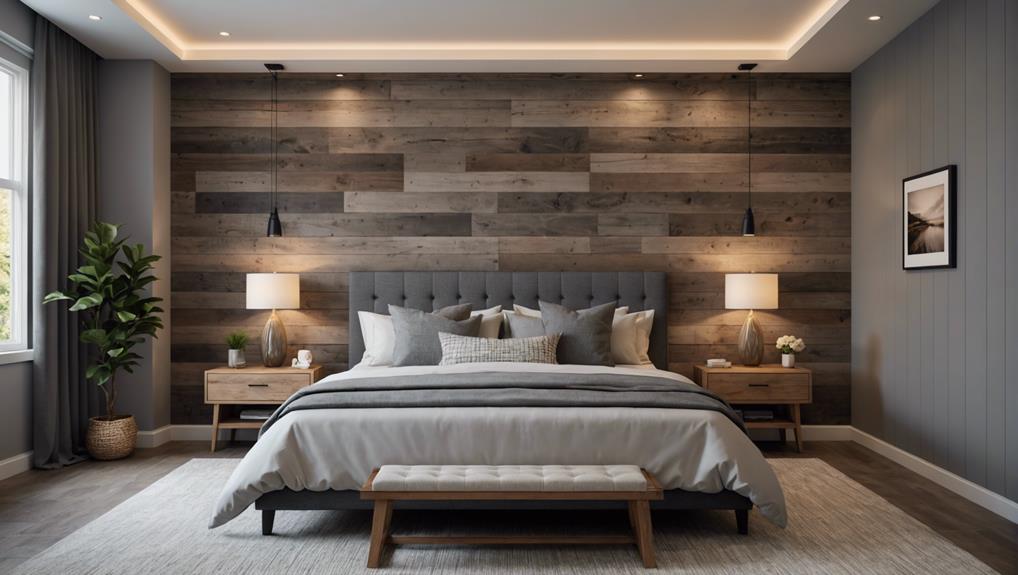
10 Steps to Create a Stunning Grey Wood Accent Wall in Your Bedroom
Creating a stunning grey wood accent wall in your bedroom is simpler than you might think. Start by choosing high-quality wood like MDF or pine. Select a trendy grey shade—think charcoal or blue undertones. Measure your wall with precision and prep by cleaning and priming. Cut your planks accurately using a miter saw. Prime and paint the wood with matte or satin finishes for sophistication. Secure the planks in a staggered pattern using a nail gun. Add final touches with decor like throw pillows and lights. Maintain it by dusting and checking for loose planks. Discover the full process to master this DIY trend.
Key Takeaways
- Select high-quality MDF or pine boards for durability and a polished look.
- Sand and condition the wood meticulously for a smooth and flawless finish.
- Accurately measure the wall dimensions, accounting for outlets and switches.
- Use a miter saw for precise plank cuts and secure them with a nail gun or adhesive.
- Apply a grey stain or paint that complements your room’s decor for a sophisticated finish.
Choose Your Wood
Selecting the appropriate wood is essential for creating a sleek and modern grey accent wall in your bedroom. Start by choosing high-quality materials like MDF or pine boards. These options not only provide durability but also offer a smooth surface that’s ideal for achieving a contemporary look.
Pay close attention to the thickness and width of the wood, as these factors play a significant role in defining the texture and pattern of your wall. Thin, wide planks can create a streamlined, minimalist aesthetic, while thicker, narrower boards might lend a more traditional yet polished appearance.
Before applying any finish, make sure the wood is meticulously sanded and conditioned. This step is vital for a flawless end result. When it comes to finish options, a grey stain or paint is your go-to for a sophisticated and modern vibe. Matte or satin finishes add a subtle elegance, making the accent wall a focal point without overwhelming the space.
The right finish will enhance the natural grain of the wood, adding depth and visual interest. By focusing on wood quality and finish options, you create a texture and pattern that enhances the overall design of your bedroom.
Select the Right Grey
Now that you’ve chosen the perfect wood, it’s time to focus on selecting the right shade of grey to complement your accent wall. Understanding grey color psychology is essential here; different shades can evoke varying emotions and aesthetics.
For a modern look, consider shades like charcoal grey or light grey. Charcoal grey makes a bold statement, adding depth and sophistication, while light grey brightens the room, maintaining a contemporary vibe.
Finding the perfect shade involves considering the atmosphere you wish to create. Grey with blue undertones can induce a calming, serene ambiance, perfect for a restful bedroom environment. Conversely, warm grey tones introduce a touch of coziness, making the space feel inviting and snug.
Here are some visual inspirations:
- Charcoal Grey: Bold, sophisticated, and makes a striking statement.
- Light Grey: Brightens up the room, adds subtle depth, and maintains a modern aesthetic.
- Warm Grey: Cozy, inviting, and creates an intimate atmosphere.
Trend awareness is important; currently, grey tones are versatile and timeless, fitting well with various interior styles. Whether you opt for a bold or subtle grey, make sure it harmonizes with your existing decor and personal style preferences.
Measure Your Wall
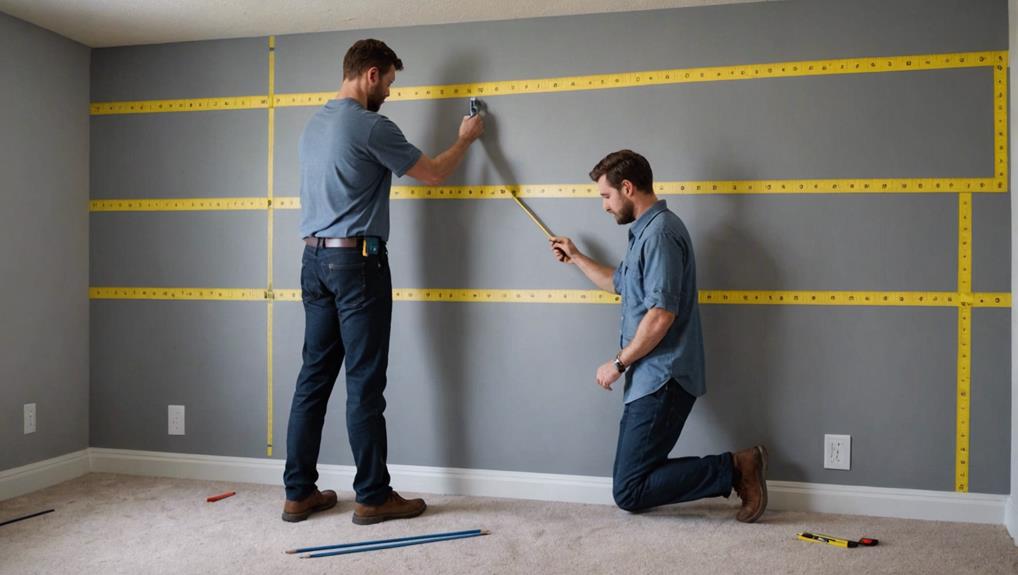
To begin, accurately measure the length and height of your wall using a tape measure and level, ensuring precision for a professional finish.
Mark your reference points clearly, accounting for any outlets or switches that could affect your wood layout.
Double-check your measurements to guarantee you purchase the right amount of materials, avoiding wastage and ensuring a seamless installation.
Determine Wall Dimensions
Accurately measuring the height and width of your wall is crucial to make sure you purchase the right amount of grey wood materials for your accent wall. Begin by taking a tape measure and recording the height from floor to ceiling, and the width from one corner to the other. This guarantees you buy just enough materials without excess.
Consider any obstacles on the wall, such as outlets or switches. These elements influence your layout and material needs. Make sure to account for:
- Outlet placement: Note the location of electrical outlets and light switches to plan your cuts and guarantee a seamless look.
- Furniture arrangement: Visualize where your furniture will be placed to understand how the accent wall will complement your room’s layout.
- Wall preparation: Before installation, think about the paint selection for the background to enhance the grey wood tones.
Use a level to confirm your measurements are precise, ensuring a professional finish. Double-check all dimensions to avoid costly mistakes.
Mark Reference Points
Start by using a pencil and a level to mark your reference points, guaranteeing each wood panel aligns perfectly for a polished, professional appearance. Accurate measurements are essential for achieving a seamless look that complements your design inspiration and enhances color coordination in your bedroom.
First, measure the length and height of your wall to establish the dimensions for your grey wood accent wall.
Next, mark reference points at regular intervals, taking into account the location of outlets, switches, and any other obstructions. This step is necessary for proper wall preparation and ensures that your wood panels will fit snugly around these elements without compromising the overall design.
Be meticulous with your measurements to ensure the wood panels align correctly, which is crucial for a seamless and professional finish. Use a level to verify that each mark is straight and even, as this will serve as your guide during installation.
Taking the time to measure and mark these reference points will ultimately result in a visually appealing accent wall that embodies both trend awareness and expert craftsmanship. Don’t rush this step; precise wall preparation now will make the finishing touches much more rewarding.
Cut the Planks
To achieve a flawless grey wood accent wall, start by measuring and marking the plank lengths with precision.
Use a miter saw for clean, straight cuts, and always prioritize safety by wearing protective gear.
Ensuring uniform plank size and smooth edges will enhance the cohesive, trendy look you’re aiming for.
Measure and Mark Lengths
First, grab your tape measure and meticulously mark each grey wood plank to match your wall’s exact dimensions. Precision is paramount here for achieving length accuracy, which guarantees that each piece fits seamlessly, contributing to a polished and cohesive look. Double-check your measurements to avoid cutting errors that could disrupt the visual harmony of your accent wall.
Before cutting, visualize the end result:
- Evenly spaced planks: Achieve a balanced, professional appearance.
- Consistent lengths: Ensure uniformity for a sleek, modern design.
- Perfect fit: Avoid gaps or overlaps for a flawless finish.
Measuring correctly is akin to prepping a canvas before wall painting; it sets the foundation for a stunning visual impact. Use a pencil to mark where each cut will be made, and make sure these marks are clear and precise. This attention to detail will pay off when you start assembling the wall.
With all lengths accurately marked, you’re ready to cut. This step is essential for maintaining the integrity of your design and ensuring the planks fit perfectly on your wall, creating an eye-catching grey wood accent that’s both trendy and timeless.
Choose Appropriate Tools
You’ll need a miter saw and a carpenter’s square to guarantee each grey wood plank is cut with precision and accuracy. The miter saw ensures clean, straight cuts, while the carpenter’s square helps you maintain perfect 90-degree angles, essential for a polished look.
When choosing your tools, prioritize quality—investing in reliable brands can make a significant difference in your project’s outcome.
Tool selection isn’t just about what you buy but how you maintain it. Regularly inspect your miter saw blade for sharpness and cleanliness; a dull blade can lead to jagged cuts, compromising the aesthetic of your accent wall. Additionally, a well-maintained carpenter’s square will ensure your measurements remain consistent.
Budget considerations are equally important. While high-end tools offer durability and precision, mid-range options can still deliver excellent results if properly maintained. Balance your spending with the tool’s frequency of use; you don’t need top-tier equipment for a one-time project, but don’t skimp on essential safety precautions.
Incorporate a nail gun for seamless installation, and consider paneling adhesive for a strong bond. Accurate measuring and marking before cutting will save you time and prevent costly mistakes, ensuring your grey wood accent wall looks professionally crafted.
Ensure Safety Precautions
Ensuring safety while cutting the planks is vital, so always wear protective eyewear and gloves to prevent injuries. Using safety equipment correctly is essential when operating a table saw. Prioritize injury prevention by following these steps closely to maintain a safe working environment.
First, measure twice and cut once to achieve precise dimensions. Accurate measurements not only ensure a seamless installation but also minimize the risk of accidents caused by re-cutting or incorrect handling.
While cutting, remember to:
- Keep fingers away from the cutting blade: Use a push stick for better control and to maintain a safe distance from the blade.
- Follow the manufacturer’s guidelines: Proper usage of power tools is critical for safety and efficiency.
- Ensure proper lighting and clear workspace: This helps prevent mishaps and allows for accurate cuts.
Using a table saw demands unwavering attention to detail. Always be aware of your surroundings and maintain a tidy workspace. This is particularly important for injury prevention as clutter can lead to accidents.
Trend-savvy DIY enthusiasts understand that a beautiful grey wood accent wall starts with meticulous preparation and safety-first practices. By adhering to these safety precautions, you’ll be well on your way to creating a stunning feature in your bedroom.
Prepare the Wall
Start by thoroughly cleaning the wall surface with a mild detergent to remove any dirt and dust, establishing a pristine canvas for your grey wood accent wall. This initial wall preparation step is vital for achieving a flawless finish.
Once the surface cleaning is complete, inspect the wall for any imperfections. Use spackling techniques to fill in holes, cracks, or dents, creating a smooth base. Apply the spackling compound evenly, and allow it to dry before sanding it down to ensure an even surface.
Next, focus on protecting adjacent surfaces like trim, ceilings, and outlets. Use painter’s tape to cover these areas meticulously. This step is important to maintain clean lines and avoid any accidental paint or primer splashes.
Prime the wall with a high-quality primer to ensure proper adhesion of the wood panels. The primer not only helps in achieving the desired color selection but also seals the surface, enhancing the durability of your accent wall. Allow the primer to dry completely, typically for 24 hours, before moving on to the next phase.
Sand the Wood
To achieve that sleek, modern look for your grey wood accent wall, start by choosing fine-grit sandpaper to guarantee a smooth finish. Sand with the grain to eradicate any rough patches and splinters, allowing your stain or paint to adhere more effectively.
Choose Appropriate Grit
Sanding your wood with the right grit sequence—starting with coarse, moving to medium, and finishing with fine—guarantees a perfectly smooth surface ready for that chic, professional grey finish. Your goal is to meticulously prepare the wood, utilizing expert sanding techniques to achieve flawless finishing touches.
Begin with a coarse grit sandpaper around 80-100 grit. This initial step eliminates rough spots and imperfections, setting a solid foundation for subsequent sanding.
Next, progress to a medium grit selection, typically around 120-150 grit, to refine the surface, eliminating any remaining unevenness.
Finally, use a fine grit sandpaper, around 220-240 grit, to achieve an impeccably smooth finish, perfect for staining or painting.
Remember, the direction in which you sand is important. Always align your sanding direction with the wood grain to avoid unsightly scratches that can compromise the final aesthetic. Proper sanding ensures that your grey wood accent wall will look clean, even, and professionally done.
- Coarse grit (80-100): Removes rough spots and imperfections.
- Medium grit (120-150): Smooths out the surface further.
- Fine grit (220-240): Provides a silky-smooth finish.
Embrace these steps to create a stunning accent wall that’s both trendy and timeless.
Sand With the Grain
Why is it important to sand with the wood grain? Sanding with the grain of the wood guarantees that you smooth out any rough areas and prepare the surface for staining or painting effectively. This technique minimizes the risk of creating visible scratches or marks, which can detract from the final look of your grey wood accent wall.
Utilizing proper sanding techniques is vital for finish preparation and surface smoothness. Here’s a visual breakdown to illustrate the process:
| Key Steps | Details |
|---|---|
| Choose Correct Grit | Opt for 120-150 grit sandpaper to avoid damage. |
| Sand with the Grain | Always move the sandpaper in the direction of the wood grain to maintain natural texture. |
| Consistent Pressure | Apply even pressure to ensure a uniform surface. |
Sanding the wood surface removes imperfections, dirt, and old finishes, creating a clean and smooth base for your accent wall. By adhering to the wood grain, you enhance the adhesion of stains or paints, ensuring a professional-looking finish that highlights the wood’s natural beauty.
Proper sanding doesn’t just prepare the wood; it transforms it, setting the stage for a stunning grey wood accent wall that’s both trendy and timeless.
Ensure Smooth Finish
Achieving a smooth finish on your wood accent wall starts with meticulously sanding the surface to guarantee excellent paint adhesion and a professional look. Sanding is a critical step in preparing your wood, ensuring that the paint adheres properly and the final product is visually striking.
You’ll want to use fine-grit sandpaper to address any imperfections and create a uniform wood texture.
Consider these steps to envision the transformation:
- Smooth Surface: Sand away rough patches and splinters, ensuring a flawless, touchable texture.
- Rounded Edges: Gently round off sharp corners, enhancing the professional appearance and preventing potential snags.
- Even Canvas: Achieve a consistent wood texture that’ll make your paint application seamless and durable.
Prime the Planks
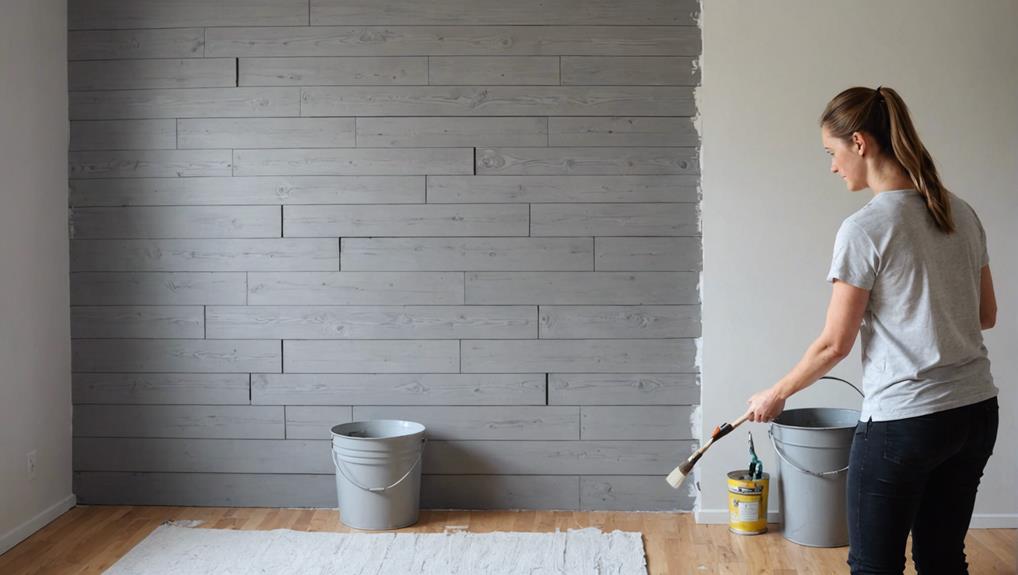
To guarantee your paint adheres perfectly and looks flawless, always start by applying a high-quality primer evenly to your wood planks. Primer application is vital because it seals the wood, ensuring a smooth surface that maximizes paint adhesion. Make sure you choose a primer quality that offers excellent adhesion benefits; this will prevent future paint chipping and peeling, which is particularly important for creating a long-lasting grey wood accent wall.
Begin by laying your wood planks on a flat surface. Using a high-quality brush or roller, apply a uniform coat of primer. Pay close attention to the edges and corners to avoid any missed spots. The goal is to create an even layer that fully covers the wood grain, providing the perfect base for the paint.
Once the primer is applied, allow it to dry completely. Adhering to the recommended drying time is essential; rushing this step can compromise the overall finish of your accent wall. Typically, primers require a few hours to dry, but always refer to the product’s instructions for the best results.
Proper priming isn’t just a step but a foundation for achieving that professional, polished look you’re aiming for in your bedroom.
Paint the Wood
Once the primer has fully dried, it’s time to apply a high-quality grey paint to your wood planks, ensuring each stroke contributes to a modern and cohesive bedroom aesthetic. Start by choosing a grey shade that complements your bedroom’s existing color scheme. This careful color selection is vital for achieving a harmonious look.
For the paint application, consider using a paint sprayer to guarantee efficient and uniform coverage over the wood panels. This method not only saves time but also provides a seamless finish that brushes or rollers might struggle to achieve. If a sprayer isn’t available, a high-quality brush with synthetic bristles works well for even application.
Before you begin, make sure your wall preparation is flawless. Any imperfections on the wood should be sanded down to allow the paint to adhere properly.
Effortless strokes with a paint sprayer, achieving smooth and even coverage.
Meticulous color matching to enhance the bedroom’s overall ambiance.
Attention to detail during wall preparation, ensuring no bumps or rough spots remain.
Once the paint has been applied, let it dry completely. This step is crucial before moving on to any additional finishing touches, ensuring your grey wood accent wall looks professionally done and visually appealing.
Install the Planks
Installing the grey wood planks transforms your bedroom into a chic and contemporary sanctuary, blending craftsmanship with modern design. Start by measuring and cutting the planks to fit your wall dimensions accurately. Precision is crucial; use a high-quality saw to guarantee clean cuts. Before installation, consider painting or staining the planks to achieve your desired design variations and color options.
Secure the planks using a nail gun or strong adhesive. Make sure to keep each plank level for a professional finish. To create a visually appealing design, arrange the planks in a staggered pattern. This not only enhances the aesthetic but also adds texture and depth to your accent wall.
Fill any nail holes or gaps with wood filler for a seamless finish. This step provides those essential finishing touches and ensures a polished look. For ongoing maintenance, regularly dust the wall and occasionally check for any loose planks.
Here’s a quick reference guide:
| Step | Tools Needed | Tips |
|---|---|---|
| Measure and Cut | Tape Measure, Saw | Guarantee precise measurements |
| Secure the Planks | Nail Gun, Adhesive | Keep planks level |
| Staggered Pattern | – | Enhances visual appeal |
| Fill Gaps | Wood Filler, Putty Knife | Seamless finish |
Final Touches
Why not enhance your grey wood accent wall with a few expertly chosen final touches that seamlessly blend style and functionality? To create a cohesive and inviting space, it’s essential to think about color coordination, lighting options, and practical storage solutions.
Here are some ideas to get you started:
- Color coordination: Add a pop of color with decorative throw pillows or a cozy throw blanket that complements the grey tones of your accent wall. This not only adds visual interest but also creates a warm and welcoming atmosphere.
- Lighting options: Install sconce lighting or a stylish pendant light to highlight the texture and grain of the wood. The right lighting can create a warm, inviting ambiance that enhances the overall aesthetic of the room.
- Storage solutions: Incorporate wall-mounted shelves or floating nightstands for a functional yet stylish way to keep your essentials within reach. These options offer a sleek look that doesn’t detract from the beauty of your accent wall.
Frequently Asked Questions
How Do I Make My Bedroom Accent Wall Stunning?
To make your bedroom accent wall stunning, focus on color coordination and lighting effects. Use high-quality grey wood, contrast with bold hues, and incorporate modern lighting fixtures to create a visually striking, on-trend focal point.
How Do You Start a Wood Accent Wall?
You start a wood accent wall by selecting tools like a miter saw and nail gun. Begin by preparing the surface—measure and mark the area. Pre-drill holes for easy attachment, ensuring a seamless, trendy look.
Which Wall Should Be the Accent Wall in a Bedroom?
Consider wall positioning and create a focal point by choosing the wall behind the headboard. This strategic placement maximizes visual impact and aligns with current design trends, making your bedroom both stylish and cohesive.
What Type of Wood Do You Use for an Accent Wall?
When selecting wood species for your accent wall, prioritize MDF for a sleek finish or engineered wood like plywood for texture. Guarantee adequate wood sourcing, so your materials are high-quality and sustainable, in line with modern design trends.
Conclusion
Creating a stunning grey wood accent wall in your bedroom isn’t just a DIY project; it’s a design statement. With the right wood, perfect grey hue, and precise measurements, you’ve transformed your space into a chic, modern sanctuary.
From priming to painting and finally installing, every step is essential.
Now, step back and admire your handiwork. Your bedroom’s new focal point isn’t just trendy—it’s a sign of your impeccable taste and craftsmanship.
Enjoy your revitalized retreat!


Leave a Reply