DIY Tiling Tricks for Chic Kitchen Spaces
To elevate your kitchen with chic tiling, start by choosing durable porcelain tiles; larger ones minimize grout cleaning, while subway tiles in neutral tones offer timeless elegance. Mosaic tiles can introduce texture as a stylish backsplash. Equip yourself with essential tools like nippers, grout spreader, and a spirit level to guarantee perfectly aligned tiles. Embrace symmetrical layouts for a balanced, polished look, using geometric patterns to add sophistication. Opt for matte finish tiles to keep maintenance easy, and don’t overlook the importance of selecting the right grout color and applying sealant near sinks for endurance. With these tips, you’re on your way to creating a kitchen space that’s as functional as it is fashionable.
Key Takeaways
- Opt for larger format porcelain tiles to achieve a seamless look and minimize grout cleaning.
- Utilize tile patterns like subway or mosaic to add timeless elegance or visual interest.
- Ensure tiles are perfectly aligned using a spirit level for a polished, symmetrical layout.
- Choose matte finish tiles for easier maintenance and to reduce visible smudges.
- Regularly clean with mild detergent and promptly repair chips for extended tile lifespan.
Selecting the Perfect Tiles
When it comes to elevating your kitchen’s aesthetic, selecting the perfect tiles can transform the space, blending functionality with chic design. Porcelain tiles, known for their durability and versatility, are an excellent choice for kitchen areas prone to spills and splashes. By opting for larger format tiles, you’ll not only create a seamless look that visually expands the space but also reduce the hassle of cleaning grout lines, making your kitchen maintenance a breeze.
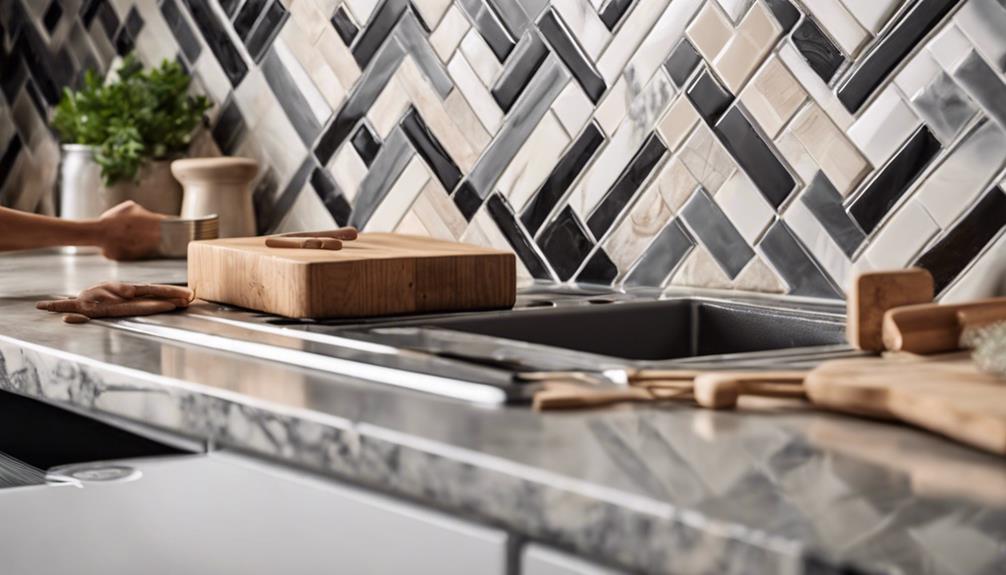
Incorporating tile patterns into your kitchen can dramatically enhance its visual appeal. Consider the timeless elegance of subway tiles in neutral colors to achieve a classic look that complements various kitchen styles without overwhelming the senses. For those looking to inject a bit of personality, mosaic tiles offer a splendid opportunity to add texture and visual interest, especially as a backsplash or accent feature.
Color coordination plays an important role in achieving a cohesive kitchen design. Tiles with a matte finish aren’t only trendy but practical, minimizing the appearance of smudges and fingerprints, which are inevitable in a bustling kitchen. By thoughtfully selecting your tiles, you can create a kitchen that’s both functional and stylish, embodying the latest trends while ensuring longevity and ease of maintenance.
Essential Tiling Tools
To achieve that flawless finish in your chic kitchen space, you’ll need the right set of tiling tools, each playing a pivotal role in the installation process. Starting with safety gear, don’t overlook the importance of safety goggles. They’re your first line of defense against any flying debris, ensuring your vision is protected while you bring your design to life.
Nippers and a grout spreader are indispensable for shaping tiles and spreading grout with precision, while a spirit level guarantees that every tile aligns perfectly, avoiding any unsightly unevenness that could detract from the aesthetic you’re aiming for. Precision tools like tile markers, tile cutters, and measuring tape are essential for accurate cutting and placement, ensuring each piece fits seamlessly within your design layout.
Materials like the cement backing board, filler, and tile adhesive lay the foundation for a strong and durable installation. A notched trowel and leveling tools are vital for applying adhesive evenly, preventing any tiles from sitting higher than others. Finally, a grouting sponge is key for wiping away excess grout, leaving you with a professional and polished finish that’s sure to impress.
Symmetrical Layout Techniques
Mastering symmetrical layout techniques can transform your kitchen’s aesthetic, offering a balanced and visually harmonious space that reflects the latest design trends. By embracing symmetry in your tiling, you’re not just installing tiles; you’re crafting an environment that exudes order, elegance, and a polished look that’s both inviting and trend-forward.
Here’s how you can achieve this:
- Centered Designs: Start by identifying the central point of your kitchen wall or floor. Use this as your anchor for laying out tiles, guaranteeing that the pattern expands equally from this point. This technique creates a focal point, drawing the eye and giving your kitchen a structured feel.
- Mirror-Image Placements: Consider placing tiles in a way that each side mirrors the other. This approach works wonders for creating a balanced space. Whether it’s a backsplash or flooring, mirror-image placements contribute to a cohesive and structured aesthetic.
- Geometric Patterns: Leverage geometric patterns to introduce symmetry with a modern twist. Patterns like chevrons, herringbones, or simple squares can be aligned to create a uniform look that enhances the overall balance and symmetry of your kitchen.
Incorporating these symmetrical layout techniques, centered designs, and geometric patterns won’t only elevate your kitchen’s style but also secure it remains at the forefront of design innovation.
Grouting and Finishing
Achieving a flawless finish in your chic kitchen space hinges on mastering the art of grouting and sealing, making sure durability meets design in every tile laid. Grout color choices greatly influence the aesthetic appeal of your tiles, turning them into a statement piece or a subtle background. Additionally, the finishing touches, such as properly sealing edges near sinks, can prevent water damage, making your stylish backsplash not just a visual delight but also a practical feature.
Here’s how to guarantee your grouting and finishing are on point:
| Step | Tips |
|---|---|
| Applying Sealant | Use a nozzle for precision, smooth out with a wet finger. |
| Drying | Allow the sealant to dry completely for protection. |
| Extra Protection | Apply additional sealing for crackle glazes in high-use areas. |
Maintenance and Repairs
After guaranteeing your chic kitchen tiles are perfectly grouted and sealed, it’s time to focus on keeping them in pristine condition through smart maintenance and timely repairs. A well-maintained tile surface not only enhances the beauty of your kitchen but also extends the lifespan of your tiles. Here’s how you can achieve this:
- Regular Cleaning: Use a mild detergent to clean your tiled surfaces regularly. This simple step prevents dirt accumulation and maintains the aesthetic appeal of your tiles without risking damage to the grout color or tile finish. Avoid abrasive cleaners that can scratch your tiles or wear down the grout.
- Protect from Heat: Always place coasters or trivets under hot pots and appliances. Direct heat can cause cracking or discoloration, compromising the chic look you’ve worked so hard to achieve. This precaution helps maintain the integrity of your sealing options.
- Prompt Repairs: Address chips or cracks immediately. Quick repairs prevent further damage and are less noticeable, keeping your kitchen looking flawless. Regularly reapply grout as needed to ensure the grout color complements your tiles, keeping the space looking fresh and well-maintained.
Frequently Asked Questions
What Is the Latest Trend in Kitchen Tiles?
You’re seeing geometric patterns and matte finishes leading the trends in kitchen tiles. Subway patterns mixed with colorful grouts are in, adding a chic, detailed touch that’s both modern and aesthetically pleasing.
What Type of Tiles Make a Kitchen Look Bigger?
To make your kitchen look bigger, opt for tiles in light colors and glossy finishes. These choices reflect light beautifully, creating a spacious illusion that’s both trendy and aesthetically pleasing. They’re a game-changer!
What Should You Use to Fill Spaces Between Tiles?
To fill spaces between tiles, choose grout with a color that complements your tiles. Opt for waterproofing techniques like sealing to enhance durability. This selection not only adds to your space’s aesthetics but also guarantees longevity.
Where Is the Best Place to Start Tiling a Kitchen?
To guarantee a chic finish, start your tile preparation by focusing on layout planning. Choose the kitchen’s center or a visual focal point, like behind the stove, for a balanced and visually appealing result.
Conclusion
Now that you’ve mastered the art of DIY tiling, your kitchen radiates chic sophistication. Remember, the right tiles can transform your space, and with the essential tools and techniques under your belt, maintaining that elegant look is a breeze.
Keep up with the trends, pay attention to detail, and don’t shy away from minor repairs. Your kitchen isn’t just a cooking space; it’s a reflection of your style. Embrace the journey of continuous improvement and watch your kitchen come alive.


Leave a Reply