10 Best DIY Kitchen Flooring Installation Tips
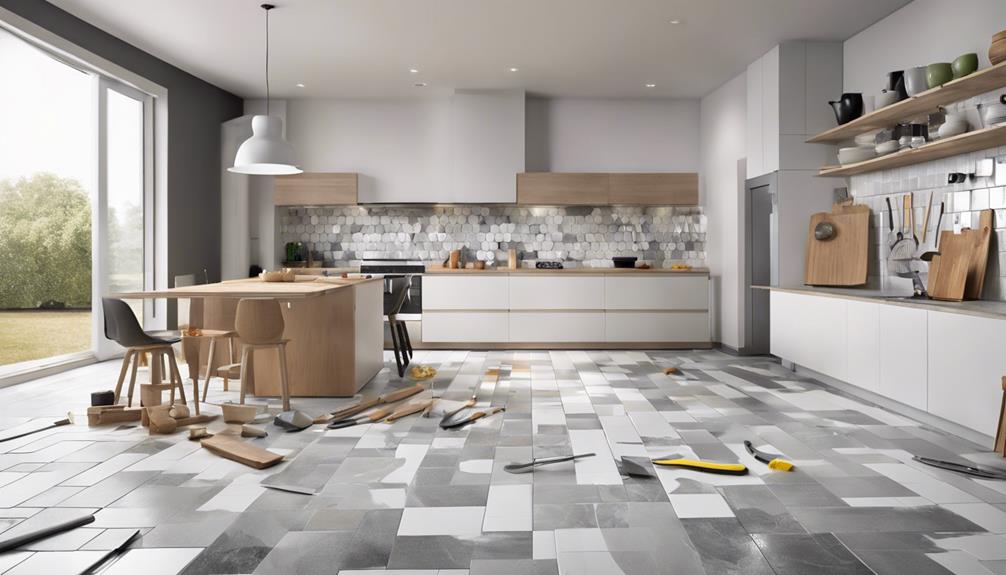
Transform your kitchen by starting with the right flooring! First, check your subfloor for imperfections, making sure it's ready for your new floor. Choose durable materials like Luxury Vinyl Tile (LVT) that complement your kitchen's decor while balancing quality and cost. Precisely measure and cut your materials, and use tools like a door jamb saw and T spacers to guarantee even spacing. Don't forget to acclimate your flooring and employ the correct adhesive technique for a seamless finish. Finally, follow through with regular maintenance to keep your floor looking great. These foundational tips will set you up for success, and there's even more to uncover as you proceed.
Key Takeaways
- Inspect and repair subfloor for cracks, holes, and ensure it is level for a smooth installation.
- Choose durable flooring material like Luxury Vinyl Tile (LVT) that matches your kitchen's decor and budget.
- Use the correct tools, such as a door jamb saw and 1/8 inch T spacers, for precise cuts and even tile spacing.
- Follow manufacturer's guidelines for adhesive application, ensuring even spreading and allowing it to set properly.
- Employ a rubber mallet to tighten seams and a sealant on grout lines for a polished and durable finish.
Preparing the Subfloor
Before you start installing your new kitchen flooring, it's essential to make sure that the subfloor is clean, dry, and perfectly level. Subfloor preparation isn't just a preliminary step; it's the foundation of your entire installation process. Any overlooked issues can lead to major problems down the line, from uneven surfaces that make your new floor look sloppy to severe moisture damage that could require a complete redo.
Firstly, inspect the subfloor meticulously for any cracks, holes, or uneven areas. Subfloor repair is vital to address these problems before moving forward. Fill in the gaps and sand down the high spots. If you're working with a concrete subfloor, don't skip on applying a moisture barrier. This extra layer is your best defense against moisture that can seep up and warp your flooring or foster mold growth.
Additionally, consider the benefits of adding an underlayment. This layer not only provides cushioning but also offers sound absorption and insulation, enhancing the overall feel and efficiency of your kitchen flooring. Remember, a well-prepared subfloor is key to the longevity and stability of your DIY installation. Taking the time to do it right ensures your kitchen flooring will look great and last for years to come.
Choosing the Right Materials
After preparing your subfloor meticulously, it's important to choose the right materials that'll complement your kitchen's aesthetics and withstand the rigors of daily use. The selection process involves careful consideration of both color coordination and budget considerations, ensuring you achieve a stunning look without breaking the bank.
Here are four key points to guide you:
- Luxury Vinyl Tile (LVT): Opt for LVT for its durability and ease of maintenance. It's waterproof and scratch-resistant, making it ideal for a busy kitchen environment.
- Groutable Vinyl Tile: For a more refined appearance, consider groutable vinyl tile. This option adds a polished and finished look, closely mimicking the aesthetics of natural stone or ceramic tiles.
- Color Choice: Select a color that harmonizes with your kitchen's decor. The right shade will create a cohesive atmosphere, enhancing the overall design of your space.
- Quality and Affordability: Materials like Stainmaster Casa Italia Tiles offer both quality and affordability. It's important to find a balance that doesn't compromise on the look or longevity of your flooring.
Utilizing Proper Tools
Having the appropriate tools at your disposal can greatly streamline the kitchen flooring installation process, promoting a professional and efficient job. For instance, a Door Jamb Saw is indispensable for precise cutting around door frames, making sure your luxury vinyl tiles fit perfectly without any awkward gaps. It's vital, however, to maintain your tools regularly to keep them in top working condition. Sharpening blades and cleaning after use not only prolongs their life but also guarantees tool safety.
When laying out your tiles, don't forget to use 1/8 inch T spacers. These small but mighty tools are key to maintaining even spacing between tiles, contributing to a uniform and professional finish. Remember, tool safety extends to even the seemingly innocuous. Always handle spacers carefully to avoid injury.
Applying grout can be messy, but with a Rubber Grout Float and a Plastic Scraper, you can spread grout smoothly and ensure a clean look. Afterward, a Big Sponge becomes your best friend for wiping away excess grout without damaging the tile surface. Keeping these tools clean after each use is essential for their longevity and effectiveness. Always prioritize tool maintenance and safety to guarantee your DIY project isn't only successful but also enjoyable.
Measuring and Cutting Accurately
To guarantee a flawless finish in your kitchen flooring project, it's essential to accurately measure the floor area and precisely cut your luxury vinyl tiles, thereby minimizing waste and achieving a professional look. Precision cutting and accurate measurements are foundational to this process. Here's how to achieve them:
- Accurate Measurements: Start by using a tape measure to accurately determine the size of your kitchen floor. This step is pivotal for calculating the amount of flooring material you'll need, ensuring you don't come up short or overpurchase.
- Precision Cutting: For areas around door frames and corners, a door jamb saw is indispensable. It allows for precise cuts that fit snugly, eliminating gaps and ensuring seamless fits.
- Double-Checking: Before making any cuts, always double-check your measurements. This practice prevents wasteful errors and ensures each luxury vinyl tile fits perfectly in its designated spot.
- Spacing Tiles: Employ 1/8 inch T spacers to accurately space your tiles. This not only aids in achieving a uniform look but also contributes to the overall professional appearance of your kitchen flooring.
Ensuring Tight Seams
Ensuring tight seams between your vinyl planks is vital for a professional-looking and durable kitchen floor installation. To achieve this, start by using a rubber mallet to gently but firmly tap the planks together. This method ensures that each plank fits snugly against its neighbor, minimizing gaps and creating a uniform surface.
Applying pressure along the seams helps to securely lock the planks in place. This step is essential to prevent any future shifting that might cause gaps. During this process, it's important to constantly check for visible gaps or unevenness. Any discrepancies can compromise the seamless finish you're aiming for.
Seam inspection plays a significant role in this phase. After locking the planks together, take a moment to closely examine each seam. If you notice any gaps, even the slightest, go back and apply additional pressure or use the rubber mallet again to correct it.
Remember to acclimate your flooring material in the installation area before starting. This precaution prevents the planks from expanding or contracting post-installation, which can affect seam tightness. Lastly, always adhere to the manufacturer's guidelines regarding seam sealing and tightness to ensure the integrity and longevity of your kitchen floor.
Aligning Patterns Correctly
Start by laying out your tiles on the floor in the pattern you desire before applying any adhesive, ensuring that the designs align perfectly at the seams for a seamless and professional appearance. Achieving this level of precision involves a few critical steps:
- Use Tile Spacers: These handy tools help maintain consistent spacing between tiles, which is essential for uniform pattern alignment. They play a significant role in achieving a cohesive look across your kitchen floor.
- Regularly Check Alignment: As you progress, take a step back and review your work. It's easier to correct any pattern misalignments before the adhesive sets, saving you from potential headaches later.
- Employ Pattern Alignment Techniques: Explore creative layouts and be methodical in your approach. Start from a focal point and work your way outwards, ensuring each tile aligns with its neighbors both in pattern and spacing.
- Troubleshooting Misaligned Tiles: If you spot an error, don't panic. Gently lift the affected tile, if possible, and realign it. For tiles that have already set, consider ways to incorporate the mistake into a feature or use partial tiles to correct the pattern flow.
Mastering pattern alignment techniques and efficiently troubleshooting misaligned tiles won't only enhance your kitchen's aesthetic appeal but also reflect a high level of craftsmanship in your DIY flooring project.
Adhesive Application Techniques
Now, let's focus on how you can master adhesive application techniques.
First, it's important you choose the right adhesive type as recommended by your flooring's manufacturer to guarantee a seamless installation.
Then, perfecting your spreading method will secure an even and generous application, setting the stage for durable and stable kitchen flooring.
Selecting Right Adhesive Type
Selecting the right adhesive is important for a successful DIY kitchen flooring installation, as it directly affects the speed and ease of your project. Understanding adhesive compatibility and subfloor preparation are key steps before diving into your flooring adventure. Here's what you need to remember:
- Choose a pressure-sensitive adhesive for peel and stick luxury vinyl tile flooring, which allows easier repositioning.
- Opt for a trowel-applied adhesive for traditional glue-down vinyl flooring for a more durable bond.
- Make sure the adhesive matches your subfloor material to prevent installation failures.
- Always adhere to the manufacturer's guidelines for adhesive application to secure the best results and longevity of your kitchen flooring.
Perfect Adhesive Spreading Method
To guarantee a flawless finish, you'll need to master the technique of evenly spreading adhesive using a notched trowel on your subfloor before laying down the flooring. Ensuring adhesive coverage across the entire surface is vital for preventing any gaps or unevenness.
You'll want to work in small sections. This approach keeps the adhesive from drying out before you have the chance to set the flooring in place. Always adhere to the manufacturer's instructions tailored to the specific type of adhesive you're using to achieve best results.
Navigating Around Obstacles
When installing DIY kitchen flooring, working around obstacles like cabinets and appliances demands precise measurements and careful planning to guarantee a seamless finish. Obstacle management and precision cutting are vital to make sure a seamless fit and a professional finish. Here's how you can navigate around obstacles effectively:
- Use a Door Jamb Saw: This tool is essential for making precise cuts around door frames and beneath cabinets. It allows the flooring to slide under smoothly, creating a polished look.
- Measure Twice, Cut Once: Before cutting, carefully measure the space around islands, cabinets, and appliances. This prevents unnecessary waste and ensures that each piece fits perfectly.
- Trim Corners and Door Frames: Adjust corners and door frames as necessary. This step ensures that the flooring lays flat and extends evenly across the entire kitchen floor.
- Employ Tile Spacers: Utilize 1/8 inch T spacers to maintain consistent spacing around obstacles. This small but vital detail contributes to a uniform and aesthetically pleasing finish.
Taking your time to work methodically around these obstacles won't only enhance the functionality of your kitchen but also its overall appearance.
Sealing and Finishing Touches
Once you've laid down your kitchen flooring, it's essential to apply a sealant to the grout lines to ward off stains and moisture.
Use a dedicated applicator or a small brush for an even coat, ensuring you don't miss any spots.
After applying, give it ample time to dry before conducting a final inspection to catch any areas you might've missed, guaranteeing your flooring's longevity and appearance.
Apply Sealant Evenly
Applying sealant evenly across grout lines is essential for protecting your kitchen flooring from stains and moisture. Proper grout maintenance and mastering sealing techniques are important steps in ensuring the longevity of your floor.
Follow these steps to apply sealant effectively:
- Choose the Right Tool: Use a small foam brush or sponge for precise application.
- Cover Completely: Make sure the sealant covers the entire surface of the grout to avoid unprotected areas.
- Dry Thoroughly: Allow the sealant to dry completely, adhering to the manufacturer's instructions.
- Regular Maintenance: Reapply sealant every 1-2 years to maintain protection.
Final Inspection Tips
Having mastered the application of sealant, it's important to conduct a final inspection to guarantee every detail of your kitchen flooring is perfected. Begin by ensuring your grout sealer application was thorough, using a sealer applicator or a small brush for even coverage without excess on the tiles.
Next, meticulously inspect the curing process, allowing the grout sealer to cure fully as recommended. This step is essential to prevent premature wear or damage. Look over the entire floor for any missed grout lines or spots needing touch-up sealing, ensuring complete protection against stains and moisture.
Maintenance and Care Tips
To maintain the beauty and integrity of your groutable vinyl tile flooring, it's essential to follow a few simple care and maintenance tips. These steps not only help in keeping your floor looking new but also extend its lifespan, guaranteeing you get the most out of your DIY installation effort. Here are key practices to adhere to:
- Grout cleaning and Furniture protection: Regularly sweep or vacuum the floor to prevent dirt and debris buildup. This simple routine maintains the cleanliness of your grout lines and vinyl surface. For added protection, place furniture protectors under heavy items like tables and chairs to prevent scratching or denting the vinyl flooring.
- Use a damp fiber cloth mop for easy cleaning. A gentle mop helps in removing surface dirt without damaging the grout or the vinyl tiles.
- Avoid harsh chemicals or abrasive cleaners that can damage the grout. Instead, for tough stains, opt for a mild detergent mixed with warm water.
- Spot clean using a solution of mild detergent and warm water for any spills or stains. This method ensures that you're not only addressing the dirt but doing so in a way that doesn't compromise the flooring's integrity.
Frequently Asked Questions
What Is the Easiest Flooring to Put in a Kitchen?
You're looking for the easiest kitchen flooring? Luxury vinyl tile (LVT) is your best bet, thanks to its durability and moisture resistance. It's DIY-friendly, offering a hassle-free installation with a professional finish.
What Is the Easiest Flooring to Install by Yourself?
For DIY, luxury vinyl tile (LVT) is the easiest flooring to install yourself. It requires minimal tools, making material comparison straightforward. Simply peel, stick, and trim for a quick, cost-effective kitchen makeover.
What Is the Cheapest Way to Redo a Kitchen Floor?
The cheapest way to redo your kitchen floor involves hunting for flooring deals and comparing materials. Opting for DIY luxury vinyl tiles can cut costs dramatically, especially if you snag a bargain and do the installation yourself.
Do You Put Vinyl Flooring Under Appliances?
Yes, you should put vinyl flooring under appliances, considering flooring expansion and moisture. It guarantees a cohesive look, guards against spills, and maintains durability. Just be sure to level appliances to prevent damage.
Conclusion
In wrapping up, remember to prep your subfloor meticulously, select materials that suit your kitchen's demands, and never skimp on the right tools.
Measure and cut with precision to guarantee seamless fits, and apply adhesive skillfully for a durable finish.
Tackle obstacles with patience, seal everything beautifully, and keep up with regular maintenance to preserve your floor's charm.
By following these tips, you'll create a kitchen floor that's not only stunning but also withstands the test of time.


Leave a Reply