Simple Guide: Effortless Kitchen Floor Cleaning Solutions
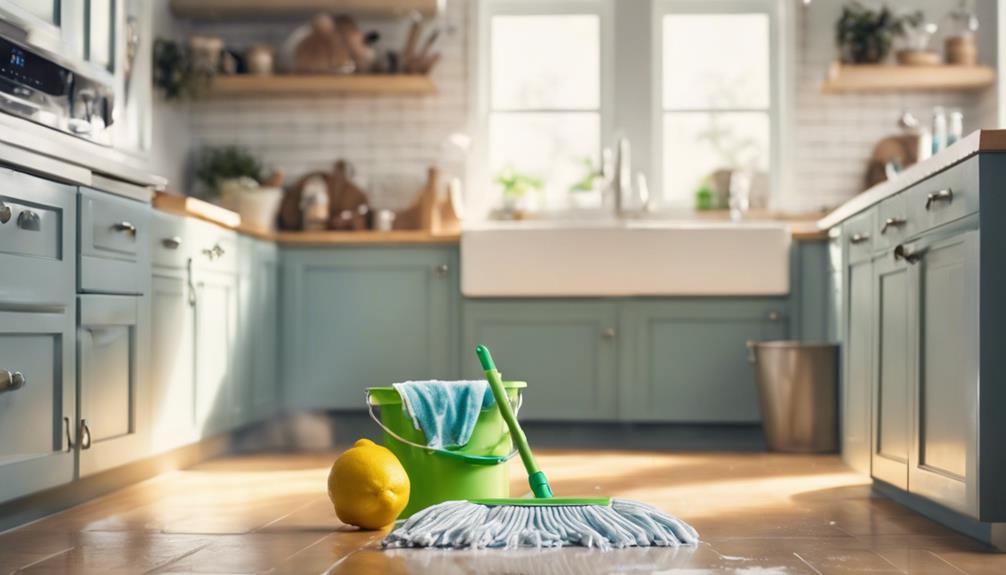
For an effortless kitchen floor cleaning solution, start by choosing the right tool: a soft bristle broom or a vacuum for hard floors. Sweep in one direction, focusing on high-traffic areas to collect more dirt. Before the main wash, pre-washing and spot cleaning with warm water and mild dish soap can tackle stubborn stains. Select a mop—preferably a flat microfiber type—for its efficiency, and pair it with a floor-specific cleaner to avoid damage. Important drying techniques, like using a dry mop pad or a fan, are essential to prevent water damage and preserve your floor’s finish. Implementing these strategies will make sure your kitchen floor remains pristine and inviting.
Key Takeaways
- Select the right tool: a soft bristle broom or vacuum for daily cleaning to prevent surface scratches.
- Pre-wash and spot clean using warm water and mild dish soap for stubborn stains, ensuring a more efficient mopping process.
- Use floor type-appropriate cleaners, like pH-neutral solutions for hardwood and non-abrasive ones for tiles, to avoid damage.
- Employ a flat microfiber mop with a wet pad for mopping, followed by quick drying techniques to prevent water damage and slips.
- Implement regular maintenance like immediate spill cleanup and using doormats to reduce dirt, maintaining floor hygiene and appearance.
Choosing the Right Flooring
When selecting the perfect flooring for your kitchen, it’s important to take into account factors like durability, water resistance, and ease of care to ensure you choose an option that combines practicality with style. Flooring maintenance is vital in keeping your kitchen looking its best. The best materials for kitchen floors include tile, hardwood, laminate, vinyl, and linoleum, each with its maintenance requirements and benefits.
Tile flooring stands out for its durability and excellent water resistance, making it a top choice for high-traffic areas like kitchens. It’s easy to clean and maintains its appearance over time. However, grout cleaning can be a meticulous task, requiring regular attention to prevent discoloration.
Hardwood floors, while adding warmth and character, require more maintenance to prevent water damage. They may need refinishing over time to restore their original luster but are unmatched in their natural beauty.
On the other hand, vinyl and laminate flooring offer a balance of affordability and ease of care. These materials replicate the look of natural wood or stone but are more forgiving when it comes to spills and accidents. They can be easily wiped clean, making them practical options for a busy kitchen.
Daily Sweeping Techniques
To maintain your kitchen’s cleanliness and prevent the build-up of dirt and grime, it’s crucial that you sweep the floor daily, utilizing either a broom or a vacuum designed for hard surfaces. This not only keeps your space looking tidy but also preserves the longevity of your flooring.
Here are some key points to guarantee you’re sweeping effectively:
- Choose the Right Tool: Opt for a broom with soft bristles or a vacuum with a setting for hard floors to avoid scratching your surface.
- Proper Technique Matters: Sweep in one direction to collect all the debris without scattering it around. For vacuums, use slow, steady passes.
- Focus on High-Traffic Areas: Pay extra attention to places that see more activity, as they’re likely to accumulate more dirt.
- Time-Saving Tips: Create a systematic pattern for sweeping your kitchen floor to ensure no spots are missed and to make the process quicker.
Effective Pre-Wash Tips
Before you tackle the main cleaning, it’s essential to prepare your kitchen floor with a thorough pre-wash. Start by sweeping or vacuuming daily to remove loose debris, ensuring the surface is ready for more intensive cleaning.
Spot cleaning techniques, using warm water and mild dish soap, effectively target those stubborn stains and greasy spots, setting the stage for a more efficient mopping process.
Sweep or Vacuum Daily
Maintaining the pristine condition of your kitchen floor starts with the daily habit of sweeping or vacuuming to remove dirt, crumbs, and debris that could otherwise scratch or damage the surface. Daily maintenance and quick cleaning are essential steps in your routine that enhance the longevity and appearance of your floors.
Consider these practices:
- Sweep gently but thoroughly to catch every particle.
- Choose a vacuum designed for hard floors to prevent scratches.
- Focus on high-traffic areas where dirt accumulates quickly.
- Use a soft brush attachment when vacuuming to protect your floor’s finish.
Spot Cleaning Techniques
After sweeping or vacuuming your kitchen floor daily, you’ll still encounter spots and spills that require your immediate attention for spotless results.
Spot cleaning is your go-to method for tackling these quick spills and emergency stains, ensuring they don’t set in. Start by pre-washing areas with sticky residue using a mild dish soap solution. This step helps loosen tough dirt and grime effectively.
For a deeper clean, mix warm water with a small amount of floor cleaner tailored to your floor type, preventing damage while ensuring the best results. This preparation is essential for maintaining a clean and hygienic kitchen floor between regular cleaning sessions, making spot cleaning an essential, methodical approach to tackling those unavoidable messes.
Selecting Appropriate Cleaners
Choosing the right cleaner for your kitchen floor demands understanding the specific needs of your floor type to guarantee its longevity and appearance. Cleaner selection and floor protection are key considerations that can’t be overlooked. Here’s a quick guide to help you navigate the options:
- For hardwood floors, opt for pH-neutral cleaners that won’t damage the finish or integrity of the wood.
- Ceramic tiles benefit from non-abrasive cleaners, avoiding any potential scratches while keeping the surface spotless.
- If you have natural stone floors, a specialized stone cleaner is essential to prevent etching and maintain the shine without dulling the surface.
- Vinyl floors are best maintained with a simple mixture of water and mild dish soap, providing an effective yet gentle cleaning solution.
- Lastly, laminate floors require a laminate-specific cleaner to avoid warping and to ensure they retain their pristine appearance over time.
Selecting the appropriate cleaner not only safeguards your kitchen floor remains in top condition but also extends its life, protecting your investment. Always refer to the manufacturer’s recommendations to avoid any potential mishaps.
Mopping Strategies
To guarantee your kitchen floors sparkle without damage, it’s essential to master the art of mopping, beginning with selecting the right mop and technique tailored to your floor type. Opting for a flat microfiber mop with a wet pad ensures effective cleaning without excess moisture, which is particularly important for wood and laminate floors that are susceptible to water damage. For these delicate surfaces, dry mopping methods are your best bet to maintain their integrity and appearance.
When it comes to applying cleaning solutions, spraying directly onto the floor allows for targeted cleaning, especially in high-traffic or particularly dirty areas. This method not only ensures efficient cleaning but also contributes to water-saving mopping methods by avoiding unnecessary waste.
Ensuring the floor is completely dry post-mopping is a vital step. Quick drying tips include using a dry mop pad to absorb excess moisture or employing a fan or air mover in the space. This not only protects your floors but also makes them safe to walk on sooner.
Here’s a breakdown to enhance your mopping strategy:
| Method | Benefit | Floor Type |
|---|---|---|
| Dry Mopping | Prevents water damage | Wood/Laminate |
| Spray Cleaning | Targeted, efficient cleaning | All Types |
| Quick Drying | Maintains floor integrity, safety | All Types |
The Figure-Eight Motion
Mastering the figure-eight motion while mopping can greatly enhance the even distribution of cleaning solution across your kitchen floor. This method doesn’t just improve mopping efficiency; it revolutionizes your entire approach to tackling dirt buildup and stubborn stains. By adopting this technique, you guarantee that every inch of your floor receives the attention it deserves, leaving no spot untreated.
- Even Distribution: Utilizing the figure-eight pattern helps spread the cleaning solution uniformly, avoiding the problem of excess water pooling.
- Increased Coverage: The overlapping paths of the figure-eight allow you to cover more ground with each pass, making your cleaning patterns more effective.
- Stain Removal: This motion is particularly adept at addressing and removing tough stains, offering a focused approach that standard mopping might miss.
- Prevents Dirt Buildup: Regular use of the figure-eight technique in your mopping routine prevents the accumulation of dirt, contributing to a cleaner, more hygienic kitchen environment.
Drying Your Floor Properly
After you’ve mopped, it’s crucial to dry your floor quickly to prevent damage.
Using a clean, dry pad or microfiber cloth, methodically absorb the moisture, especially in areas where foot traffic is common.
This step not only safeguards your floor’s integrity but also helps avoid slips and maintains its pristine look.
Importance of Quick Drying
Ensuring your kitchen floor is promptly dried after cleaning is essential to prevent water damage and maintain its integrity. Quick drying isn’t just about speed; it’s a critical step in hygiene maintenance. By ensuring your floor dries quickly, you’re taking proactive steps to:
- Prevent mold growth and the warping of wood or laminate floors, which can occur due to excess moisture.
- Reduce the risk of bacterial growth on damp surfaces, keeping your kitchen clean and hygienic.
- Avoid the hazards of slippery tile floors, minimizing the risk of slips and falls.
- Preserve the floor’s finish and its longevity, ensuring it continues to look good and function well for years to come.
Effective Drying Techniques
To effectively protect your kitchen floor from water damage and maintain its aesthetic appeal, it’s essential to employ proper drying techniques immediately after cleaning. Using a clean, dry microfiber cloth or absorbent towels helps soak up any leftover moisture, guaranteeing a streak-free finish. It’s vital, especially on tile or laminate, to fully dry the floor to prevent slips and falls. Different flooring materials may need specific drying methods to avoid warping or discoloration, making air drying or gentle wiping recommended for certain types. Make sure all areas, especially high-traffic ones, are completely dry to keep your kitchen clean and safe.
| Method | Best For | Tips |
|---|---|---|
| Air drying | All floor types | Ensure good ventilation |
| Absorbent towels | Quick moisture removal | Use clean, dry microfiber cloths |
| Specific material technique | Sensitive floors | Follow manufacturer’s guidelines |
Preventing Water Damage
Understanding the importance of effective drying techniques, let’s now focus on how properly drying your kitchen floor can prevent water damage, a vital step in maintaining your flooring’s longevity and aesthetic.
- Water damage prevention, floor protection: Use a clean, dry mop pad or microfiber cloth to make sure no moisture is left behind, safeguarding against mold, mildew, and warping.
- Moisture control, floor longevity: Thorough drying maintains the floor’s condition and appearance for years.
Follow specific drying instructions for different flooring types to avoid damage.
Regularly check for signs of moisture or water damage to address issues promptly.
Adhering to these steps not only enhances cleanliness and hygiene but also plays an essential role in preserving your kitchen floor’s integrity and beauty.
Maintenance and Care
Maintaining your kitchen floor’s appearance and longevity requires regular care, including sweeping or vacuuming to eliminate dirt and debris that could scratch the surface. For floor protection and easy maintenance, adopting a few simple habits can make a significant difference.
| Maintenance Task | Purpose & Benefit |
|---|---|
| Sweep or vacuum regularly | Prevents surface scratches by removing dirt and debris. |
| Wipe up spills immediately | Avoids stains and sticky residues, keeping the floor pristine. |
| Use doormats at entrances | Reduces dirt and moisture, protecting the floor’s cleanliness. |
| Place felt pads under furniture | Prevents scratches, ensuring the floor remains undamaged. |
Incorporating these practices into your routine guarantees your kitchen floor remains in top condition. Not only does this routine help in safeguarding the floor’s surface, but it also extends its lifespan. Remember, avoiding harsh chemicals and abrasive cleaners is key; these can strip the finish or damage the floor over time. Opt for gentle, manufacturer-recommended products instead. Through consistent care, your kitchen floor will continue to look its best, reflecting your dedication to its maintenance and care.
Stain Removal Solutions
After establishing a routine for keeping your kitchen floor in pristine condition, let’s explore effective solutions for tackling stubborn stains that might still find their way onto your surfaces. Stain removal hacks and quick fixes can be lifesavers in maintaining the cleanliness of your kitchen.
Here’s how you can address those tough spots without much fuss:
- Make a paste with baking soda and water to gently scrub away tough stains. This simple mixture lifts stains without scratching your floor.
- For stubborn grease stains, mix equal parts water and vinegar. This solution cuts through the grease, leaving your floor spotless.
- Lemon juice not only removes stains but also leaves your kitchen smelling fresh. It’s perfect for a natural, effective clean.
- Club soda works wonders on spills and stains. Just pour it over the affected area and wipe. It lifts the stain without leaving any residue or damaging the surface.
These methods offer both quick fixes and deep cleaning options for various types of stains on your kitchen floor. With these tips, you’ll keep your kitchen looking its best, ready to tackle any spills or stains that come your way.
Eco-Friendly Cleaning Options
Why not turn to nature’s cupboard for eco-friendly cleaning options that are both effective and gentle on your kitchen floors? Utilizing natural ingredients like vinegar, baking soda, and lemon juice, you can tackle stains, grease, and odors without resorting to harsh chemicals. These green cleaning methods not only safeguard the environment but also guarantee a safe space for your family.
Vinegar, a potent natural disinfectant, can be easily diluted with water to create a simple yet powerful mopping solution. Its acidic nature helps break down dirt and grime, leaving your floors sparkling clean. For those stubborn areas, baking soda comes to the rescue. Its abrasive texture aids in scrubbing away tough stains while neutralizing unpleasant odors, especially in high-traffic zones of your kitchen.
Don’t overlook the power of lemon juice. This citrus wonder not only leaves behind an invigorating scent but also boasts antibacterial properties, making it an excellent choice for sanitizing your floors. By incorporating these eco-friendly cleaning options into your routine, you’re choosing a healthier, greener way to maintain the cleanliness and hygiene of your kitchen floors.
Cleaning Tools Essentials
As you prepare to tackle kitchen floor cleaning, selecting the right tools is essential.
You’ll need to choose brushes and mops that not only suit your floor type but also support eco-friendly cleaning practices.
Understanding the nuances of each tool, from their material to their application, will guarantee you achieve a spotless finish efficiently.
Essential Cleaning Brushes
Selecting the right cleaning brushes is essential for effectively tackling tough stains and grime on your kitchen floor. Understanding brush maintenance and the various cleaning brush types enhances your approach to kitchen cleanliness.
Here’s a quick guide:
- Scrub Brushes: Ideal for removing stubborn stains and grime.
- Grout Brushes: Specifically designed to clean grout lines between tiles efficiently.
- Griddle Brushes: Best for cleaning griddles and flat surfaces, ensuring no residue is left behind.
- Tile and Grout Cleaning Brushes: Specialized tools for deep cleaning tile floors, reaching into crevices for a thorough clean.
Investing in quality brushes and understanding their specific uses will keep your kitchen floors looking pristine.
Mop Selection Guide
Choosing the right mop is a critical step in maintaining the cleanliness and appearance of your kitchen floors, requiring careful consideration of features like style, material, and compatibility with your flooring type.
For top cleaning efficiency, opt for a flat-style mop equipped with a microfiber pad. These pads excel in capturing dirt and are ideal for kitchen environments. A mop featuring a spray mechanism can greatly aid in addressing tough spots, ensuring a thorough clean without excessive effort.
Prioritize mop maintenance by selecting models with reusable and washable pads, which not only enhance cleaning performance but also offer cost savings over time. Additionally, an adjustable handle can significantly increase comfort, making the cleaning process more manageable.
Eco-Friendly Cleaning Agents
Incorporating eco-friendly cleaning agents into your routine isn’t only a step towards healthier living but also a stride in protecting our environment. Opting for green cleaning products and natural floor cleaners guarantees your kitchen remains spotless without compromising your health or the planet.
- Microfiber cloths: Ideal for trapping dirt and reducing the need for chemical cleaners.
- Natural sponges: Gentle on surfaces while effectively scrubbing away grime.
- Plant-based detergents: Offer a non-toxic solution for tough stains.
- Vinegar, baking soda, and lemon juice: A powerful trio that naturally disinfects and cleans.
Preventing Floor Damage
To safeguard your kitchen floor from unnecessary damage, it’s crucial to adopt preventative measures that guarantee its longevity and appearance. Implementing floor protection and damage prevention strategies ensures that your kitchen remains not only functional but also aesthetically pleasing.
Here’s a detailed plan to safeguard your floor:
| Preventative Measure | How It Helps |
|---|---|
| Use furniture pads | Prevents scratches and damage from chairs and tables. |
| Place rugs or mats | Protects areas of high traffic from wear and tear. |
| Clean up spills immediately | Prevents stains and material damage. |
| Avoid harsh chemicals | Preserves the floor’s finish by preventing stripping or scratching. |
Scheduling Regular Cleanings
Establishing a regular cleaning schedule is essential for maintaining your kitchen floor’s hygiene and appearance, with weekly sessions recommended to tackle dirt and grime effectively. By integrating time management and adjusting cleaning frequency based on your kitchen’s needs, you can guarantee your floor remains in pristine condition. Here’s how:
- Choose a specific day and time each week for cleaning: This helps in creating a routine, making it easier to remember and stick to your cleaning schedule.
- Adjust the frequency for high-traffic areas: Some parts of your kitchen may need more attention. Don’t hesitate to clean these spots more often.
- Plan your cleaning around less busy times: Find a time when the kitchen is least used. This makes your cleaning process smoother and more efficient.
- Keep cleaning supplies ready and accessible: Having everything you need in one place saves time and encourages you to stick to the schedule.
Implementing a cleaning schedule not only makes the task less challenging but also ensures consistent maintenance. This approach not only prolongs the life of your kitchen floor but also keeps it looking its best, reflecting a well-kept home.
Frequently Asked Questions
What Is the Easiest Way to Clean a Kitchen Floor?
To easily clean your kitchen floor, start by using robot vacuums to sweep up debris. Then, apply effective mopping techniques with a microfiber mop and the right cleaner, ensuring it’s completely dry afterwards for best results.
What Is the Best Easy to Clean Kitchen Flooring?
Considering flooring materials and durability considerations, the best easy-to-clean kitchen flooring is porcelain tile. It’s highly resistant to water, stains, and odors, ensuring a low-maintenance and durable solution for your kitchen’s demands.
What Is the Best Homemade Floor Cleaning Solution?
You’ll find the best homemade floor cleaning solution combines vinegar and water. This mixture’s ratio of 1:1 maximizes ingredient benefits, efficiently cutting through grease and leaving floors sparkling. It’s eco-friendly and highly effective.
What Household Items Can You Use to Clean Kitchen Floors?
You can use household items like vinegar for its versatility and baking soda for its benefits in cleaning kitchen floors. Mix these with water or lemon juice to effectively lift dirt and leave a fresh scent.
Conclusion
To conclude, maintaining a pristine kitchen floor doesn’t have to be overwhelming. Start by choosing the right flooring and adopting daily sweeping habits. Pre-wash techniques and the selection of appropriate cleaners are crucial. Opt for effective mopping strategies and don’t overlook eco-friendly options.
Equipping yourself with essential cleaning tools, preventing floor damage, and sticking to a regular cleaning schedule are key. By following these methodical steps, you’ll guarantee your kitchen floor remains spotless with minimal effort. Remember, consistency is your ally.


Leave a Reply