Replacing Your Outdoor Light Fixture in 7 Simple Steps
Replacing your outdoor light fixture requires following these seven streamlined steps. First, gather all necessary tools and materials, prioritizing safety items like insulated tools and safety glasses. Next, turn off the power by switching off the correct circuit breaker and confirming with a voltage tester. Remove the old fixture, then install the new crossbar using the provided screws. Connect the wiring, ensuring wire colors match and connections are secure. Mount the new fixture to the crossbar and finally, seal the fixture with silicone caulk to prevent water damage. For a deeper understanding of each step, explore further instructions.
Key Takeaways
- Turn off the circuit breaker and verify power is off with a voltage tester.
- Remove the old fixture and install the new crossbar securely.
- Match and connect the wires using wire connectors and electrical tape.
- Mount the new fixture to the crossbar with the appropriate screws.
- Seal around the base of the fixture with silicone caulk to ensure weatherproofing.
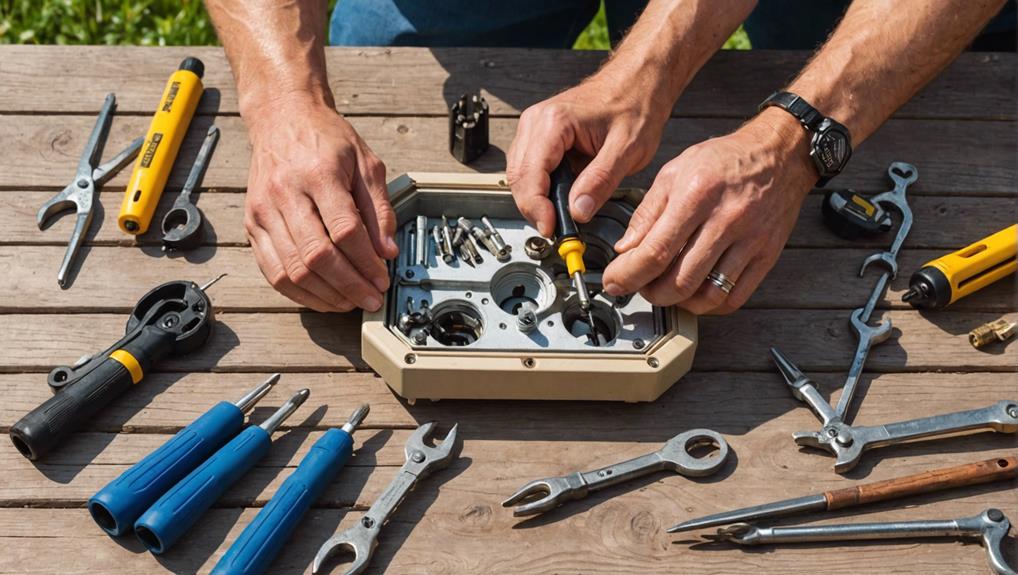
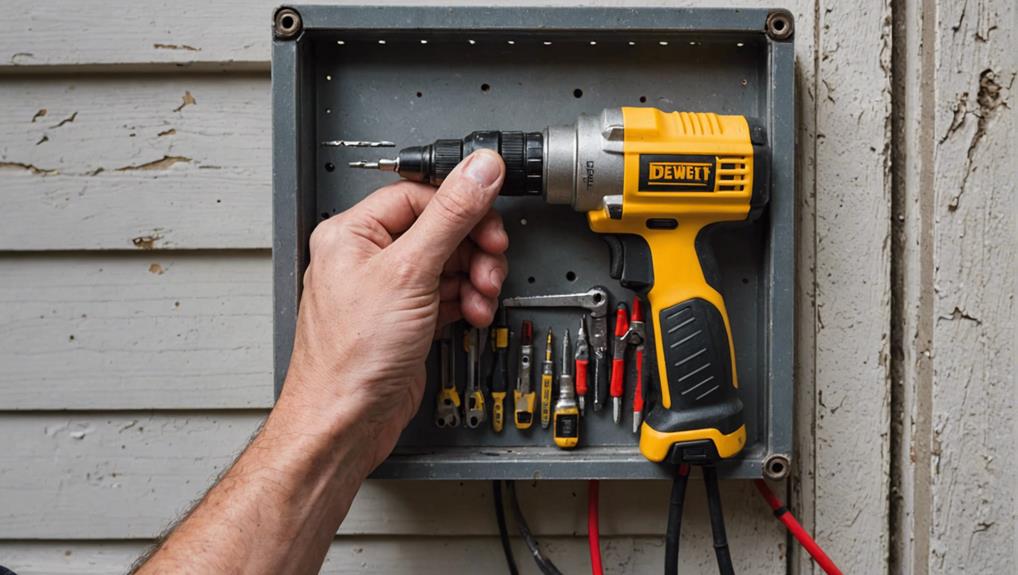
Gather Tools and Materials

To replace your outdoor light fixture efficiently, gather essential tools such as a screwdriver, pliers, electric drill, voltage tester, and safety glasses. Start by making sure you have all necessary materials, including the new outdoor light fixture and electrical tape. Having these items ready beforehand will streamline the process and prevent unnecessary interruptions.
When working with electrical fixtures, it’s important to follow safety precautions. Using insulated tools is necessary to reduce the risk of electrical shock. Safety glasses protect your eyes from debris or accidental sparks during installation. A voltage tester is essential to confirm that the power is indeed off before you begin any work.
Proper lighting is also crucial. Since you’re replacing an outdoor fixture, it’s often best to work during daylight for maximum visibility. However, if that’s not possible, use a reliable flashlight to ensure you see clearly. Good visibility helps you identify wiring connections and secure components correctly, ensuring a safe and accurate installation.
With the right tools, materials, and safety precautions in place, you’ll be well-prepared to replace your outdoor light fixture effectively and safely.
Turn Off the Power
First, locate the circuit breaker that controls your outdoor light fixture and switch it off.
Then, use a voltage tester to verify that the power is completely off.
This guarantees a safe environment before you start the replacement process.
Locate Circuit Breaker
Begin by locating the circuit breaker panel in your home to turn off the power supply to the outdoor light fixture. This is a critical step for ensuring electrical safety and preventing potential hazards. Circuit breaker panels are typically found in basements, garages, or utility rooms.
Once you’ve identified the panel, open it and look for the breaker that controls the power source for your outdoor lighting. Each breaker should be labeled to indicate which circuit it controls. If your panel isn’t labeled, you may need to switch off the main breaker or use a process of elimination to identify the correct one.
Turning off the power source at the breaker will prevent electrical shocks and damage during the replacement process. Flip the breaker switch to the ‘off’ position. Taking this precautionary measure is essential for safe handling of any electrical components.
Always double-check that the power is indeed off before proceeding further. This may involve a quick test with the light switch or using a voltage tester. Remember, electrical safety can’t be overstated when working with home wiring and fixtures.
Verify Power Off
Double-check the power is off by using a voltage detector on the wires connected to the outdoor light fixture. This step is crucial to guarantee your safety. Start by turning off the power at the main electrical panel. Locate the breaker that controls the outdoor light fixture and switch it to the off position. If you haven’t labeled your circuits yet, now is a good time to do so for easier identification in the future.
Next, grab your voltage detector and approach the light fixture. Carefully remove the fixture cover to expose the wiring. Hold the voltage detector close to each wire to verify there’s no electrical current. The absence of any signal confirms the power is off. This double-checking process is essential to avoid any electrical mishaps.
Safety precautions are paramount when handling electrical components. Always wear insulated gloves and ensure you’re standing on a dry surface. Additionally, having someone present can provide an extra layer of security. They can assist you if you encounter any issues or require immediate help.
Once you’ve confirmed the power is off and checked the connections, you can proceed with the fixture replacement confidently.
Use Voltage Tester
Confirm the power is off by using a voltage tester on the exposed wires of the outdoor light fixture. This important step ensures your safety by verifying there’s no electricity flow before you proceed with any work.
Here are some voltage tester precautions and usage tips to keep in mind:
- Turn off the power at the main electrical panel. Simply flipping the light switch isn’t enough; you need to cut off the power supply from the circuit breaker.
- Use a reliable voltage tester. Before testing, ensure your voltage tester is working correctly by testing it on a known live wire.
- Test all wires. Even if you think you’ve turned off the power, test each exposed wire in the fixture to guarantee no electricity is present.
- Keep safety in mind. Have someone present as an additional safety measure and use insulated tools to prevent accidental shocks.
Remove the Old Fixture
Before you start, turn off the power at the main electrical panel to guarantee safety during the removal process. It’s essential to follow safety precautions to prevent electrical shocks. After switching off the power, use a voltage detector to confirm there’s no electricity flowing to the old fixture. This step is important; never skip it.
Next, carefully unscrew the screws that attach the old light fixture to the wall or ceiling. Keep a firm grip on the fixture to prevent it from falling and causing damage. Once the screws are removed, gently lower the fixture and expose the ceiling wires.
Now, disconnect the wires by unscrewing the wire nuts that join the fixture’s wires to the ceiling wires. Be sure to note which wires connect where, as this information will be crucial later.
With the fixture fully detached, take care in handling and disposing of the old fixture. If it’s in good condition, consider donating it to a local reuse center. If it’s broken or obsolete, follow your local regulations for proper disposal.
Install the New Crossbar
First, align the mounting screws with the holes on the new crossbar to guarantee a secure fit.
Next, firmly secure the crossbar by tightening the screws into the fixture holes.
Align the Mounting Screws
To guarantee a secure installation, align the mounting screws on the new crossbar with the pre-drilled holes in the outdoor light fixture. Begin by checking screw alignment to make sure the screws fit perfectly with the fixture holes. This step is vital for stability and safety. Measure for fit by holding the crossbar up to the mounting bracket and confirming the screws align with the holes.
Here’s a precise process to follow:
- Check screw alignment: Verify the screws on the crossbar match the fixture’s pre-drilled holes.
- Measure for fit: Hold the crossbar up to the mounting bracket to ensure the screws align correctly.
- Adjust if necessary: If alignment isn’t perfect, make slight adjustments to either the crossbar or the fixture to achieve a snug fit.
- Attach crossbar: Secure the crossbar to the fixture holes using the appropriate screws.
This alignment process is essential for a secure and stable mounting. By making sure the screws are correctly aligned and fit properly, you prevent potential issues such as wobbling or detachment.
Before proceeding with electrical connections, double-check the crossbar is firmly in place to guarantee the safety and longevity of your outdoor light fixture.
Secure the Crossbar Properly
Confirm that the new crossbar is compatible with your existing fixture and securely attach it to the wall or ceiling. This guarantees mounting stability and prevents potential hazards.
Start by removing any old sealant from the mounting area to avoid issues with crossbar alignment. A clean surface is essential for a secure attachment.
Next, follow the manufacturer’s instructions precisely. Begin by securing the vertical crossbar to the fixture holes using the provided screws. Make sure the screws are tight, but be cautious not to overtighten, which could strip the threads. Properly aligned screws are crucial for the overall stability of the installation.
After securing the vertical crossbar, attach the horizontal crossbar. Use the screws designed to hold the light fixture up. Double-check that both the vertical and horizontal crossbars are level and aligned correctly. Misalignment at this stage can lead to future complications with the light fixture’s positioning and functionality.
Proper crossbar alignment not only ensures the fixture hangs correctly but also contributes significantly to the mounting stability. By meticulously following these steps, you’ll have a secure foundation for your new outdoor light fixture, minimizing the risk of future adjustments or repairs.
Adjust for Fixture Fit
Guarantee the new crossbar fits snugly by carefully aligning it with the existing fixture holes and securing it with the provided screws. Start by checking the condition of the existing crossbar to confirm crossbar compatibility with your new light fixture. If the old crossbar shows signs of wear or doesn’t match, you’ll need to remove it. Unscrew any screws holding it in place and make sure there’s no leftover waterproof sealant on the wall. Clean the area thoroughly to prepare for the new crossbar installation.
Follow these steps to install your new crossbar:
- Align Crossbar: Position the new crossbar over the fixture holes. Make sure it aligns perfectly to avoid any misalignment issues.
- Secure Screws: Place the provided screws through the vertical crossbar into the fixture holes. Tighten them to guarantee fixture stability.
- Apply Sealant: For wall protection, apply a suitable waterproof sealant around the crossbar to prevent water ingress.
- Attach Fixture: Finally, attach the screws that hold the new light fixture to the horizontal crossbar. This step ensures the fixture is firmly in place and stable.
Connect the Wires
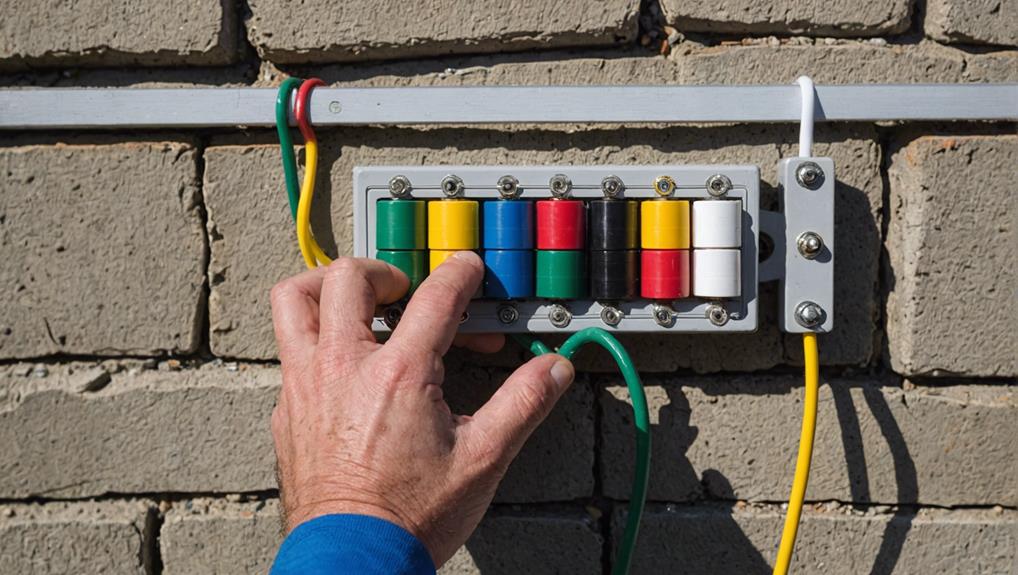
First, make sure you’re accurately matching the wire colors from the new light fixture to those in the wall, such as green/yellow, brown, and blue. Proper wiring color matching is critical to guarantee a safe and functional connection.
Next, employ wire connection techniques to twist the exposed copper ends of the wires together securely. This will guarantee maximum contact and prevent any loose connections.
| Wire Color | Light Fixture | Wall/Junction Box |
|---|---|---|
| Green/Yellow | Ground Wire | Ground Wire |
| Brown | Live Wire | Live Wire |
| Blue | Neutral Wire | Neutral Wire |
After twisting, use wire connectors to cap each connection. This adds an extra layer of security. Additionally, wrap each connection with electrical tape to further prevent any loosening or exposure over time.
Don’t forget to connect the ground wire from the light fixture to the appropriate grounding wire in the wall or junction box. This is often the green or bare copper wire.
Once all connections are made, double-check that all wire connections are tight and secure before turning the power back on. Properly securing the wires guarantees the longevity and safety of your new light fixture.
Mount the New Fixture
How do you guarantee a secure and level installation when mounting your new light fixture? Begin by making sure you have a sturdy ladder to access the mounting area safely.
Once you’re up there, check that the new fixture is compatible with the existing crossbar. This is important for both fixture positioning and the integrity of the electrical connections.
Follow these steps to mount the fixture precisely:
- Attach the Fixture: Use the appropriate screws to attach the new fixture to the crossbar. Ensure the screws are tightened securely but not overly tight to avoid damaging the fixture.
- Check Alignment: Before fully securing the fixture, verify that it’s properly aligned and level. Use a bubble level to check for precision.
- Secure the Fixture: Once aligned, finish tightening the screws to secure the fixture in place.
- Weatherproofing: It’s essential to add a sealant around the fixture to prevent water seepage. This step is important for long-term weatherproofing.
Seal the Fixture
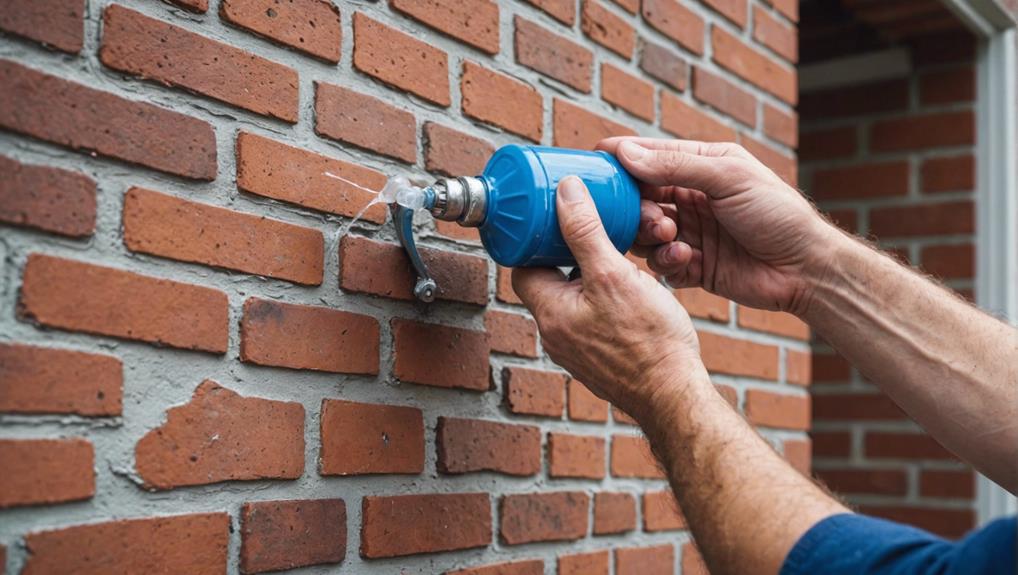
After securely mounting the new fixture, it’s time to seal it with silicone caulk to prevent water intrusion and protect the electrical connections.
Start by applying a generous amount of caulk around the base of the fixture where it meets the wall. This waterproofing technique ensures no water can seep into the electrical components, a critical step for maintaining electrical safety precautions.
Check for any gaps or openings where water could penetrate. Even small gaps can allow moisture to enter, compromising the fixture’s integrity and safety. Use additional caulk as needed to fill these gaps. Your goal is to create a watertight seal that adheres firmly to both the fixture and the wall surface.
Proper sealing methods not only protect the fixture from moisture but also prolong its lifespan. Weatherproofing strategies like this are essential for outdoor installations exposed to the elements.
After applying the caulk, allow it to dry completely. This drying period is essential for ensuring a secure and effective seal.
Don’t rush this step. Allowing the caulk to cure fully before turning on the power will maximize the effectiveness of your weatherproofing efforts and guarantee the longevity of your newly installed outdoor light fixture.
Frequently Asked Questions
How to Replace Outdoor Lighting Fixtures?
When replacing outdoor lighting fixtures, first turn off the power. Familiarize yourself with the types available. Use wiring basics: match wire colors and secure connections. Confirm the fixture is tightly mounted, sealed, and allows proper drainage.
Can I Replace an Outside Light Myself?
Yes, you can replace an outside light yourself. Focus on electrical safety: turn off power at the main panel. Use proper DIY tools, check crossbar condition, and securely connect wires. Confirm the fixture is level and sealed.
How Do You Replace a Ceiling Light Fixture in 8 Simple Steps?
First, wear safety gear and turn off power. Remove the old fixture and disconnect the wires. Attach the new bracket, connect the wiring, and secure the new fixture. Finally, insert light bulbs and test the installation.
How to Change a Light Fixture in the Uk?
To change a light fixture in the UK, hire a qualified electrician. UK regulations mandate certified professionals for safety. Consider weather conditions for outdoor fixtures to prevent electrical hazards. Verify compliance with Part P Building Regulations.
Conclusion
By following these seven straightforward steps, you’ll efficiently replace your outdoor light fixture.
Gather all necessary tools and materials before you start.
Always make sure the power is off to avoid any electrical hazards.
Carefully remove the old fixture, install the new crossbar, and connect the wires correctly.
Securely mount the new fixture and seal it properly to protect against weather.
With precision and attention to detail, you’ll enhance your outdoor lighting safely and effectively.

10 Essential Steps to Care for Outdoor Areca Palms
Discover the 10 essential steps to care for outdoor Areca palms and ensure their lush growth and hea

10 Low-Maintenance Outdoor Succulents for Effortless Landscaping
Know the top 10 low-maintenance outdoor succulents for effortless landscaping and discover which one
Transform Your Patio With These 7 Outdoor Awning Ideas
Improve your outdoor space with these 7 incredible patio awning ideas that blend style and functiona
Leave a Reply