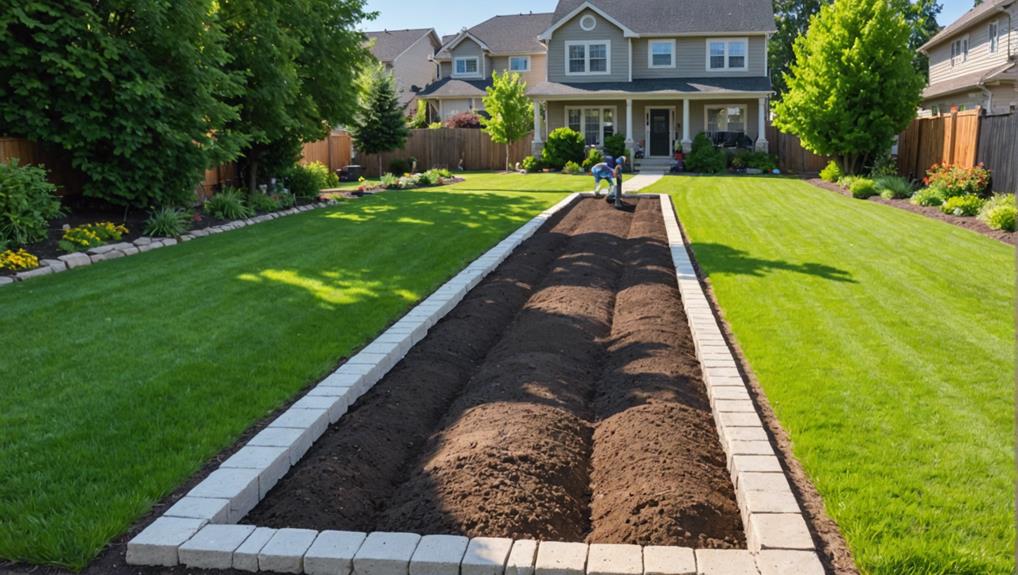
Installing Effective Outdoor Drainage Systems
Effective installation of outdoor drainage systems begins with evaluating drainage needs by identifying poor drainage areas, observing water pooling, and conducting soil percolation tests. Evaluate local rainfall patterns, soil type, and landscape gradient to select between options like French drains, linear drains, or dry wells. Installation involves precise excavation, use of perforated pipes, gravel, and geotextile fabric to guarantee regulatory compliance and longevity. Regular maintenance, such as inspecting for clogs and debris, is essential for peak performance. Appropriate material selection and following best practices are vital for effectiveness. For a detailed guide, further insights are indispensable.
Key Takeaways
- Assess drainage needs: Identify areas with water pooling and consider soil composition to determine appropriate drainage solutions.
- Choose appropriate system: Compare French drains, linear channels, and dry wells based on rainfall, soil type, and landscape gradient.
- Proper installation: Follow step-by-step guides for installing French drains, linear channels, or dry wells to ensure effective water diversion.
- Select materials wisely: Opt for concrete or plastic channels based on durability, load capacity, and environmental conditions.
- Regular maintenance: Conduct inspections and clear debris to prevent blockages and ensure the longevity of the drainage system.
Assessing Your Drainage Needs
Evaluating your drainage needs begins with accurately identifying areas of poor drainage, such as locations where surface puddling occurs after rainfall. This initial evaluation involves observing the landscape to pinpoint water pooling and determine potential property damage risks. Key factors to take into account include soil composition and existing landscaping elements, as these can greatly influence water absorption and flow. Conducting a soil percolation test, which involves pouring water into a pre-dug hole, is essential for understanding the soil's ability to drain water effectively.
Furthermore, it is crucial to account for additional contributors to poor drainage, such as natural springs or broken pipes. Identifying these factors early can prevent costly property damage and ensure the longevity of your outdoor space. Evaluating whether standard cultivation techniques, like soil aeration or the incorporation of organic matter, can alleviate minor drainage issues is also an important step. This thorough investigative process ensures that any implemented solutions are both effective and compliant with relevant regulatory standards.
Properly evaluating your drainage needs lays the foundation for selecting the most appropriate drainage system, tailored to your specific environmental conditions and regulatory requirements. This meticulous approach reduces risk and promotes sustainable landscaping practices.
Choosing the Right System
Choosing the suitable outdoor drainage system requires a thorough examination of factors such as rainfall patterns, soil type, and landscape gradient. Each of these elements impacts the efficiency and longevity of the drainage solution.
A thorough drainage system comparison, considering linear drainage channels, French drains, and attenuation crate systems, is essential in determining the best choice for your property.
Linear drainage channels are effective for managing surface water in areas with heavy rainfall. The pros include easy installation and low maintenance, though they may not be suitable for complex landscapes.
French drains, on the other hand, are excellent for directing water away from foundations, with the advantage of being versatile and effective for various soil types. However, they require more extensive installation efforts.
Attenuation crate systems offer a high capacity for water storage and gradual release but come with higher installation costs and potential regulatory compliance challenges.
For cost effective solutions, weigh the pros and cons of DIY vs professional installation. While DIY methods can be budget-friendly, they may lack the precision and regulatory adherence that professional installations provide.
Consulting with experts ensures that your drainage system is both effective and compliant with local regulations.
Installing French Drains
Installing French drains demands a methodical approach to guarantee efficient water redirection and compliance with local regulations. These systems utilize perforated pipes and gravel trenches to facilitate the redirection of excess water, making them an effective solution for gardens with poor drainage. The installation begins with a precise excavation process.
A trench, typically around 18 inches deep and 9-12 inches wide, is dug along the desired water redirection path. The trench is then lined with a layer of bedding aggregate to ensure stability and promote water infiltration. The placement of gravel is pivotal; it should cover the entire trench bottom to a depth of at least 3 inches.
Next, a perforated pipe is laid atop the gravel bed, ensuring the perforations face downward to maximize water capture. The pipe is then covered with more gravel until it is approximately 2 inches below the ground surface. To complete the installation, a geotextile fabric is placed over the gravel to prevent soil infiltration, and the trench is backfilled with topsoil.
Adhering to local regulations throughout the process is essential to guarantee both functional efficiency and legal compliance.
Setting Up Linear Drains
When setting up linear drains, it is essential to select materials that meet the specific demands of the installation environment, whether it be black plastic, composite, or metal.
Adhering to best practices during installation guarantees that the drainage system integrates seamlessly with the main underground network, providing efficient water runoff management.
Compliance with local regulations and standards is vital to guarantee both functionality and longevity of the drainage system.
Selecting Proper Materials
Selecting the appropriate materials for linear drains involves considering factors such as durability, load capacity, and environmental conditions to guarantee long-term performance and regulatory compliance. The primary materials utilized in linear drains are concrete and plastic, each with distinct advantages and specific installation techniques.
Concrete channels are known for their high load-bearing capacity and durability, making them ideal for heavy-duty applications such as driveways, car parks, and airport runways. They require precise installation techniques, including proper excavation, setting a fall of 1 in 80 for efficient water runoff, and ensuring a stable foundation by filling with appropriate aggregate materials. Concrete is also less susceptible to ultraviolet (UV) degradation, making it suitable for prolonged exposure to sunlight.
Conversely, plastic channels are lightweight, cost-effective, and quicker to install. They are particularly advantageous in residential yards and areas with lower traffic loads. Plastic channels are resistant to corrosion and chemical exposure, providing longevity in various environmental conditions. However, they demand meticulous alignment and support during installation to prevent deformation under load.
Both materials, when selected and installed correctly, guarantee effective water diversion, thereby preventing issues such as bad smells, insects, and plant diseases.
The choice between concrete and plastic should be guided by specific site requirements, regulatory standards, and the anticipated load conditions.
Installation Best Practices
Ensuring the effective performance of your selected linear drain materials necessitates adherence to meticulous installation best practices. To begin, excavate a trench where the linear drain will be installed, ensuring it corresponds to the dimensions of the drain. Establishing a proper drainage slope is critical; the trench should have a gradient of at least 1-2% to facilitate efficient water flow towards the main underground drainage system.
Next, carefully position the linear drain sections within the trench, ensuring that each section is properly aligned. Grate alignment is important, as misalignment can impede water flow and lead to ineffective drainage. Confirm that the grates are level with the surrounding surface to prevent trip hazards and ensure smooth water passage.
Following placement, secure the linear drains in position using concrete or tarmac. This not only stabilizes the drains but also ensures a level finish, which is essential for maintaining the designed drainage slope.
After securing the drains, connect them to the existing underground drainage pipes, ensuring all connections are watertight and compliant with local regulatory standards.
Lastly, conduct a thorough inspection to verify that all components are properly installed and function efficiently, ensuring long-term performance and regulatory compliance.
Implementing Dry Wells
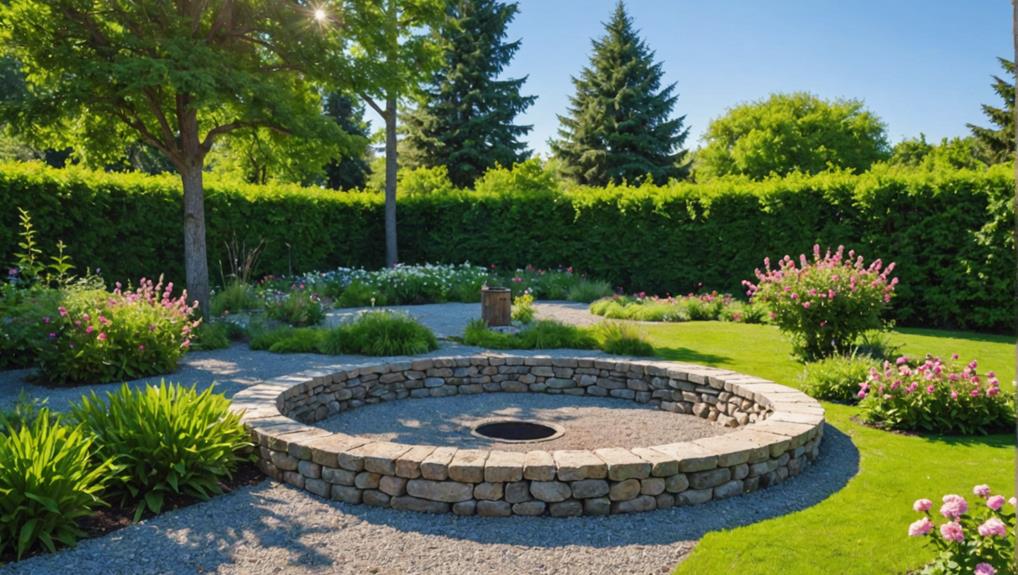
When implementing dry wells, it is vital to meticulously select appropriate locations that optimize water dispersal while minimizing disruption to existing structures.
Essential materials and tools include high-capacity drainage ports, overflow tubes, and excavation equipment, all conforming to regulatory specifications.
A step-by-step installation process guarantees that each component, from initial excavation to final landscape fabric placement, functions cohesively to prevent water accumulation and soil erosion.
Selecting Dry Well Locations
Thorough placement of dry wells is critical in areas with poor drainage to effectively mitigate water pooling, soil erosion, and potential structural damage.
A holistic approach to selecting dry well locations begins with careful landscaping considerations and an assessment of water table levels. It is essential to identify low-lying areas on the property where water naturally accumulates.
Analyzing soil composition is equally important, as sandy or loamy soils facilitate better water infiltration compared to clay-heavy soils that may impede drainage. Ensuring the property elevation is factored into the decision-making process can help in positioning dry wells to optimize gravitational water flow and prevent backflow issues.
Strategically placing dry wells near downspouts or areas prone to runoff can capture and manage rainwater efficiently. This not only addresses localized flooding but also contributes to the overall efficacy of the outdoor drainage system.
Regulatory compliance must be observed, ensuring that the installation does not interfere with underground utilities or violate local building codes.
Materials and Tools Needed
To implement an effective dry well system, it is essential to gather specific materials such as landscape fabric, gravel, and drain tubes, along with tools like a 4-ft. level, shovel, and screwdriver. These equipment essentials are fundamental for guaranteeing the integrity and efficiency of your drainage solutions.
The landscape fabric plays a vital role in preventing soil particles from clogging the drainage tubes, ensuring continuous water flow.
Gravel is used to create a permeable layer around the dry well, facilitating water infiltration and storage.
Drain tubes, often covered with fabric socks, are necessary to guide water from downspouts into the dry well, preventing surface runoff.
Key materials and tools include:
- Landscape Fabric: Prevents soil from entering the drain tubes.
- Gravel: Ensures proper water infiltration and storage.
- Drain Tubes: Direct water from downspouts into the dry well.
Using a 4-ft. level is critical for checking the slope and ensuring proper water flow towards the dry well.
A shovel is necessary for digging the hole, while a screwdriver is used to attach drain covers. Adhering to these guidelines ensures that the installation complies with regulatory standards and optimizes the effectiveness of the dry well system.
Installation Step-by-Step
Begin the installation process by excavating a sufficiently deep hole to accommodate both the dry well and an overflow tube, ensuring they meet the necessary depth requirements for best drainage performance. Utilizing precise excavation techniques is vital to maintain the integrity of the installation. The hole should be deep enough to place the dry well below the frost line to prevent freezing and ensure excellent drainage.
Once the excavation is complete, connect the drain tube to the dry well, ensuring a proper slope for effective water flow. Use a Y-fitting to link downspouts to the drain line, facilitating efficient water diversion. Cover the drainage tube with fabric to prevent clogging and filter out soil particles, which prolongs the system's efficacy.
To emphasize the importance of covering options, consider the following table:
| Covering Option | Purpose |
|---|---|
| Fabric | Prevents clogging, filters soil |
| Rock Bed | Provides stability, aesthetic |
| Drain Cover | Prevents critter entry |
Finalize the installation by attaching a cover over the tube end, creating a rock bed around it for added stability, and installing a drain cover to prevent critters from entering. Ensuring each step is compliant with local regulations will guarantee a robust and effective outdoor drainage system.
Maintenance Tips and Troubleshooting
Regular inspection and prompt clearing of debris from drainage channels are essential to guarantee the peak performance of outdoor drainage systems. Employing effective troubleshooting techniques and preventive maintenance can greatly extend the lifespan and efficiency of these systems.
Regular checks should include looking for any signs of blockages or clogs, particularly after heavy rainfall. Common issues often arise from the accumulation of leaves, soil, or other debris, which can lead to water stagnation and flooding. DIY solutions for these problems typically involve manual clearing and using water jets to guarantee unobstructed flow.
Additionally, installing filters can preemptively mitigate debris ingress into drainage pipes.
Monitor system effectiveness post-rainfall: Heavy rains can reveal weaknesses in your system.
Implement a routine maintenance schedule: Regular cleaning and inspections can prevent minor issues from escalating.
Consult professionals for persistent issues: Some problems may need specialized equipment or expertise.
Frequently Asked Questions
What Is the Most Efficient Drainage System?
The most efficient drainage system depends on specific site conditions. French drains are ideal for subsurface water management, while Swale systems efficiently handle surface runoff, both ensuring regulatory compliance and preventing waterlogging, flooding, and structural damage.
What Should You Consider When Installing a Drainage System?
When installing a drainage system, consider soil type to confirm compatibility and effectiveness, and perform a thorough cost estimation to budget for materials and labor. Adhering to local regulations and safety guidelines is also essential.
How to Install a Garden Drainage System?
To install a garden drainage system, excavate gravel trenches at the lowest points, guaranteeing proper slope. Place perforated pipes within the trenches, cover with gravel, and secure all components to make sure compliance with relevant regulations and standards.
How Do I Get Good Drainage in My Garden?
Achieving ideal garden drainage involves evaluating soil composition and selecting suitable plants. Amend soil with organic matter to improve permeability, and choose plants suited to local hydrological conditions, ensuring regulatory compliance with drainage standards.
Conclusion
The implementation of thorough outdoor drainage systems necessitates a detailed assessment of drainage needs, the selection of appropriate systems, and meticulous installation processes.
Techniques such as French drains, linear drains, and dry wells offer robust solutions tailored to specific site requirements.
Regular maintenance and timely troubleshooting are imperative for sustained functionality and regulatory compliance.
Through these measures, efficient water management can be achieved, mitigating potential damage and preserving structural integrity.

Leave a Reply