
Creating a Stunning Vertical Shiplap Bedroom: Step-by-Step Guide
Transform your bedroom with a vertical shiplap design by following these detailed steps. Begin by meticulously planning your layout and accurately measuring your walls. Gather high-quality tools and materials, such as a stud finder, nail gun, and pre-primed shiplap boards. Cut the boards with precise measurements and make sure the wall is clean and flat. Align and nail the boards, carefully handling outlets and vents for a seamless look. Finish by filling nail holes, sanding, and painting for a polished finish. For a detailed walkthrough on achieving a stunning vertical shiplap bedroom, follow the complete guide.
Key Takeaways
- Accurately measure wall dimensions to determine the number of shiplap boards required.
- Plan and sketch the layout to ensure vertical lines align perfectly and avoid obstacles.
- Prepare walls by removing baseboards, cleaning surfaces, and checking for flatness before installation.
- Cut and measure boards precisely using appropriate saws, prioritizing safety and accuracy.
- Finish with wood filler, sanding, and painting to achieve a seamless and polished look.
Plan Your Project
To begin your vertical shiplap bedroom project, first measure the length of the wall to determine the exact number of shiplap boards required. This initial step is important as it guarantees that you purchase the correct amount of material, avoiding unnecessary trips to the store and securing a seamless installation process.
Vertical shiplap benefits include creating the illusion of height in a room, making even the smallest spaces feel more expansive. Hence, consider the height of your walls and how the vertical orientation of the boards will enhance the room's overall aesthetic.
Next, meticulously plan the room layout considerations. Identify a starting point for the shiplap installation, typically a corner or a central focal point, to ensure symmetry and visual appeal. Pay attention to any obstacles such as outlets, switches, or other fixtures that will require precise cuts and adjustments.
Before proceeding, sketch a layout to visualize where each board will be placed, ensuring that the vertical lines align harmoniously with the room's architecture. This detailed planning phase is essential in achieving a professional finish and maximizing the vertical shiplap benefits for your bedroom transformation.
Gather Tools and Materials
To guarantee a smooth and efficient installation process, gather essential tools such as a stud finder, level, nail gun, and shiplap boards.
Choose high-quality materials that match your design vision, and consider budget-friendly options that do not compromise durability.
Additionally, prepare wood filler, caulk, and paint for the finishing touches to achieve a polished and seamless look.
Essential Tools Checklist
Before starting on your vertical shiplap bedroom project, make sure you have a thorough checklist of essential tools and materials. Proper tool maintenance and tool organization are key to ensuring a smooth and efficient process. Begin with a saw for cutting shiplap boards and a jigsaw for precise cuts around plug-ins. A Ryobi Brad Nailer will be indispensable for securing the boards in place.
For accurate installation, include a spirit level and a measuring tape in your toolkit. A stud finder is vital for locating wall studs to make certain the boards are securely fastened. Additionally, prepare baseboard contractor packs, paint or stain, and box extenders for plug-ins.
Adherence to tool safety measures cannot be overstated. Always wear safety goggles and gloves to protect yourself during the installation process. Tool efficiency will be maximized if all tools are in good working condition and easily accessible.
Lastly, don't overlook the finishing touches: wood filler and caulk are essential for achieving a polished look.
With the right tools and materials on hand, not only will your project proceed without unnecessary interruptions, but the end result will also be a stunning vertical shiplap bedroom.
Material Selection Tips
Having assembled your toolkit, the next step is to carefully select the materials that will bring your vertical shiplap bedroom project to life. Opt for pre-primed shiplap boards, which offer a ready-to-paint surface, streamlining the process. This choice allows for a smooth application of your preferred paint color options, enhancing the room's aesthetic appeal.
When gathering materials, include essential tools like a miter saw, caulk gun, nails, and a stud finder. For efficient and secure attachment of the boards, consider using a nail gun. Additionally, baseboard contractor packs are essential for achieving a seamless connection between the shiplap and the floor. Utilize a jigsaw to precisely cut around plug-ins, ensuring a clean installation.
Incorporate varied installation techniques depending on your design inspiration. Vertical alignment can add height to the room, making it feel more spacious. As for paint color options, lighter shades can create an airy feel, while darker hues can add a cozy, intimate atmosphere.
Budget-Friendly Options
Achieving a high-quality vertical shiplap bedroom on a budget requires strategic selection of tools and materials that balance cost-effectiveness with durability and aesthetic appeal. One effective cost-saving tip is to use pre-primed shiplap boards, which reduce the need for additional priming and save time. Essential tools to gather include a stud finder, level, nail gun, and appropriate paint or stain to achieve a professional finish.
To streamline the installation process, consider purchasing baseboard contractor packs and box extenders for plug-ins. These affordable options simplify the setup and guarantee a cohesive look. Using a jigsaw allows for accurate cutting around plug-ins, ensuring a smooth and seamless finish. For secure attachment of the shiplap boards to the wall studs, a Ryobi Brad Nailer is a reliable and budget-friendly choice.
Here's a quick reference table for the tools and materials:
| Tools | Materials | Cost-Saving Tips |
|---|---|---|
| Stud Finder | Pre-Primed Shiplap Boards | Use baseboard packs |
| Level | Paint or Stain | Box extenders for plug-ins |
| Ryobi Brad Nailer | Contractor Packs | Pre-primed boards |
Measure Your Wall

To guarantee a flawless installation of your vertical shiplap, start by accurately measuring the height and width of your wall using a reliable tape measure. Pay close attention to elements such as light switches, outlets, and vents that may impact your measurements.
Double-check all dimensions to confirm you have the correct amount of shiplap needed for a seamless and professional finish.
Accurate Wall Dimensions
Ensuring precise wall measurements is the foundational step in determining the exact amount of shiplap needed for your project. The importance of wall dimensions accuracy cannot be understated; it directly influences the success and aesthetic of your vertical shiplap installation.
Begin by measuring the width and height of your wall with utmost accuracy. Use a reliable measuring tape to record these dimensions accurately.
Start by measuring the height of the wall from floor to ceiling, making sure to take multiple measurements across different spots to account for any inconsistencies. Similarly, measure the width of the wall at various points from one end to the other. Precision in measurements is vital as it ensures that the shiplap boards fit seamlessly, providing a professional-looking finish.
Once you have these measurements, calculate the number of shiplap boards required. Divide the total width of the wall by the width of an individual shiplap board. Double-check your calculations to avoid errors.
Proper planning and accurate measurements will prevent wastage and ensure you have enough shiplap boards to cover the entire wall without interruptions, enabling a smooth and efficient installation process.
Required Measuring Tools
A reliable tape measure, a pencil for marking, and a stud finder are essential tools for accurately measuring your wall before installing vertical shiplap. Ensuring measuring accuracy is essential, as it allows for precise calculations and a seamless installation.
Begin by selecting a high-quality tape measure, as this is indispensable in achieving precision measuring techniques. Measure the entire width of your wall from one end to the other, taking note of the measurements with a pencil to facilitate accurate marking.
Next, calculate the number of cladding boards required by dividing the total wall width by the width of a single cladding board. This step is important in preventing material wastage and ensuring that the installation appears professional and cohesive.
After determining the number of boards, use a stud finder to locate the wall studs. Mark these locations clearly with your pencil, as they will provide secure attachment points for the shiplap boards.
The proper selection and use of these tool essentials—tape measure, pencil, and stud finder—are crucial for a stable and professional vertical shiplap installation. Accurate measurements and precise markings are the foundation for a stunning and secure bedroom transformation.
Calculate Board Quantity
Accurately calculating the number of shiplap boards required for your vertical installation is essential for a seamless and efficient project. Begin by considering the board orientation; since you are installing the boards vertically, measure the width of the wall where the shiplap will be applied.
Next, take into account the width of each individual shiplap board along with any board spacing that may be required.
Follow these steps for precise calculation:
- Measure Wall Width: Use a tape measure to determine the total width of the wall. Record this measurement in feet or inches.
- Determine Board Width: Identify the width of the shiplap boards you plan to use. For instance, if each board is 6 inches wide, convert this to feet (0.5 feet).
- Calculate Number of Boards: Divide the total wall width by the width of the boards. For a wall that is 10 feet wide with 6-inch boards, the calculation is 10 ÷ 0.5 = 20 boards.
- Add Extra Boards: It is prudent to purchase a few extra boards to account for mistakes or miscalculations, ensuring an uninterrupted installation process.
Cut Your Boards
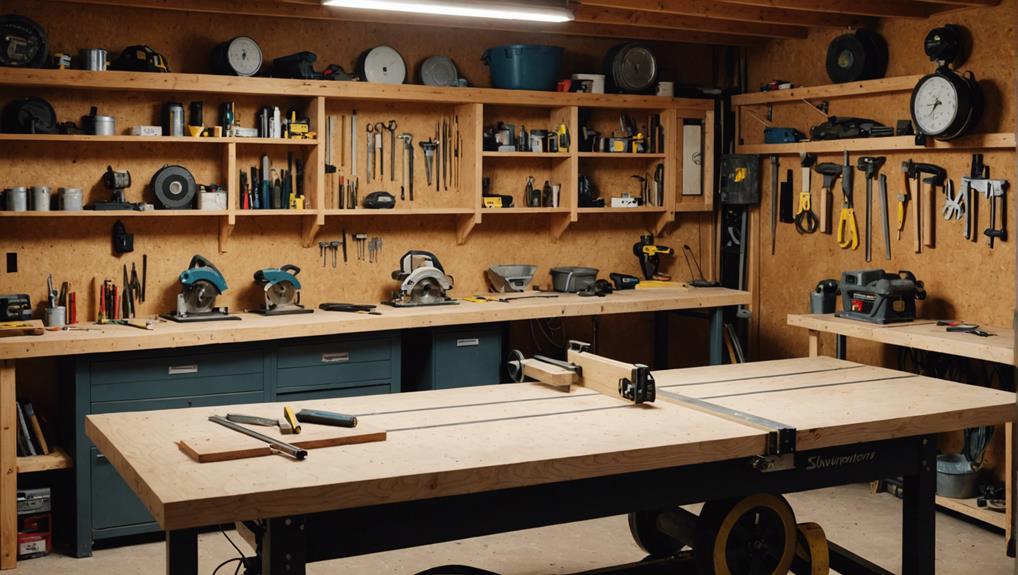
To achieve a seamless and professional finish, start by measuring and marking your shiplap boards with precision.
Utilize a track saw, circular saw, or table saw to guarantee accurate cuts, taking particular care around outlets and vents.
Prioritize safety by following all guidelines for your chosen saw and using appropriate protective gear.
Measuring for Precision
Measuring the width of your wall precisely is the foundational step for ensuring a flawless vertical shiplap installation. Whether you are opting for a vertical or horizontal shiplap design, accurate measurements are paramount to achieving a seamless and professional look.
Begin by measuring the total width of the wall where you plan to install the vertical shiplap. This initial measurement will guide the entire process:
- Measure the Width: Using a tape measure, record the full width of the wall, from one edge to the other. Ensure your tape measure is level for the most accurate results.
- Calculate the Number of Boards: Divide the total wall width by the width of a single shiplap board. This calculation will determine how many boards you need.
- Mark Your Measurements: Mark the precise measurements on each shiplap board. This step is vital for ensuring each board fits perfectly.
- Double-Check for Accuracy: Re-measure and confirm your calculations to avoid errors that could lead to misalignment and gaps.
Saws and Safety
Having completed your measurements, the next step involves cutting the shiplap boards to the precise dimensions required for a flawless vertical installation. Selecting the appropriate saw type is important for achieving accurate cuts. You may choose from a track saw, circular saw, or table saw, depending on your skill level and project requirements. Each saw offers distinct advantages: a track saw provides straight, guided cuts; a circular saw is versatile and portable; while a table saw guarantees stability and precision.
Safety is paramount when operating power saws. Always adhere to safety guidelines, including wearing appropriate protective gear such as safety goggles, ear protection, and gloves. Ensure your workspace is well-lit and free of obstructions to prevent accidents.
Mastering cutting techniques and precautions is essential for a professional finish. Measure twice and cut once to avoid costly mistakes. Use clamps to secure your boards firmly before cutting, and maintain a steady hand to achieve clean edges. Properly cut boards ensure a seamless and polished installation, contributing to the overall aesthetic of your vertical shiplap project.
Prepare the Wall
Prior to starting the shiplap installation, it is important to remove existing baseboards and make sure the wall surface is clean and flat. Proper wall preparation techniques guarantee a seamless and professional finish. Begin by carefully prying off the baseboards using a pry bar and hammer, taking care not to damage the wall.
Next, thoroughly clean the wall surface to remove any dust, dirt, or debris that might hinder the installation process. Use a damp cloth with mild detergent for effective surface cleaning tips, ensuring the wall is dry before proceeding.
To prepare your wall for the shiplap installation, follow these steps:
- Remove Baseboards: Gently pry off baseboards with a pry bar to create a clean edge for the shiplap.
- Clean the Surface: Wipe down the wall using a damp cloth and mild detergent, then let it dry completely.
- Check for Flatness: Use a level to check the wall surface for any protrusions or indentations. Sand down high spots and fill in low spots with spackle.
- Paint Preparation: If you plan to paint the shiplap, consider doing so before installation to ensure even coverage and save time later.
Locate and Mark Studs

Identifying the precise locations of wall studs is crucial for guaranteeing the structural integrity and longevity of your vertical shiplap installation. Properly locating and marking studs is a vital step to ensure that your shiplap boards are securely attached, thereby enhancing wall stability and preventing future issues such as shifting or sagging.
Begin by using a stud finder, an indispensable tool designed to accurately detect the edges and centers of wall studs behind drywall or plaster. Slowly move the stud finder horizontally across the wall until it signals the presence of a stud. Mark the location with a pencil at the top and bottom of the wall. Repeat this process across the entire surface where you plan to install the vertical shiplap.
For enhanced visual emphasis and easier installation, use a level to draw vertical lines connecting your marks. This will serve as a guide to ensure that each shiplap board is securely fastened directly to the studs, maximizing wall stability.
Consistently attaching shiplap boards to these marked studs ensures a robust and professional finish, greatly contributing to the overall durability and aesthetics of your vertical shiplap bedroom.
Install the First Board
Begin by meticulously measuring and marking the wall to determine the exact placement of the first vertical shiplap board. This initial step is of utmost importance as it sets the foundation for a seamless and professional installation. Utilize a level to guarantee the board is plumb and straight, as any deviation here will impact the alignment of subsequent boards.
Once the wall is measured and marked, follow these steps:
- Select Your Board: Choose a shiplap board that matches your desired color options and texture variations. This decision will influence the overall aesthetic of the room.
- Position the Board: Align the board with the marked line on the wall, making sure it is level and fits perfectly within the designated space.
- Secure to Studs: Use a nail gun or a hammer with nails to firmly attach the board to the wall studs. This ensures the board is securely fastened and will not shift.
- Verify Alignment: Double-check the board's alignment and levelness before proceeding to the next board. Any adjustments should be made now to maintain the installation's integrity.
Align and Nail Boards

Ensuring precise alignment, use a level to verify that each vertical shiplap board is perfectly straight before nailing it securely to the wall studs. This foundational step is vital for achieving a professional finish and guaranteeing the long-term stability of the installation. Start at one corner of the wall and work methodically across to maintain a seamless look.
Employ effective vertical alignment techniques by consistently checking the board's position with a level. This practice not only ensures straight lines but also prevents any future issues such as warping or misalignment. Once the board is in place, proceed with the nailing process. Use nail spacing tips to guide your placement; ideally, nails should be spaced 8 to 12 inches apart along the wall studs.
To ensure board securement methods are robust, always nail directly into the wall studs. This reinforces the structural integrity and stability of the shiplap installation. Double-check each board's alignment and nail spacing as you progress to maintain uniformity.
Proper board securement methods and attention to wall stud stability are paramount. By adhering to these precise techniques, you will create a clean, visually appealing vertical shiplap bedroom that stands the test of time.
Handle Outlets and Vents
With the boards securely in place, the next step involves accurately cutting around outlets and vents to guarantee a seamless and professional finish. Proper attention to outlet placement and vent considerations guarantees that the overall appearance remains clean and cohesive.
Follow these detailed instructions for precise cuts and a polished look.
- Measure and Mark: Carefully measure the dimensions of each outlet and vent. Use a pencil to mark these measurements on the shiplap board where the cuts are needed. Double-check these marks to avoid inaccuracies.
- Cut with Precision: Utilize a jigsaw or a similar tool to make precise cuts along the marked lines. Take your time to ensure that the cuts are exact, as this will prevent gaps or uneven edges around the outlets and vents.
- Fit and Adjust: Place the cut board around the outlet or vent to check for fit. If necessary, make minor adjustments to guarantee a snug and seamless fit. Proper fitting is essential to maintaining a professional look.
- Secure the Boards: Once the fit is confirmed, secure the boards around the outlets and vents using nails or adhesive. Make sure that the edges are aligned perfectly to maintain the shiplap's clean lines.
Install Trim Pieces

To achieve a polished and cohesive look, carefully install trim pieces around the edges of the shiplap to conceal seams and provide a finished appearance. Begin by securing new baseboards to the wall studs using a brad nailer; this guarantees the baseboards are stable and properly aligned.
Trim placement is vital, so make sure that all pieces are accurately measured and cut to fit the specific dimensions of your room.
Next, utilize scrap wood to create top trim, effectively concealing any visible seams where the shiplap meets the ceiling. For a seamless look, align the trim pieces precisely before securing them with nails. To enhance the overall aesthetic, consider trim color choices that either match or complement the shiplap. This decision can greatly impact the room's visual harmony.
Once all trim pieces are in place, caulk the seams between them to achieve a clean and professional appearance. This step is important for covering any gaps and ensuring that the trim pieces blend seamlessly with the shiplap walls.
Attention to detail in trim placement and color choices will enhance the room, making it visually appealing and cohesive.
Fill Nail Holes
After installing the trim pieces, meticulously fill the nail holes using a high-quality wood filler to guarantee a flawless and uniform finish. This step is important for achieving a seamless look that enhances the overall aesthetic of your vertical shiplap bedroom.
Follow these steps to secure the best results:
- Apply Wood Filler Generously
Use a putty knife to apply the wood filler generously over each nail hole. Make sure to slightly overfill each hole to allow for any shrinkage during the drying process.
- Let the Wood Filler Dry Completely
Allow ample time for the wood filler to dry thoroughly. This is essential for achieving a durable and long-lasting finish. Check the manufacturer's instructions for the recommended drying time.
- Sand Filler Smooth
Once the wood filler is completely dry, gently sand the filled areas until they are flush with the surrounding surface. Use fine-grit sandpaper to avoid damaging the shiplap boards. This step ensures a smooth and even finish, ready for the next stage.
- Remove Excess Dust
After sanding, wipe away any excess dust using a damp cloth. Removing dust is crucial for the subsequent finishing touches, ensuring that the surface is clean and ready for painting or other finishes.
Paint the Shiplap

Before beginning the painting process, make sure that the shiplap surface is clean and free from any dust or debris to achieve a pristine and professional finish. Use a damp cloth to wipe down the surface, making certain that all particles are removed. Next, apply painter's tape to protect adjacent surfaces from paint splatter.
Choosing the right paint color and finish options is essential for achieving the desired look. Opt for a high-quality paint suitable for wood surfaces to guarantee durability. Consider using a semi-gloss or satin sheen; these finishes not only provide a subtle shine but also make cleaning easier. Start at the top of the wall and work your way down to avoid drips and ensure a smooth finish.
After the first coat, allow the paint to dry completely before adding a second coat for full coverage. This step is critical to achieve an even, professional appearance.
For long-term maintenance, follow these tips: regularly dust the shiplap with a microfiber cloth and clean any smudges or stains with a mild soap and water solution. These cleaning techniques will help maintain the beauty of your vertical shiplap bedroom for years to come.
Frequently Asked Questions
How Do You Start Vertical Shiplap?
To start vertical shiplap, first prepare the wall by marking and locating studs. Utilize measuring tools to cut boards to the desired length. Begin installation from a corner, ensuring the first board is level for a professional finish.
How to Install Vertical Shiplap Without Liquid Nails?
To install vertical shiplap without liquid nails, employ nailing techniques by securing boards to wall studs. Alternative adhesives aren't needed. Guarantee proper spacing and alignment, then utilize wood filler and caulk for a seamless, polished finish.
Can Shiplap Be Hung Vertically?
Yes, shiplap can be hung vertically. Utilizing various shiplap materials and a range of paint options can enhance this design choice, creating the illusion of higher ceilings and adding texture, warmth, and character to the bedroom decor.
Does Vertical Shiplap Make Room Look Bigger?
Vertical shiplap creates an optical illusion that enhances perceived ceiling height, making the room appear larger and more spacious. This effect draws the eye upward, providing a sense of openness and contributing to a visually appealing aesthetic.
Conclusion
To conclude, the creation of a vertical shiplap bedroom involves a meticulous series of steps. This includes planning, gathering necessary tools and materials, precise measurement, accurate calculation of board quantity, careful cutting of boards, addressing outlets and vents, installing trim pieces, filling nail holes, and painting the shiplap.
By adhering to these detailed instructions, one can achieve a visually stunning and professionally finished space. This ensures both functionality and aesthetic appeal in the interior design.



Leave a Reply